Every year before Easter I make sure to get my lawn prepped and ready to go for the Spring and Summer heat. By nailing this routine, I’m able to get green grass quickly that stays green throughout the year. I’ve missed this window of opportunity before and ended up with more weeds than grass.
My 5-step pre-Easter lawn care checklist:
Complete a soil test kit: soil test kits are the easiest way to get a diagnostic on your yard to determine exactly what it needs. Go ahead and send it in ASAP and complete the next steps while you wait.
Clean the canvas: Get all the sticks, leaves, debris, and anything else off of your lawn that has been sitting there for the past few months.
Put down pre-emergent:Pre-emergent is the best way to protect your lawn from invasive grasses and weeds that love to pop-up and choke out your grass.
Use the results from your soil test kit: After a week or so, your soil test kit results should be in and a fertilizer recommendation should have been made. Follow these instructions to make sure your lawn is getting the right nutrients.
Put down mulch:Mulch is a great way to make your lawn stand out and contrast against your perfectly green grass.
With Christmas just around the corner, I thought it would be the perfect time to share some of my top tips and tricks for creating a nice-looking outdoor Christmas landscape lighting display. My favorite part: I’ll tell you how to make it easy install AND put away – year after year.
As a serial learner of lessons the hard way, I thought I would save you some time and show you exactly how the pros do it. Here’s a quick summary of the tips. You can click each one to jump down to it.
Plan out what you want the lights to look like on paper
Get high quality lights that you don’t have to throw away each year
Get really good, long extension cords
Test all the lights before putting them up (this was learned the hard way)
My Ultimate Outdoor Christmas Light Secrets: Exposed
You know how your mom has that old recipe book with different meatloaf and weird Jell-O casseroles? This is basically the same thing but with old secrets from my experience. Some say that these secrets were originally found with the Declaration of Independence.
Tip #1: Map out the lights
The key to a successful outdoor lighting display is careful planning. Start by taking a stroll around your property and envisioning where you want to place lights. Consider highlighting architectural features like roof lines, trees, and porch columns. Planning ahead will help you determine the quantity and types of lights you need, preventing last-minute trips to the store and ensuring you have everything on hand when you start decorating.
The before!
Tip #2: Get the nice lights
When it comes to outdoor lighting, quality matters. I know it seems like buying more expensive lights is a huge waste of money, but it makes a huge difference in the installation experience.
Invest in durable, weather-resistant lights that can withstand the winter elements. LED lights are an excellent choice for their energy efficiency and long lifespan. They might cost a bit more upfront, but they’ll save you money in the long run and reduce the likelihood of mid-season replacements. Plus, they come in a variety of colors and styles, allowing you to get creative with your display.
Tip #3: Always keep in mind extension cord placement for Christmas lights
Dealing with a web of extension cords can be a headache. To minimize frustration, plan your layout with extension cords in mind. This is arguably the most important component of setting up the lights – matching the male plugs to the female outlets.
This is a sweet plug for outdoor Christmas lights.
Use outdoor-rated extension cords and strategically place them to ensure a clean and organized setup. Consider using cord management tools like stakes or clips to keep everything in place and prevent tripping hazards. A well-thought-out extension cord strategy will save you time and make your display look polished.
Tip #4: Plug the Christmas lights in before hanging them up
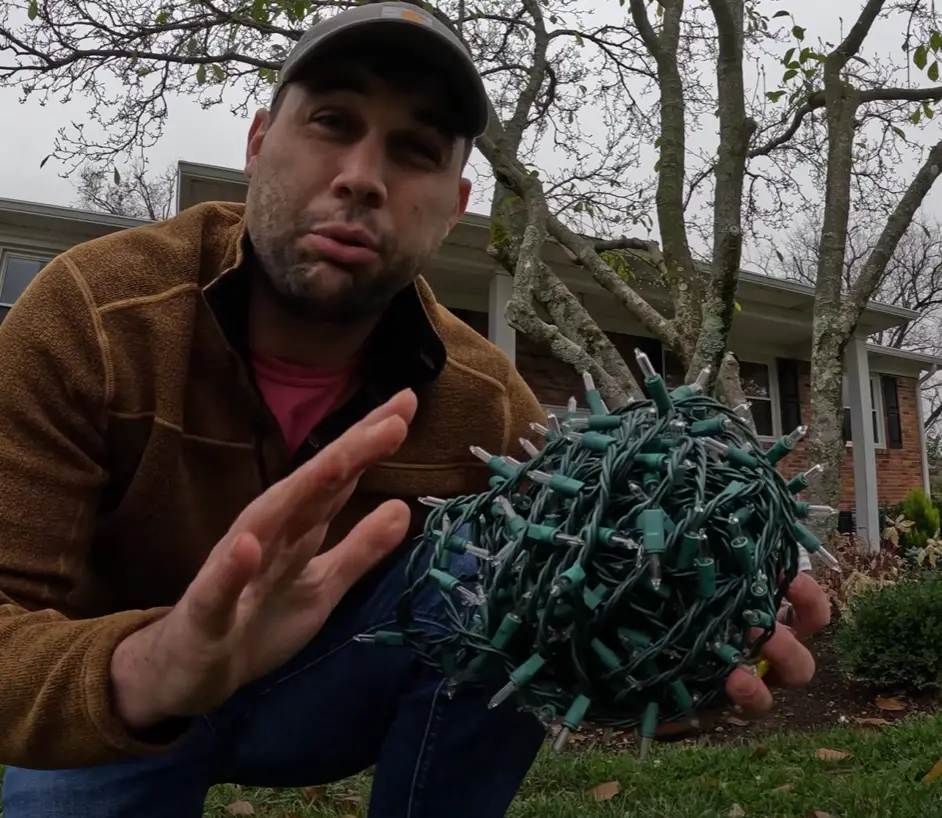
There’s nothing worse than spending hours meticulously placing lights, only to discover a section isn’t working. Before you start hanging lights, test each strand to ensure they are functioning correctly.
Super secret – wrap them in a ball like this and they don’t tangle.
This will save you the headache of troubleshooting later on and help you identify any faulty bulbs that need replacing. It’s a small step that can make a big difference in the overall success of your outdoor lighting project.
Nothing worse than getting the lights up, gathering everyone around, and having a strand be completely dead.
Tip #5: Use multiple layers of Christmas lights
To create a visually stunning display that will make your neighbor jealous, think about adding depth through layered lighting. Use a combination of different light types, such as string lights, pathway lights, and spotlights. This will add dimension to your outdoor space and make it more visually appealing. Experiment with different angles and distances to find the perfect balance. Layered lighting not only enhances the overall aesthetics but also adds a touch of swag to your Christmas display.
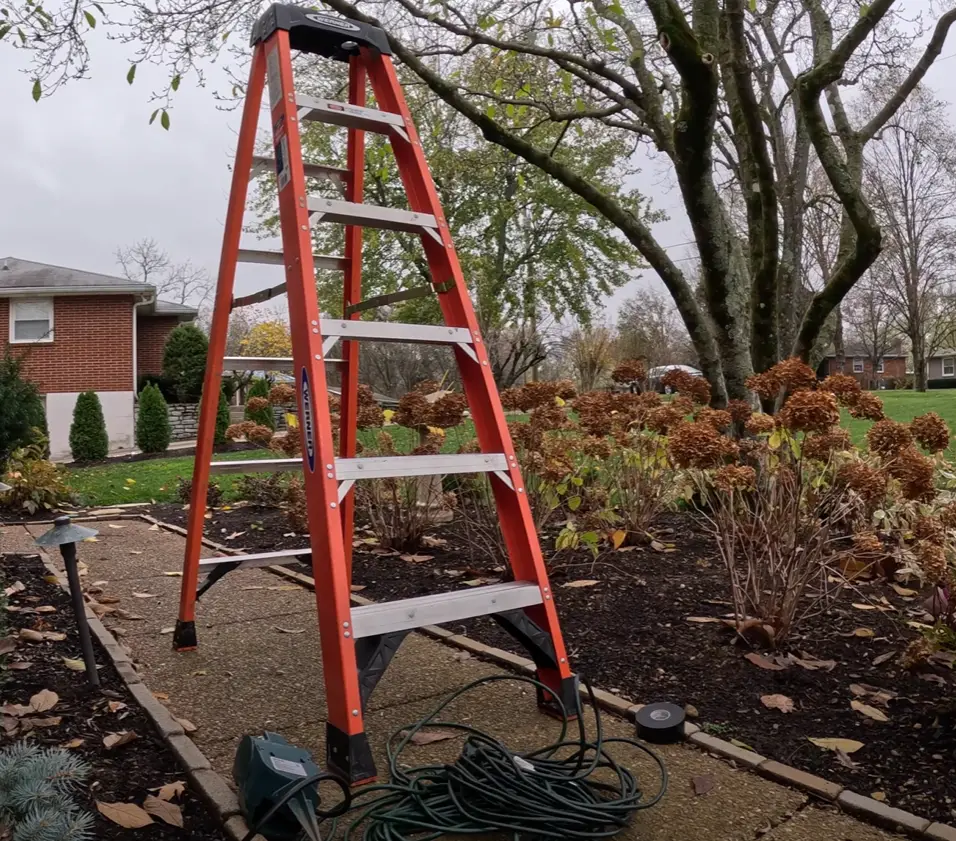
Tip #6: Please be safe
While the goal is to create a dazzling display, safety should always be a top priority. Secure lights properly to avoid them falling or becoming a tripping hazard. Be cautious when using ladders, especially on uneven ground.
If you’re unsure about the safety of a particular setup, don’t hesitate to ask your jealous neighbor for help. Ensuring a safe decorating environment will allow you to enjoy your Christmas lights without any worry.
Tip #7: Use a timer for your Christmas lights
Save yourself the trouble of manually turning lights on and off every day by using timers. Timers are a game-changer, automating the process and ensuring your display shines bright during the designated hours. Set them to come on just as the sun sets and turn off when you head to bed. Not only does this make your life easier, but it also contributes to energy conservation by avoiding unnecessary use during daylight hours.
Best of luck hanging up Christmas lights!
Wrapping up, I hope these tips help you create a hassle-free and stunning outdoor lighting display this Christmas season. Remember, the key is to plan ahead, invest in quality, and prioritize safety. Stay tuned for more helpful tips, and don’t forget to subscribe for a chance to win exciting giveaways every month. Until next time, happy decorating!
Here’s my secret: You can use Christmas lights on your bushes and cover with a sheet to protect bushes from frost.
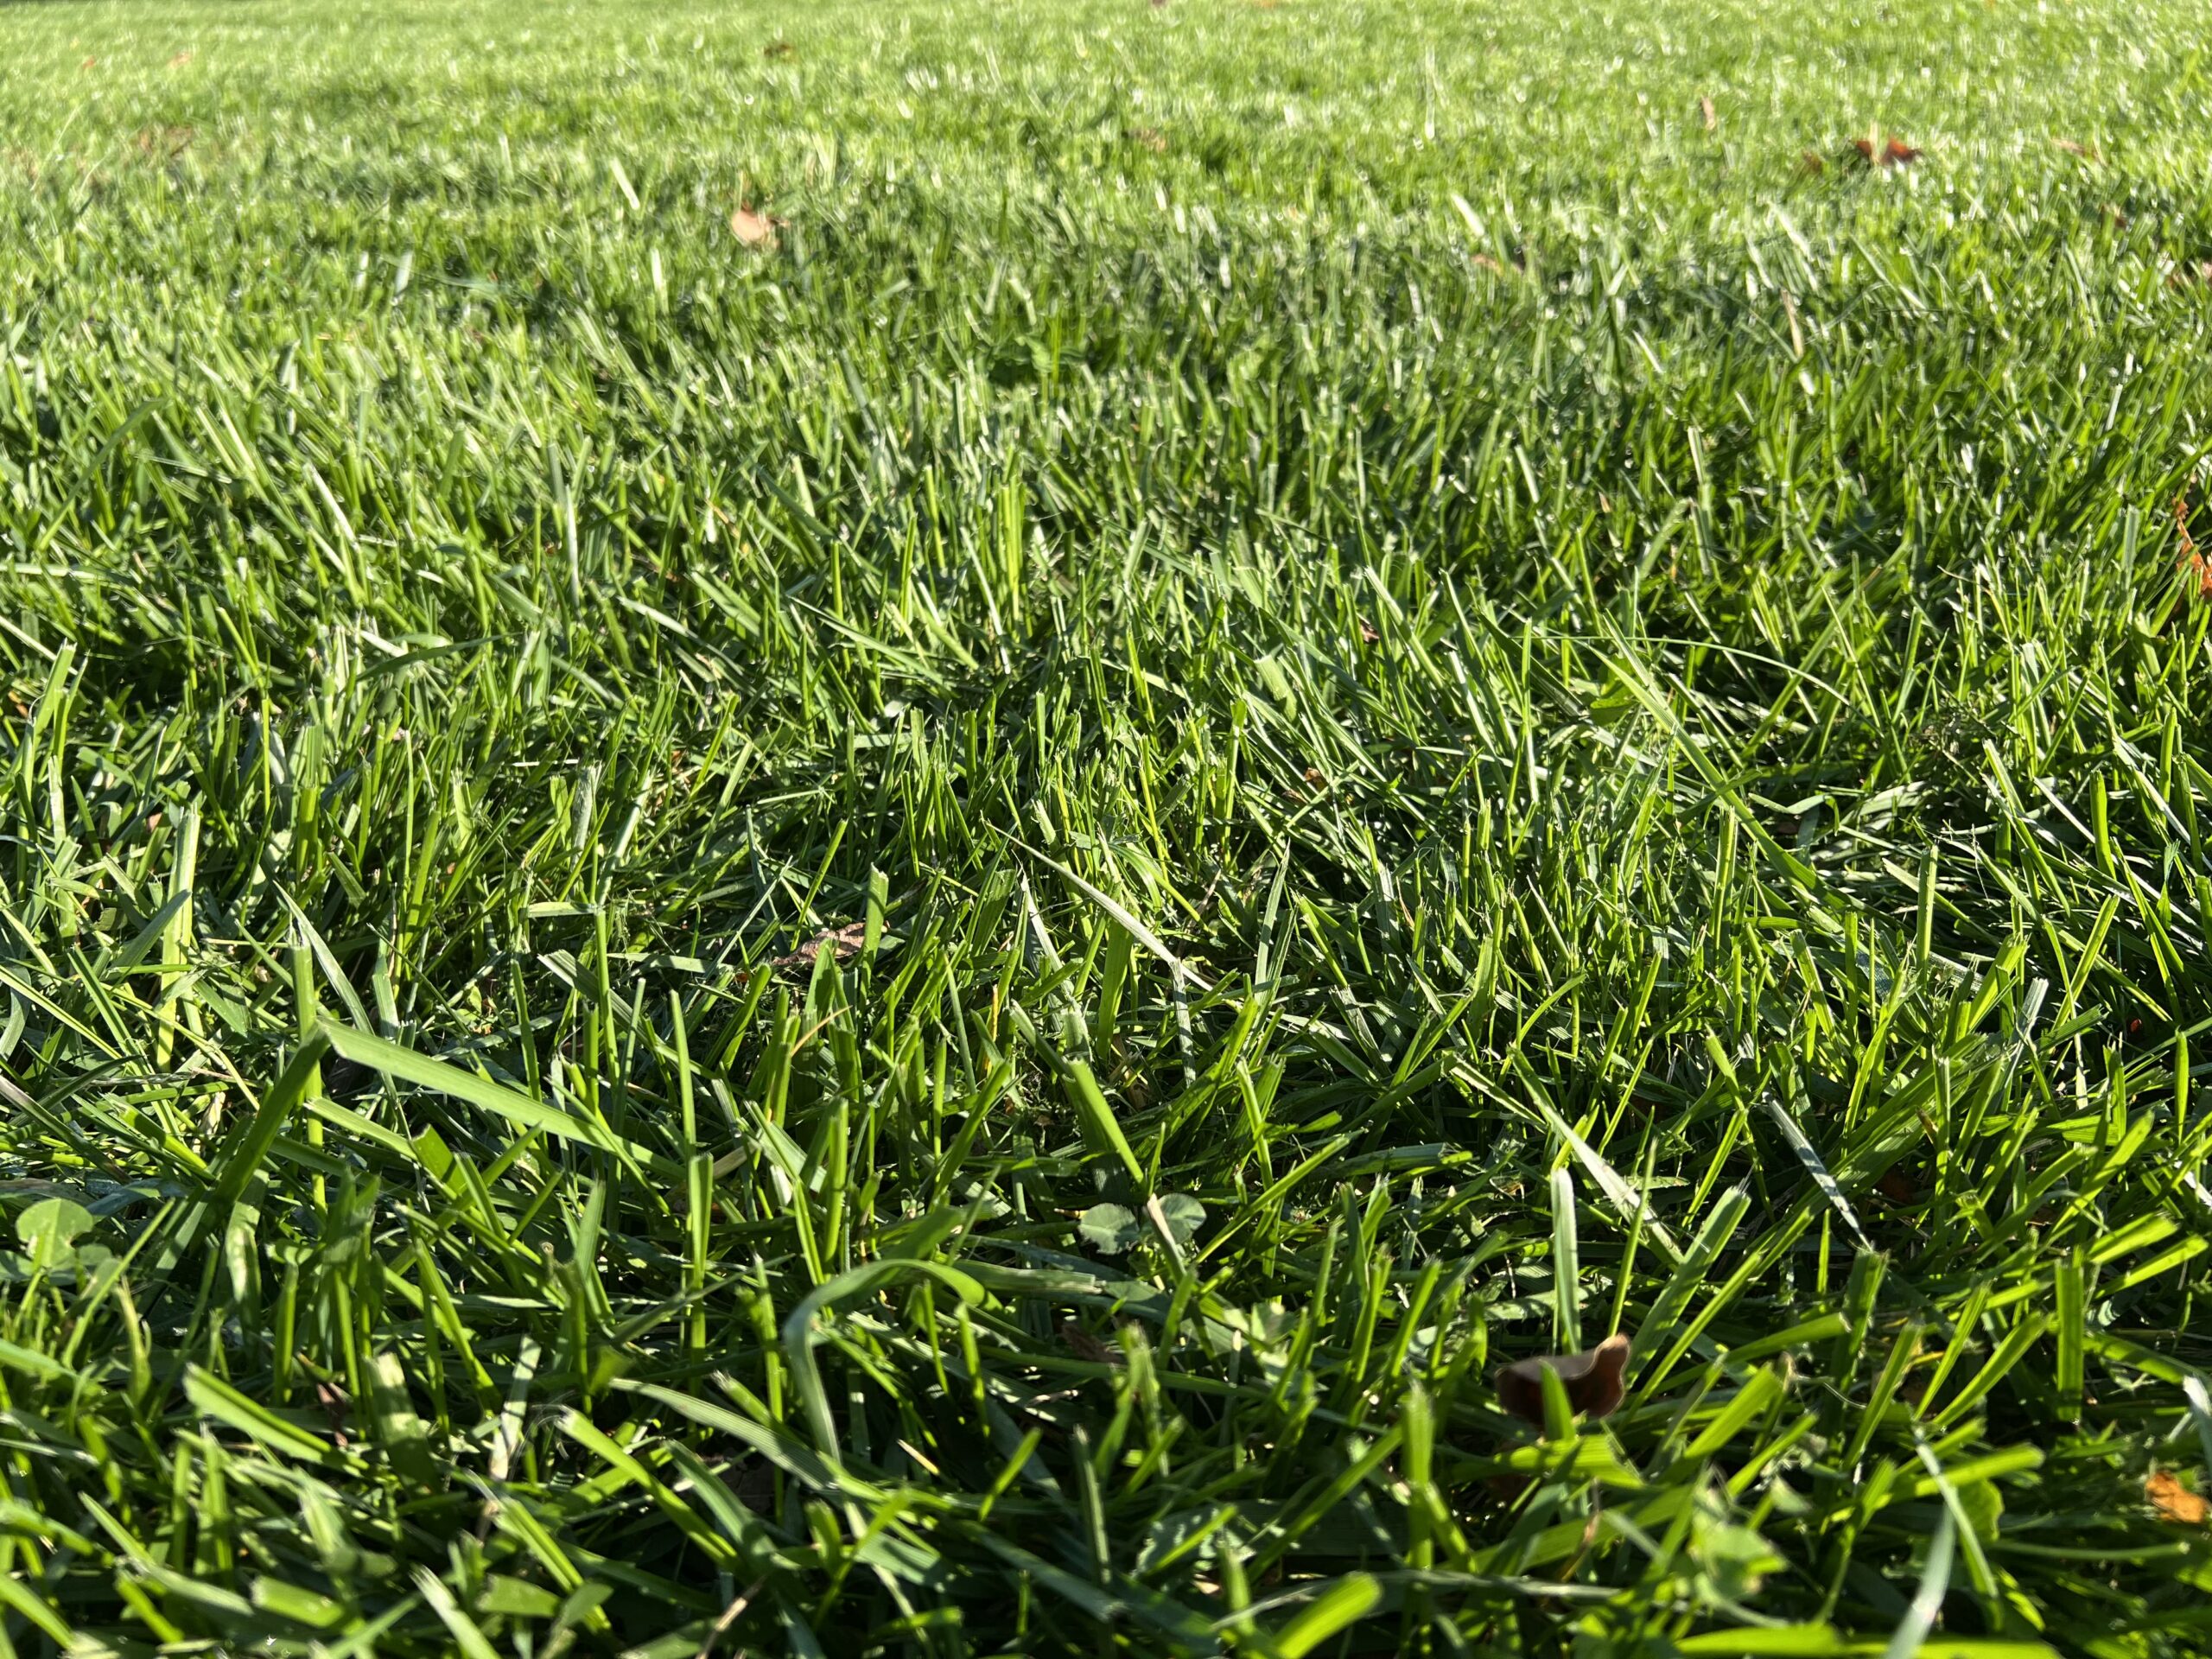
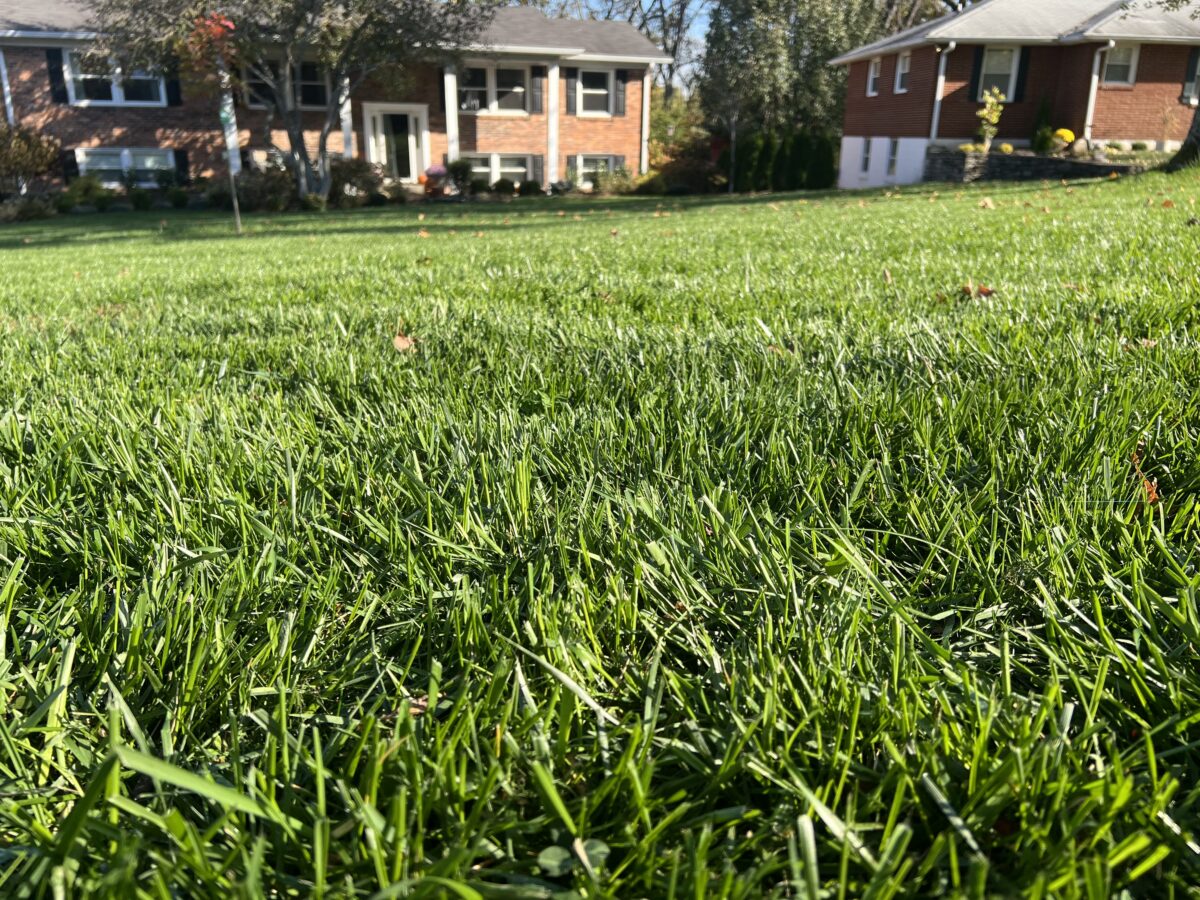
This November, I am shocked to say that my grass looks greener than it does at the beginning of Spring. You read that right – it is about 45 degrees out this morning and my grass is greener than the Grinch’s bottom.
Here are three ways I’m getting extremely green grass this November:
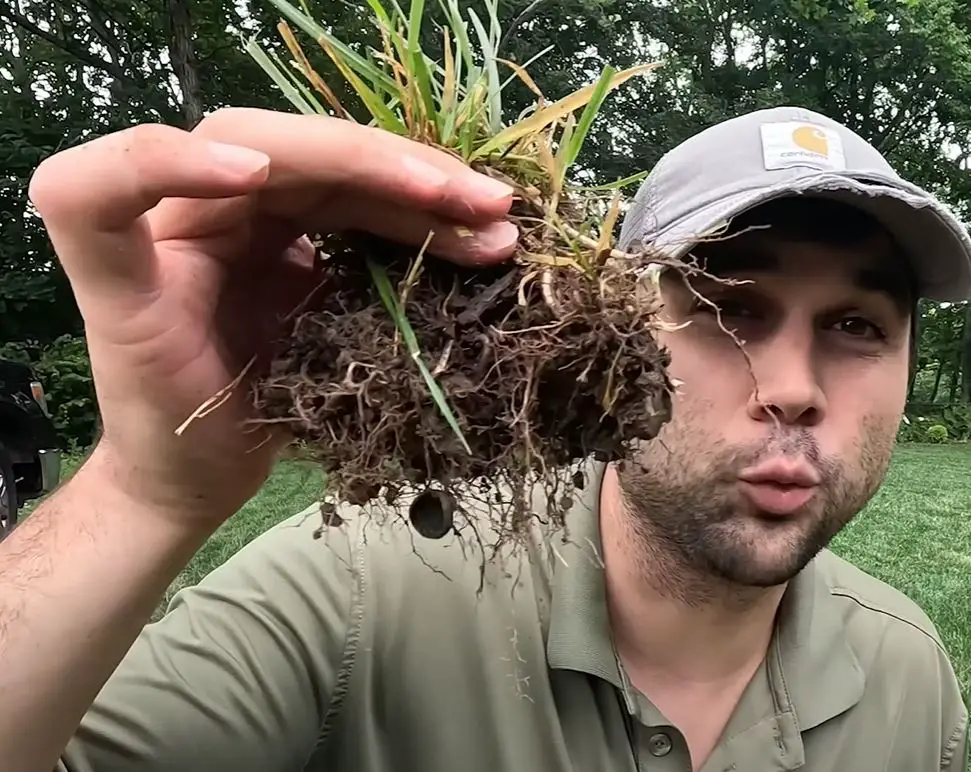
I prepped with a really good dethatching, aerating, and overseeding regiment back in October
Keeping all of the leaves off of my yard (which is a constant battle)
If you want to learn more about keeping your grass green this Fall, I’ll go into more detail below!
Step One: Prior preparation prevents poor performance (in your lawn)
If you are a first time reader of The Lawn Review, then you may not know that I am all about preparation. Preparing my cool season grass for seeding in the Fall starts with a good routine. Here’s mine (with links to other posts I’ve written that explain more):
Using a dethatcher to get the dead grass off of my soil and give it room to breath
If you don’t want to read all those different articles, check out my Youtube video highlighting exactly what I did to get my lawn prepped for the Fall.
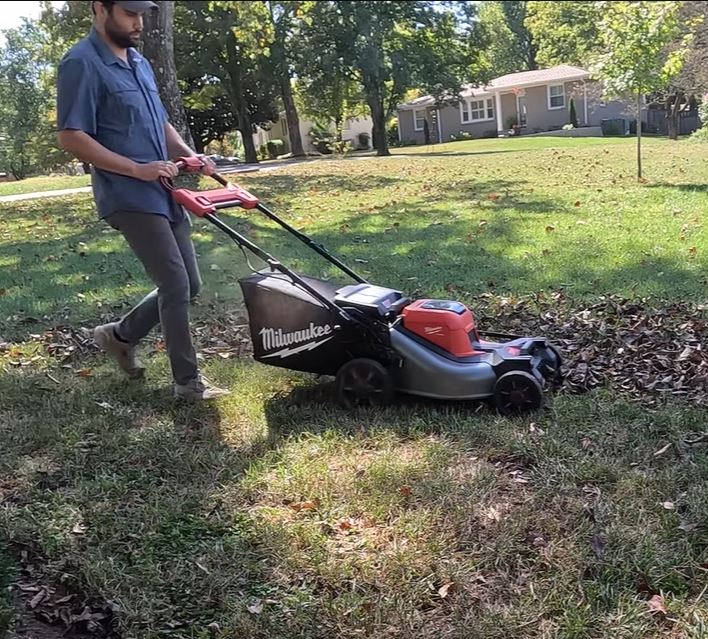
Step two: Get the leaves off of my lawn
It is truly a never ending battle to keep leaves off of your lawn in the Fall. But keeping the leaves off of your lawn is a crucial step in getting your grass to thrive in November.
I have a huge Oak tree out in my backyard that absolutely dumps leaves around early November. If I don’t stay on top of it, then my entire yard will turn into a leaf pile. It is pretty, sure, but it destroys your grass’ chance of success to get fully seeded and grown in in the Fall.
All that work we did for prior preparation to prevent poor performance? Out the window.
When I think pre-emergent, I almost always think of the Spring: trying to get the weeds killed before they really start shooting up with the warm weather. But here’s something that will blow your mind:
Weeds still grow in cold weather, just at a slower rate.
Weeds will infiltrate your lawn, start to slowly grow, then the second the soil temperature starts rising – BOOM you have a huge mess on your hands.
Putting down a winter pre-emergent like this one from our friends at The Andersons will give you a huge head start on your Spring routine. Better yet, it will make your lawn stick out compared to your neighbors. Isn’t that what this is all about?
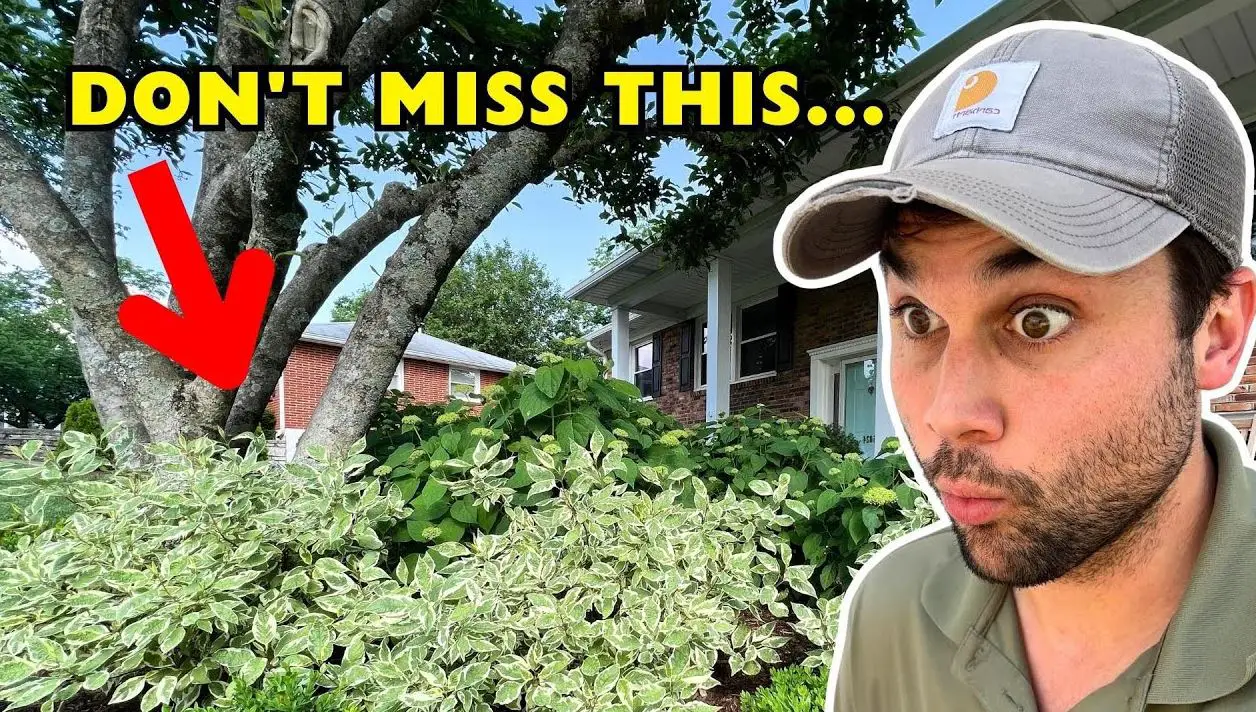
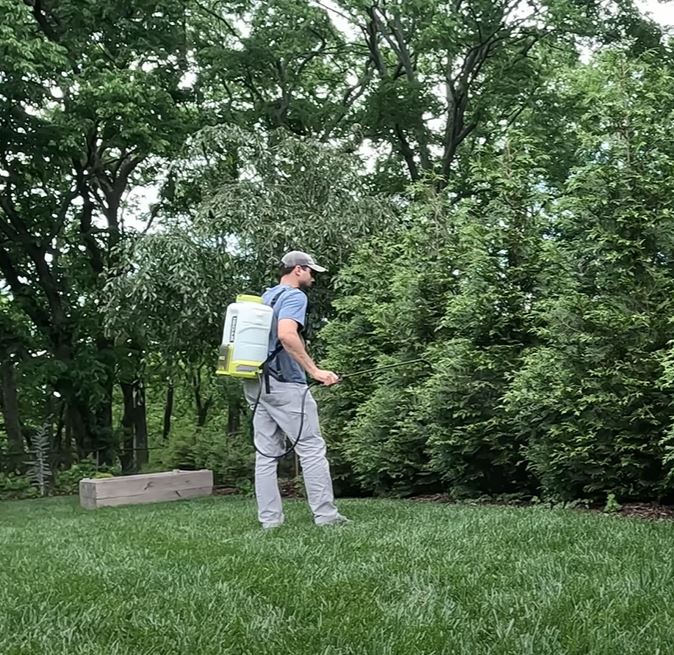
I’ve never lost a plant to disease, fungus, insect, or mites! In this guide, I’ll share with you the secrets of maintaining thriving outdoor plants. You’ll learn exactly what I do, when I do it, and how I do it to keep my backyard green and flourishing. You can read the below or check out my Youtube video that walks through the whole process.
Let’s dive into the key points covered in this guide and unveil the secrets to successful outdoor plant care.
Choosing the Right Products
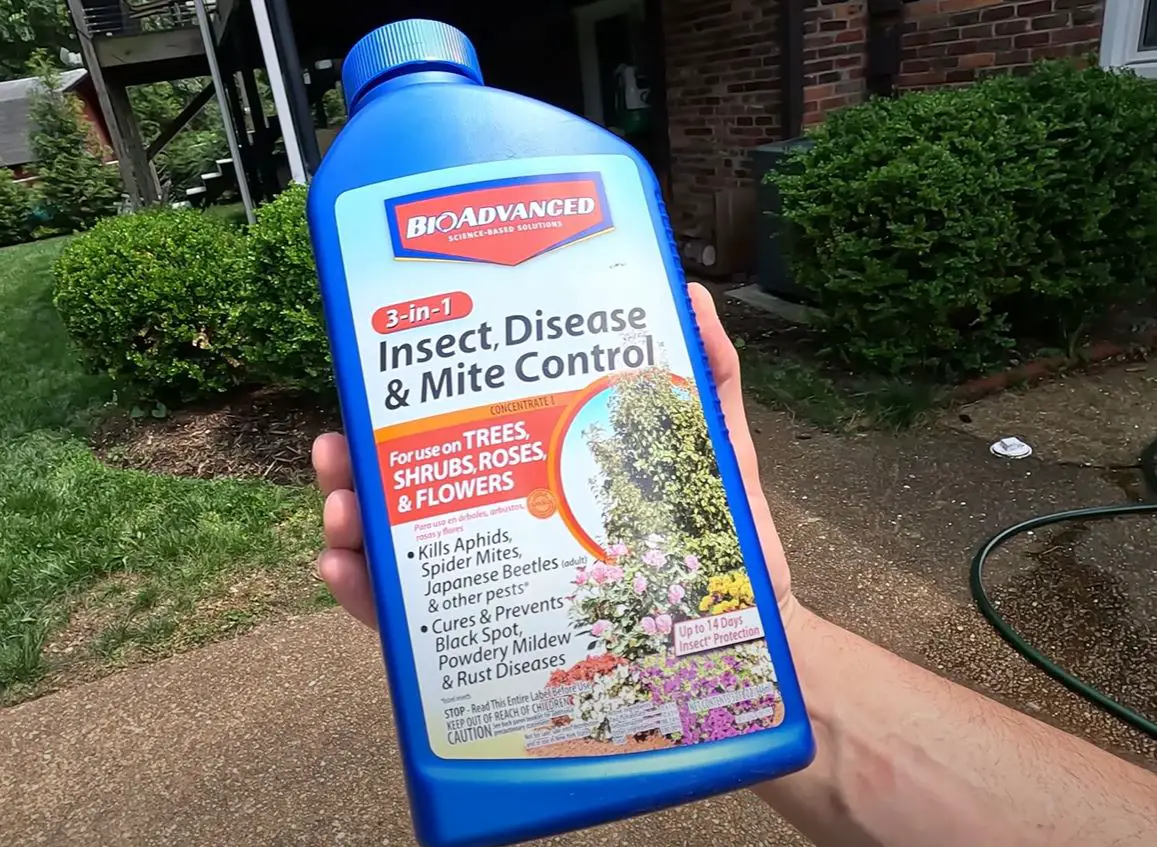
The first step in ensuring the health of your outdoor plants is choosing the right products. Bioadvanced offers a range of solutions, and one that’s particularly effective is the Bioadvanced 3-in-1 product that you can grab on Amazon.
This versatile formula is designed to protect your plants against insects, diseases, and mites. It’s a valuable tool in my gardening arsenal and what I would consider my “secret weapon”. Bioadvanced offers other specialized products like the Tree & Shrub Protect & Feed, Complete Insect Killer, Rose and Flower Care, and Fruit Citrus & Vegetable Insect Control. I use the rose version on my knock out roses.
Each of these products serves a specific purpose, so select the one that fits your plants and what you’re trying to accomplish.
Note: this is not a sponsored post in any way. I talk a lot about Bioadvanced but have never had communication with them and certainly never been paid to use or talk about their products.
Bioadvanced 3-in-1: Your Garden’s Best Friend
Bioadvanced 3-in-1 is truly a garden’s best friend. It’s a game-changer when it comes to warding off potential threats. This all-in-one solution simplifies my outdoor plant maintenance routine, making it incredibly easy to protectmy garden from pests, diseases, and mites (where the 3 in 3-in-1 comes from).
Bioadvanced offers a well-rounded approach to plant care, ensuring that your garden remains vibrant and pest-free. It’s an excellent choice for those who value the simplicity of a one-size-fits-all solution. If you know me, you know I’m rocking the three-in-one shampoo, conditioner and body wash just like every other guy out there. Bioadvanced does the same thing for your plants.
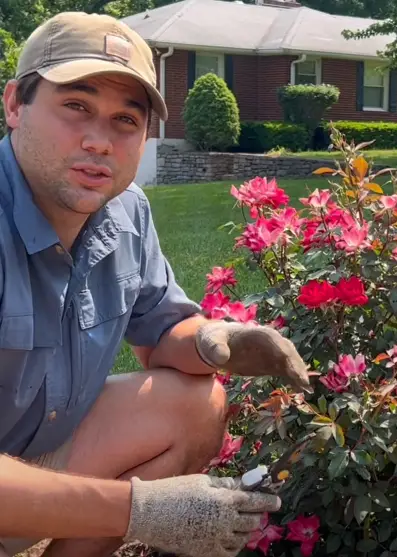
Quick aside: Using Bioadvanced Rose and Flower Care
When it comes to taking care of my flowering plants, Bioadvanced’s Rose and Flower Care is my go-to solution. This product is specially formulated to provide the essential nutrients and protection these delicate plants need.
With regular use, I get stunning blooms and healthy foliage throughout the season. It’s as simple as applying the product according to the instructions, and your roses and flowers will absolutely pop all season long. No more getting demolished by bugs!
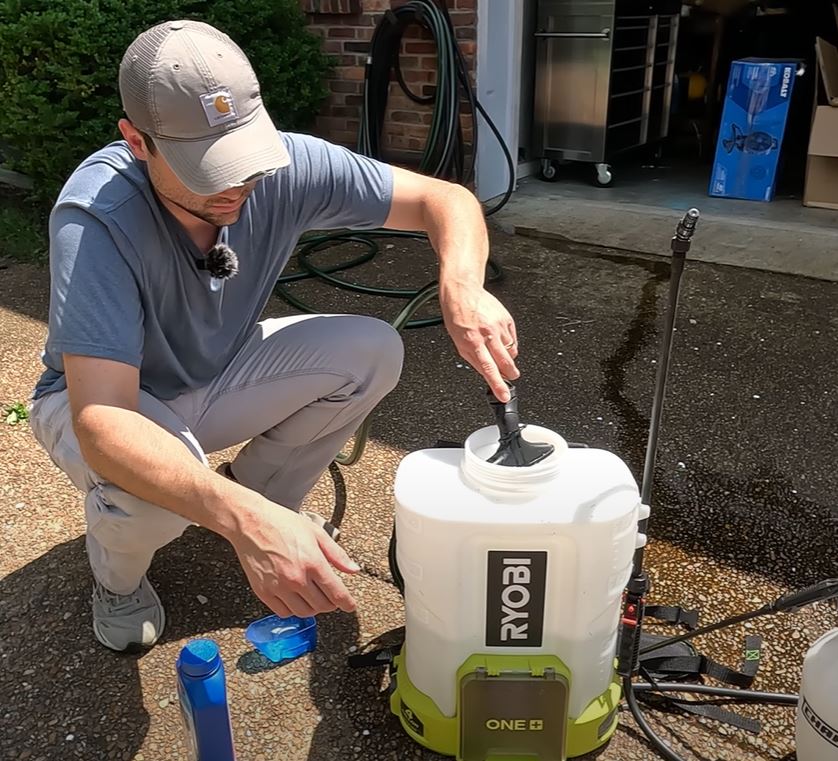
How I apply these products to my plants
To ensure the effectiveness of these products, it’s crucial to follow the recommended application instructions. Timing is essential. Applying the solution at the right time can make all the difference.
For example, in spring, as new growth starts to emerge, it’s an ideal time to protect your plants with Bioadvanced 3-in-1. Frequent monitoring and applying treatments as needed is also key. Regular inspections will help you identify potential issues early, ensuring your plants are never caught off guard by pests or diseases.
Prioritize Prevention Over Cure
One of the most crucial lessons I’ve learned in my gardening journey is that an ounce of prevention is worth more than a pound of cure (something my mom always said). Translation: it’s easier and more effective to prevent problems from occurring in the first place rather than trying to treat them once they’ve taken hold.
This is where products like Bioadvanced’s 3-in-1 shine – they serve as a proactive shield against potential threats. Your outdoor plants will thank you for the extra care and attention.
Proper Outdoor Plant Maintenance
Alongside using the right products, maintaining your outdoor plants involves various other aspects. Regular watering, appropriate sunlight, and the right soil conditions are equally important. Additionally, pruning and deadheading help your plants channel their energy more effectively and keep them looking tidy and attractive. Be sure to research the specific needs of your plants to create a suitable maintenance routine.
Careful Observation and Adaptation
Gardening isn’t just about following a set of rules; it’s about observing your plants and adapting your care routine accordingly. Pay close attention to the behavior of your plants. If you notice any changes or signs of distress, act promptly. It’s crucial to address issues early to prevent them from spreading to other parts of your garden. By being attentive, you can ensure that your outdoor plants remain in top-notch condition.
Share Your Thoughts With Us!
I’ve shared my tried-and-true methods for keeping outdoor plants healthy, vibrant, and thriving. Now, it’s your turn! I’d love to hear about your experiences and any additional tips you have for plant care. Gardening is a community, and we all benefit from sharing our knowledge and expertise.
Let’s continue to nurture our green spaces and create beautiful, thriving gardens. Find us on Youtube!
Final thoughts on Bioadvanced
Maintaining outdoor plants doesn’t have to be that hard – it isn’t like having a pet or a child. With the right products, timely care, and careful observation, you can ensure that your garden remains disease-free and teeming with life. By grabbing some Bioadvanced products, following their instructions, and adapting your care routine to the needs of your plants, you’ll be well on your way to becoming a successful plant mom or dad.
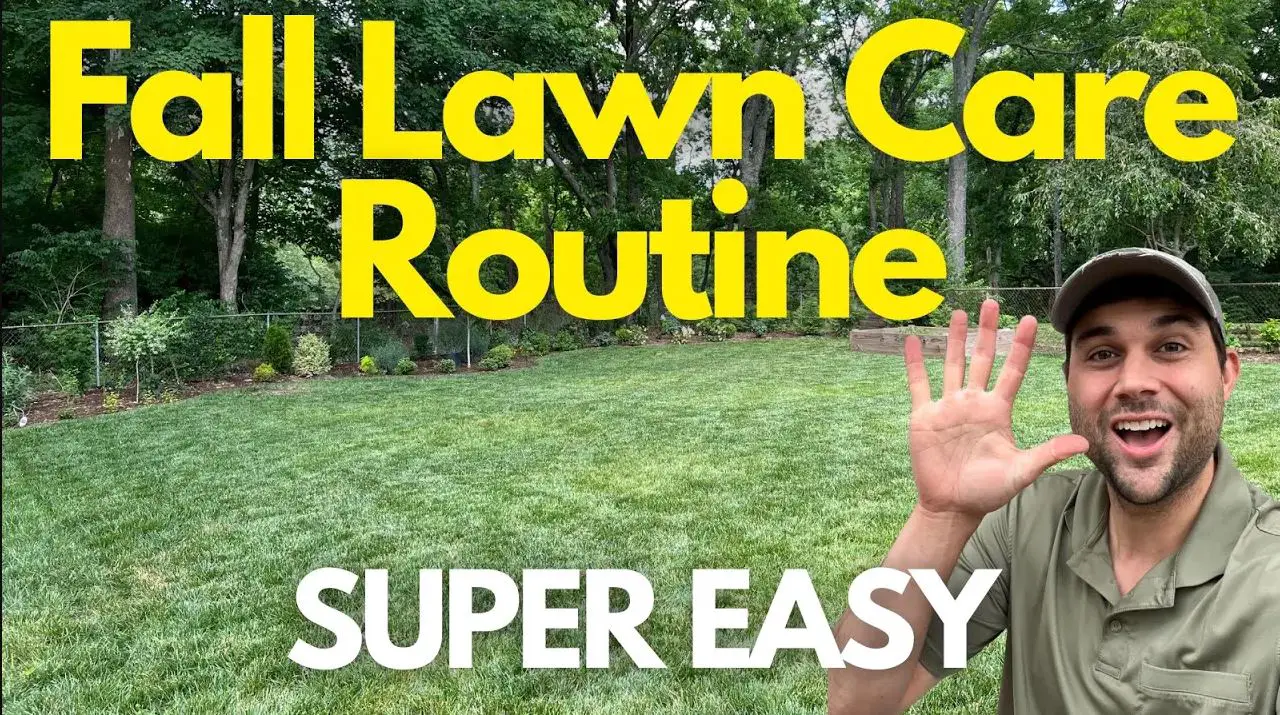
Maintaining a beautiful lawn is a source of pride for many homeowners (me), and it’s no secret that a lush Spring lawn starts with proper care in the Fall.
In a recent Youtube video I made titled “The TRUTH about FALL Lawn Care that the PROS know. (5 STEPS),” I share my valuable insights into Fall lawn care. Let’s dive into the main points of my Fall lawn routine to uncover the secrets the pros swear by.
Here are the steps for a perfect Fall lawn:
Clearing the surface of your lawn
Mowing at the right height
Aerating your lawn with a core aerator (you can rent from Home Depot)
Overseeding with a spreader
Implementing weed control and a consistent watering schedule
I cannot overemphasize the importance of clearing the surface of your lawn. This means removing debris, sticks, dog poop, leaves, and any clutter that may have accumulated over the summer.
A clean surface provides a fresh start for your lawn as your grass prepares to enter the dormant winter phase. This step takes a few minutes, but its impact on your lawn’s health is invaluable.
One of the sneakiest but most crucial steps for maintaining a healthy lawn in the Fall is proper mowing. In my video I delve into the importance of mowing at the right height. The pros recommend gradually lowering your mower blade height with each cut as fall progresses.
This technique ensures that your grass doesn’t become too long and susceptible to diseases like snow mold. Additionally, I recommend not removing more than one-third of the grass blade’s height in a single mowing session to maintain the lawn’s vitality.
Aerating the lawn with a core aerator
Aeration is a key practice that helps your lawn breathe. Aerating your lawn involves perforating the soil with small holes to allow nutrients, water, and air to penetrate the roots. Aeration is essential in reducing soil compaction and thatch, both of which can hinder your lawn’s growth. This step is essential for ensuring that your grass receives the nourishment it needs to thrive.
You can pair this step with dethatching, which is the process of removing thatch (dead grass) from your lawn’s surface. Combined, these two will allow your lawn to become fully oxygenated and receive sunlight and nutrients that give you.. You can read more about my experience with dethatchers here.
Pro tip: You can rent this thing from Home Depot (like I did) for super cheap.
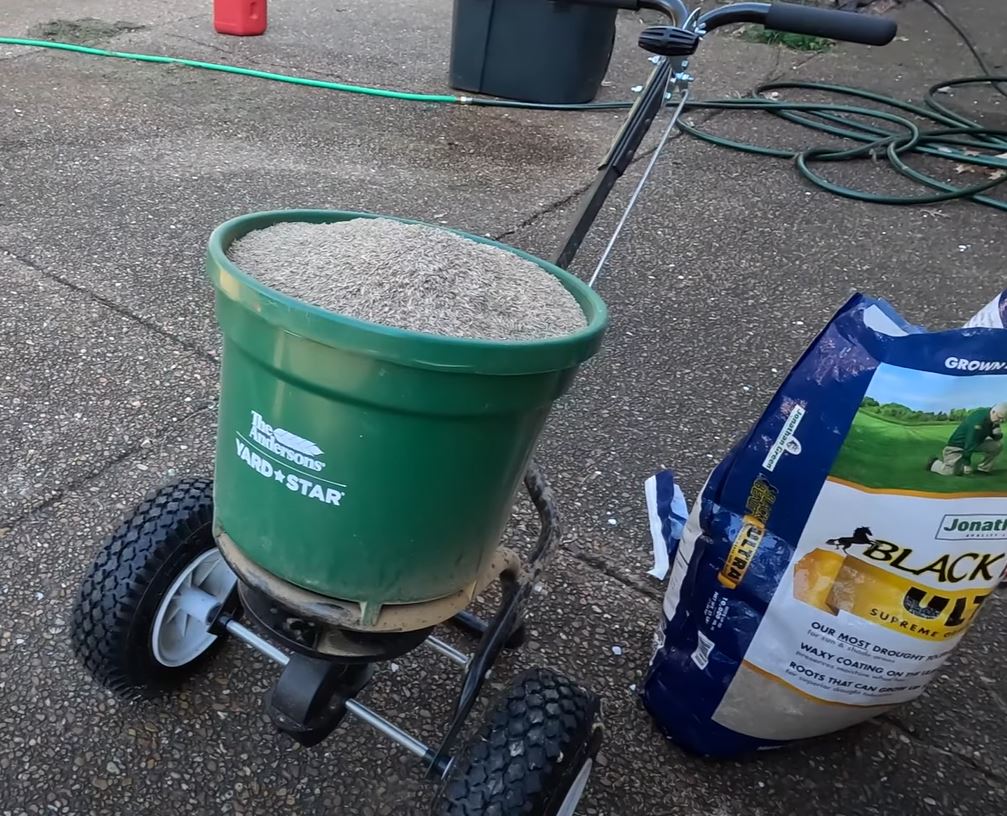
Overseeding your lawn
Overseeding is a vital aspect of fall lawn care to ensure that your grass grows back thick. Thick grass chokes out and prevents weeds and invasive grasses from taking root in your yard. The best defense is a good offense.
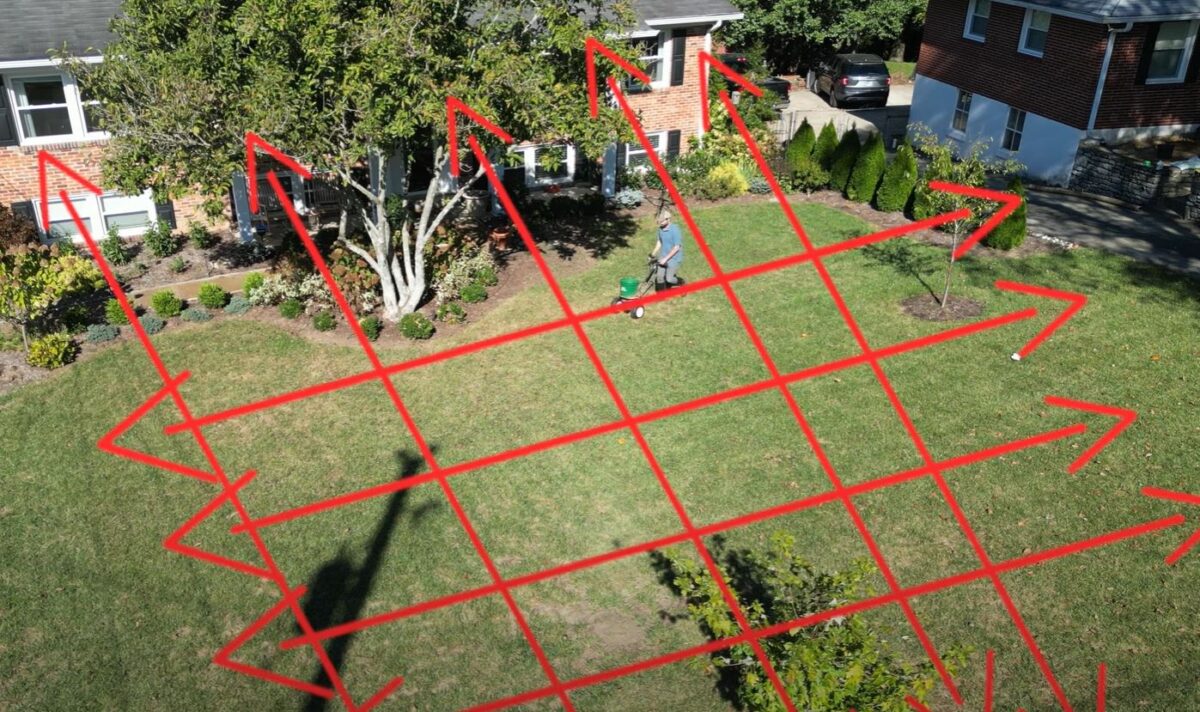
I suggest overseeding in the Fall to fill in any bare patches and encourage thick, lush growth. In my video, I explain exactly how I use my spreader in my yard to ensure that I get sufficient, even coverage of seed.
Pro tip: Follow my pattern above for ensuring even coverage throughout your yard.
Weed Control and Watering Schedules
The final steps in achieving a beautiful Fall lawn that sets you up for a beautiful spring lawn involve weed control and setting up a proper watering schedule. My video goes into detail about the types of herbicides and weed control products to use in the fall to prevent weeds from taking over your lawn during the winter.
I also share insights into the importance of keeping a consistent watering schedule: I recommend deep, infrequent watering rather than shallow, frequent watering, which can encourage shallow root growth.
Final words: My Fall Lawn Routine
By following these professional tips, you can ensure that your lawn thrives during the fall and emerges in the spring as a vibrant, healthy carpet of green. Don’t neglect your lawn this fall; follow these expert recommendations to enjoy a stunning lawn when warmer days return.
This summer you will want your lawn to look its best. However, there are some essential rules that I follow to keep my grass healthy and vibrant when the summer heat comes and threatens to destroy my lawn.
Today, I will discuss the key points from my Youtube video titled “Four Things You Should NEVER Do in Your Lawn in the Summer.” My expert insights will help you maintain a lush, green lawn all summer long.
Keeping your lawn in top shape during the summer involves a few key strategies.
Water your lawn deeply and infrequently to encourage strong root growth.
Avoid the temptation to mow your grass too short; instead, maintain a higher mowing height to protect your lawn from the harsh summer sun.
Don’t forget to fertilize your lawn, as it still needs nutrients to thrive during this season.
Be cautious about heavy foot traffic and take steps to protect your grass in areas prone to high use.
Proper Lawn Watering During Summer Months
One of the most crucial aspects of summer lawn care is watering. Contrary to popular belief, I advise against daily watering, as it can be detrimental to your turf and its roots.
Instead, I opt for deep and infrequent watering. Here’s why: frequent shallow watering promotes shallow root growth, leaving your lawn more vulnerable to drought and heat stress. By watering deeply once a week, you encourage your grass to develop deep, strong roots that can access water stored in the soil.
Deeper roots produce thicker, healthier, happier grasses that will be durable throughout the summer and prevent invasive grass and weed growth.
Mow High, Not Low During Summer Heat
While you might be tempted to give your lawn a close cut during the summer, this is a mistake. Mowing your lawn too short can put significant stress on your grass, making it more susceptible to damage from the sun and pests.
Crank the height up!
I recommend mowing your grass at a higher setting on your lawn mower. This keeps the grass blades longer, providing more shade to the soil and roots while helping to retain moisture. Taller grass also helps inhibit weed growth, as it competes more effectively for sunlight.
If you have bermudagrass or other warm season grasses, you still want to mow higher than you might think even though these require shorter cuts than cool season grasses.
Don’t Skip Fertilization in the Summer
Summer is not the time to neglect your lawn’s nutritional needs. Fertilization is crucial even during the warmer months. I always emphasize the importance of feeding your lawn.
Properly timed and balanced fertilization ensures that your grass has the nutrients it needs to thrive, promoting healthy growth and vibrant green color. Make sure to use a summer-specific lawn fertilizer, as it is designed to meet the unique needs of your grass during this season.
I used to throw my hands up in frustration during the summer as it seemed like putting any type of fertilizer down was a waste. But with the proper watering schedule and appropriate fertilizer, you can make a solid green yard even on the hottest days.
Avoid Heavy Traffic in Your Lawn
Summer often means more outdoor activities, which can lead to heavy foot traffic on your lawn. While it’s fun to play games, host gatherings, or enjoy picnics in your yard, too much activity can damage your grass. I suggest being mindful of where and how you move about your lawn – while still enjoying it.
Solution: consider creating designated paths or areas for high-traffic use to minimize the wear and tear on your grass. This simple step can help preserve the health and appearance of your lawn throughout the summer.
For me, it was putting down pavers in the most worn paths of my yard that helped keep my kids off of the grass.
Final words: Keeping a healthy summer lawn
In reality, I had to learn this stuff the hard way after breaking every single one of these rules at one time or another.
By following these tips from my video, you’ll be well on your way to maintaining a beautiful, healthy lawn all summer long.
Orbit’s In-Ground Sprinkler System was a super easy choice for me to buy. I love doing my lawn myself and getting this thing for super cheap on Amazon was enough motivation for me to finally set one of these up.
Whenever I used to pass by someone in my neighborhood with an in-ground sprinkler system, my immediate thought was always “can’t hide money!”. In-ground sprinkler systems and big money go hand-in-hand. But let me tell you what – it doesn’t have to be that way. You can get a great system and set it up yourself for something I call “middle class fancy”.
Let me explain more – or you can watch our full YouTube video guide here, where we tested the entire process.
Here are the quick steps for setting up your Orbit In-Ground Sprinkler System:
Let me walk you through exactly how I set up my Orbit in-ground sprinkler system from start to finish.
Step 1: Buy the system (skip if you’ve already done this)
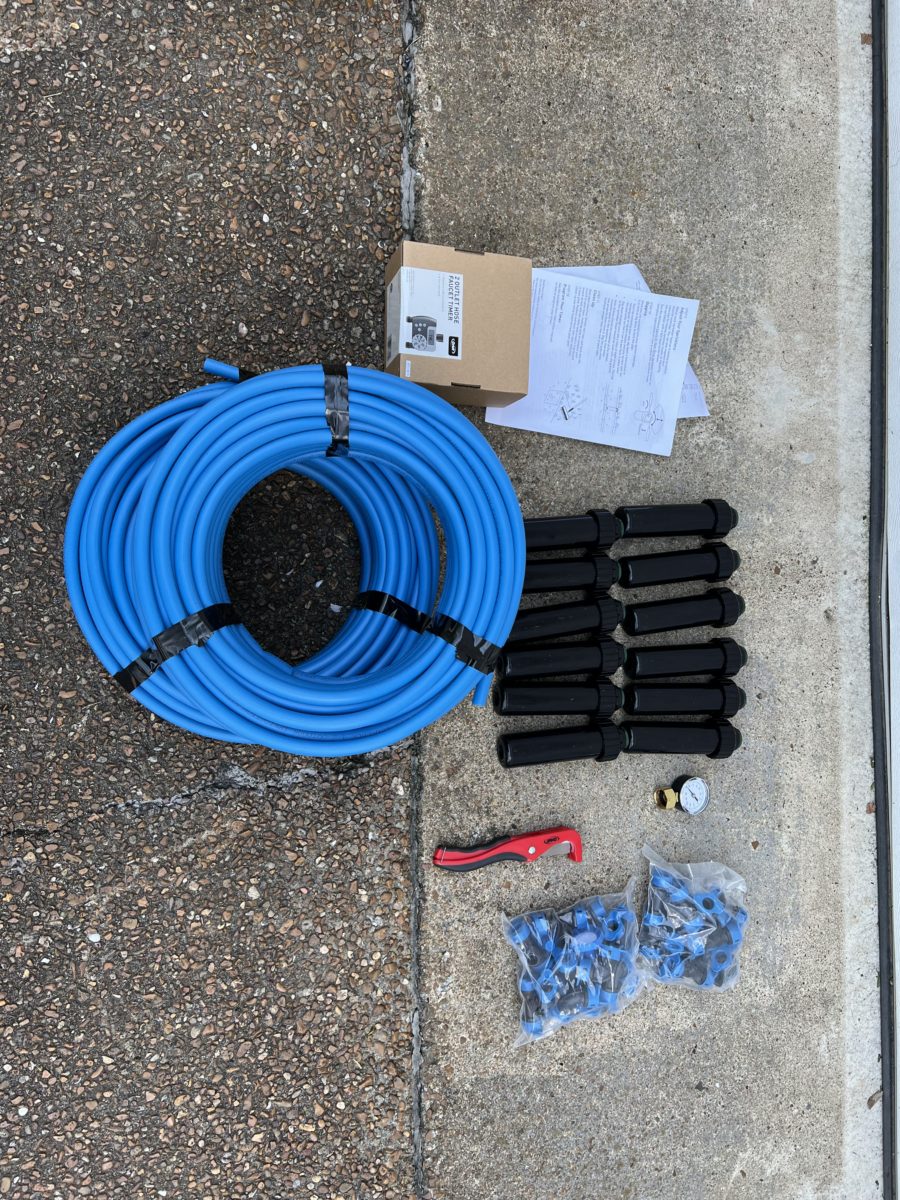
Sounds obvious, but trying to do any pre-work here will majorly mess you up. Going out and digging up a pathway will only bite you in the butt if you haven’t bought the system yet. I got mine from Amazon and it was absurd how cheap the whole kit was.
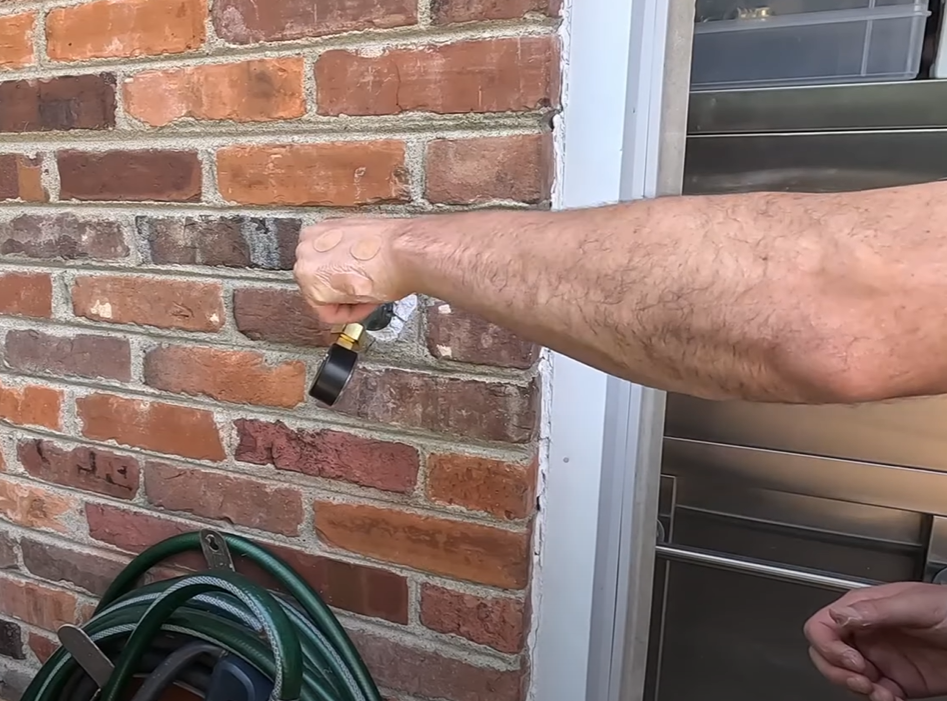
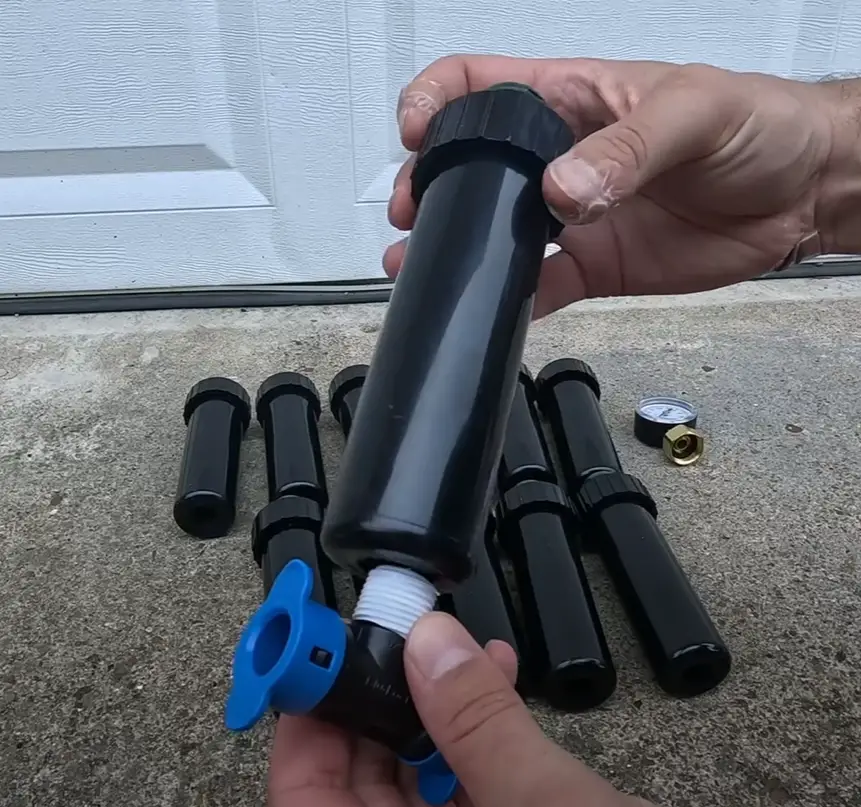
Step 2: Test your hose faucet water pressure
Fortunately, Orbit sends you a nice little pressure gauge that you can hook to your hose faucet that tells you how much water pressure your hose puts out. Simply screw this on, measure the pressure, and keep note of the measurement.
Just a warning here – if your pressure is below 35 PSI, this thing may be super wimpy and not worth it. If your PSI is above 80, then you may want a pressure reducer as it might be too strong for this system.
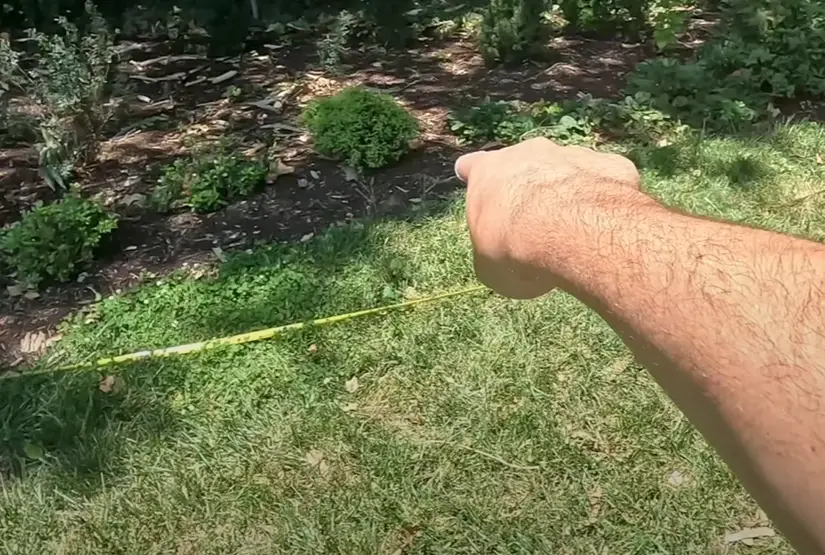
Step 3: Design your sprinkler set up
Orbit has a guide that correlates how much pressure your faucet puts out with how far apart you need to set up your sprinklers. Since mine was on the high end, I am putting each one of my sprinkler heads 24 feet apart.
This takes some careful mapping and spacing in your yard. Orbit recommends a U shape in your yard for you to get optimal spacing and watering. I mapped mine out with some yard stakes to make sure it was all even Steven before doing any kind of digging.
Quick tip: While mapping this out, let the blue hose that comes with the system lay out in your yard and relax and “melt”. This will help kill any tension once you start laying it down.
Step 4: Assemble all the sprinkler heads
The sprinkler head set up is pretty straightforward and provided in the attached instructions. You simply clip on the blue caps to the base hose adaptor connector and screw those on. I bought some plastic stakes and zip tied the sprinkler heads to those. I’ll explain more later.
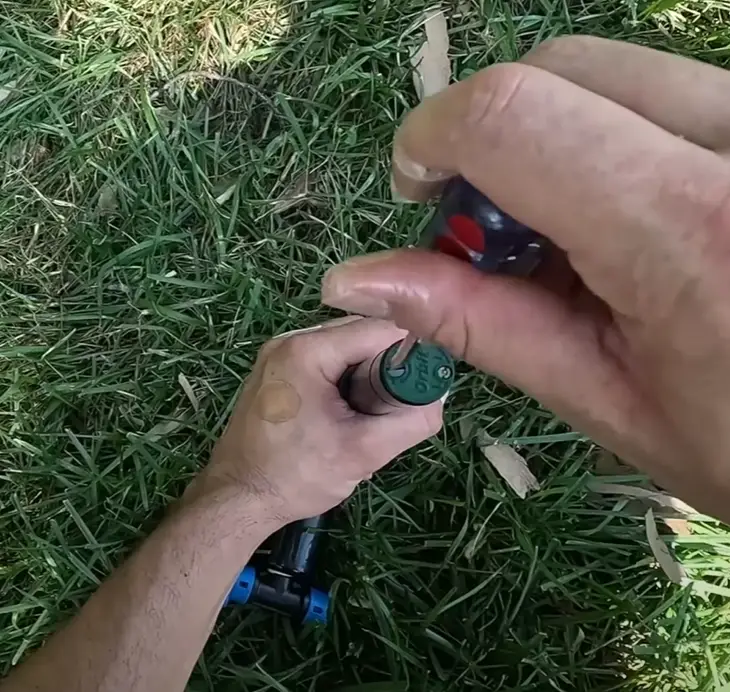
Step 5: Adjust sprinkler heads
Once you’ve got your sprinkler heads attached to your stake and in the spot you want them in your lawn, remove the inner sprinkler component (with the green cap). Pull down the spring and set the parameters of the sprinkler. To do this, you get a flathead screwdriver and tighten it until you have a good range.
This takes some trial and error to figure out exactly how this needs to be set up for your yard, but basically functions like a complex parameter range on any other sprinkler (even the oscillating sprinklers).
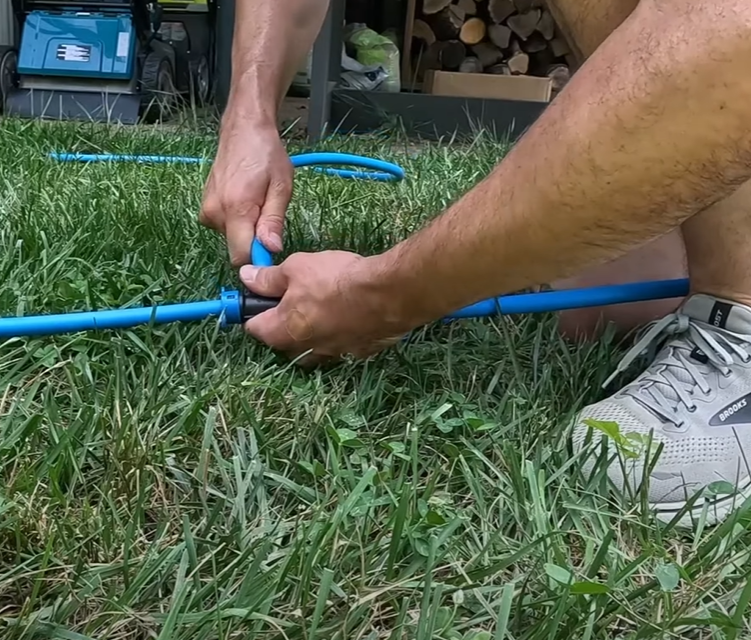
Step 6: Lay out the hose above ground
It’s really important to make sure you set up the full system before doing any digging. This means actually getting the hose out, cutting it, and connecting it to the sprinkler system. Orbit sends a nice tube cutter that lets you easily cut down the hose to the size you need. Some important tips here that I learned the hard way is to push the blue hose in as far as possible to make sure you don’t get leakage.
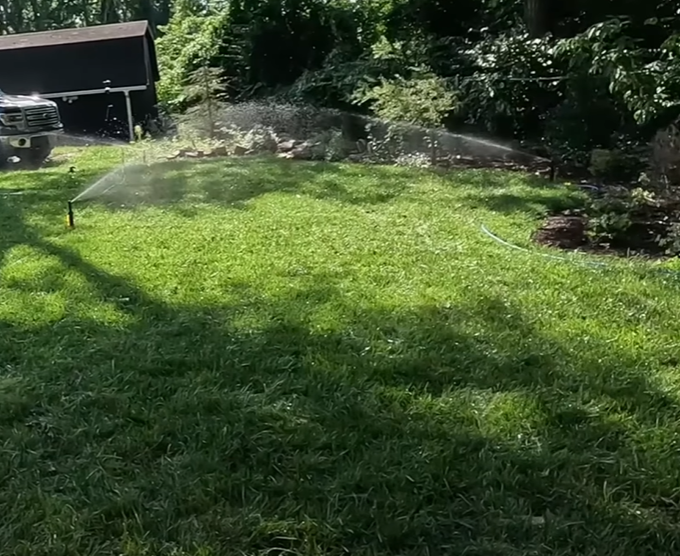
Step 7: Give the Orbit Sprinkler System a test run
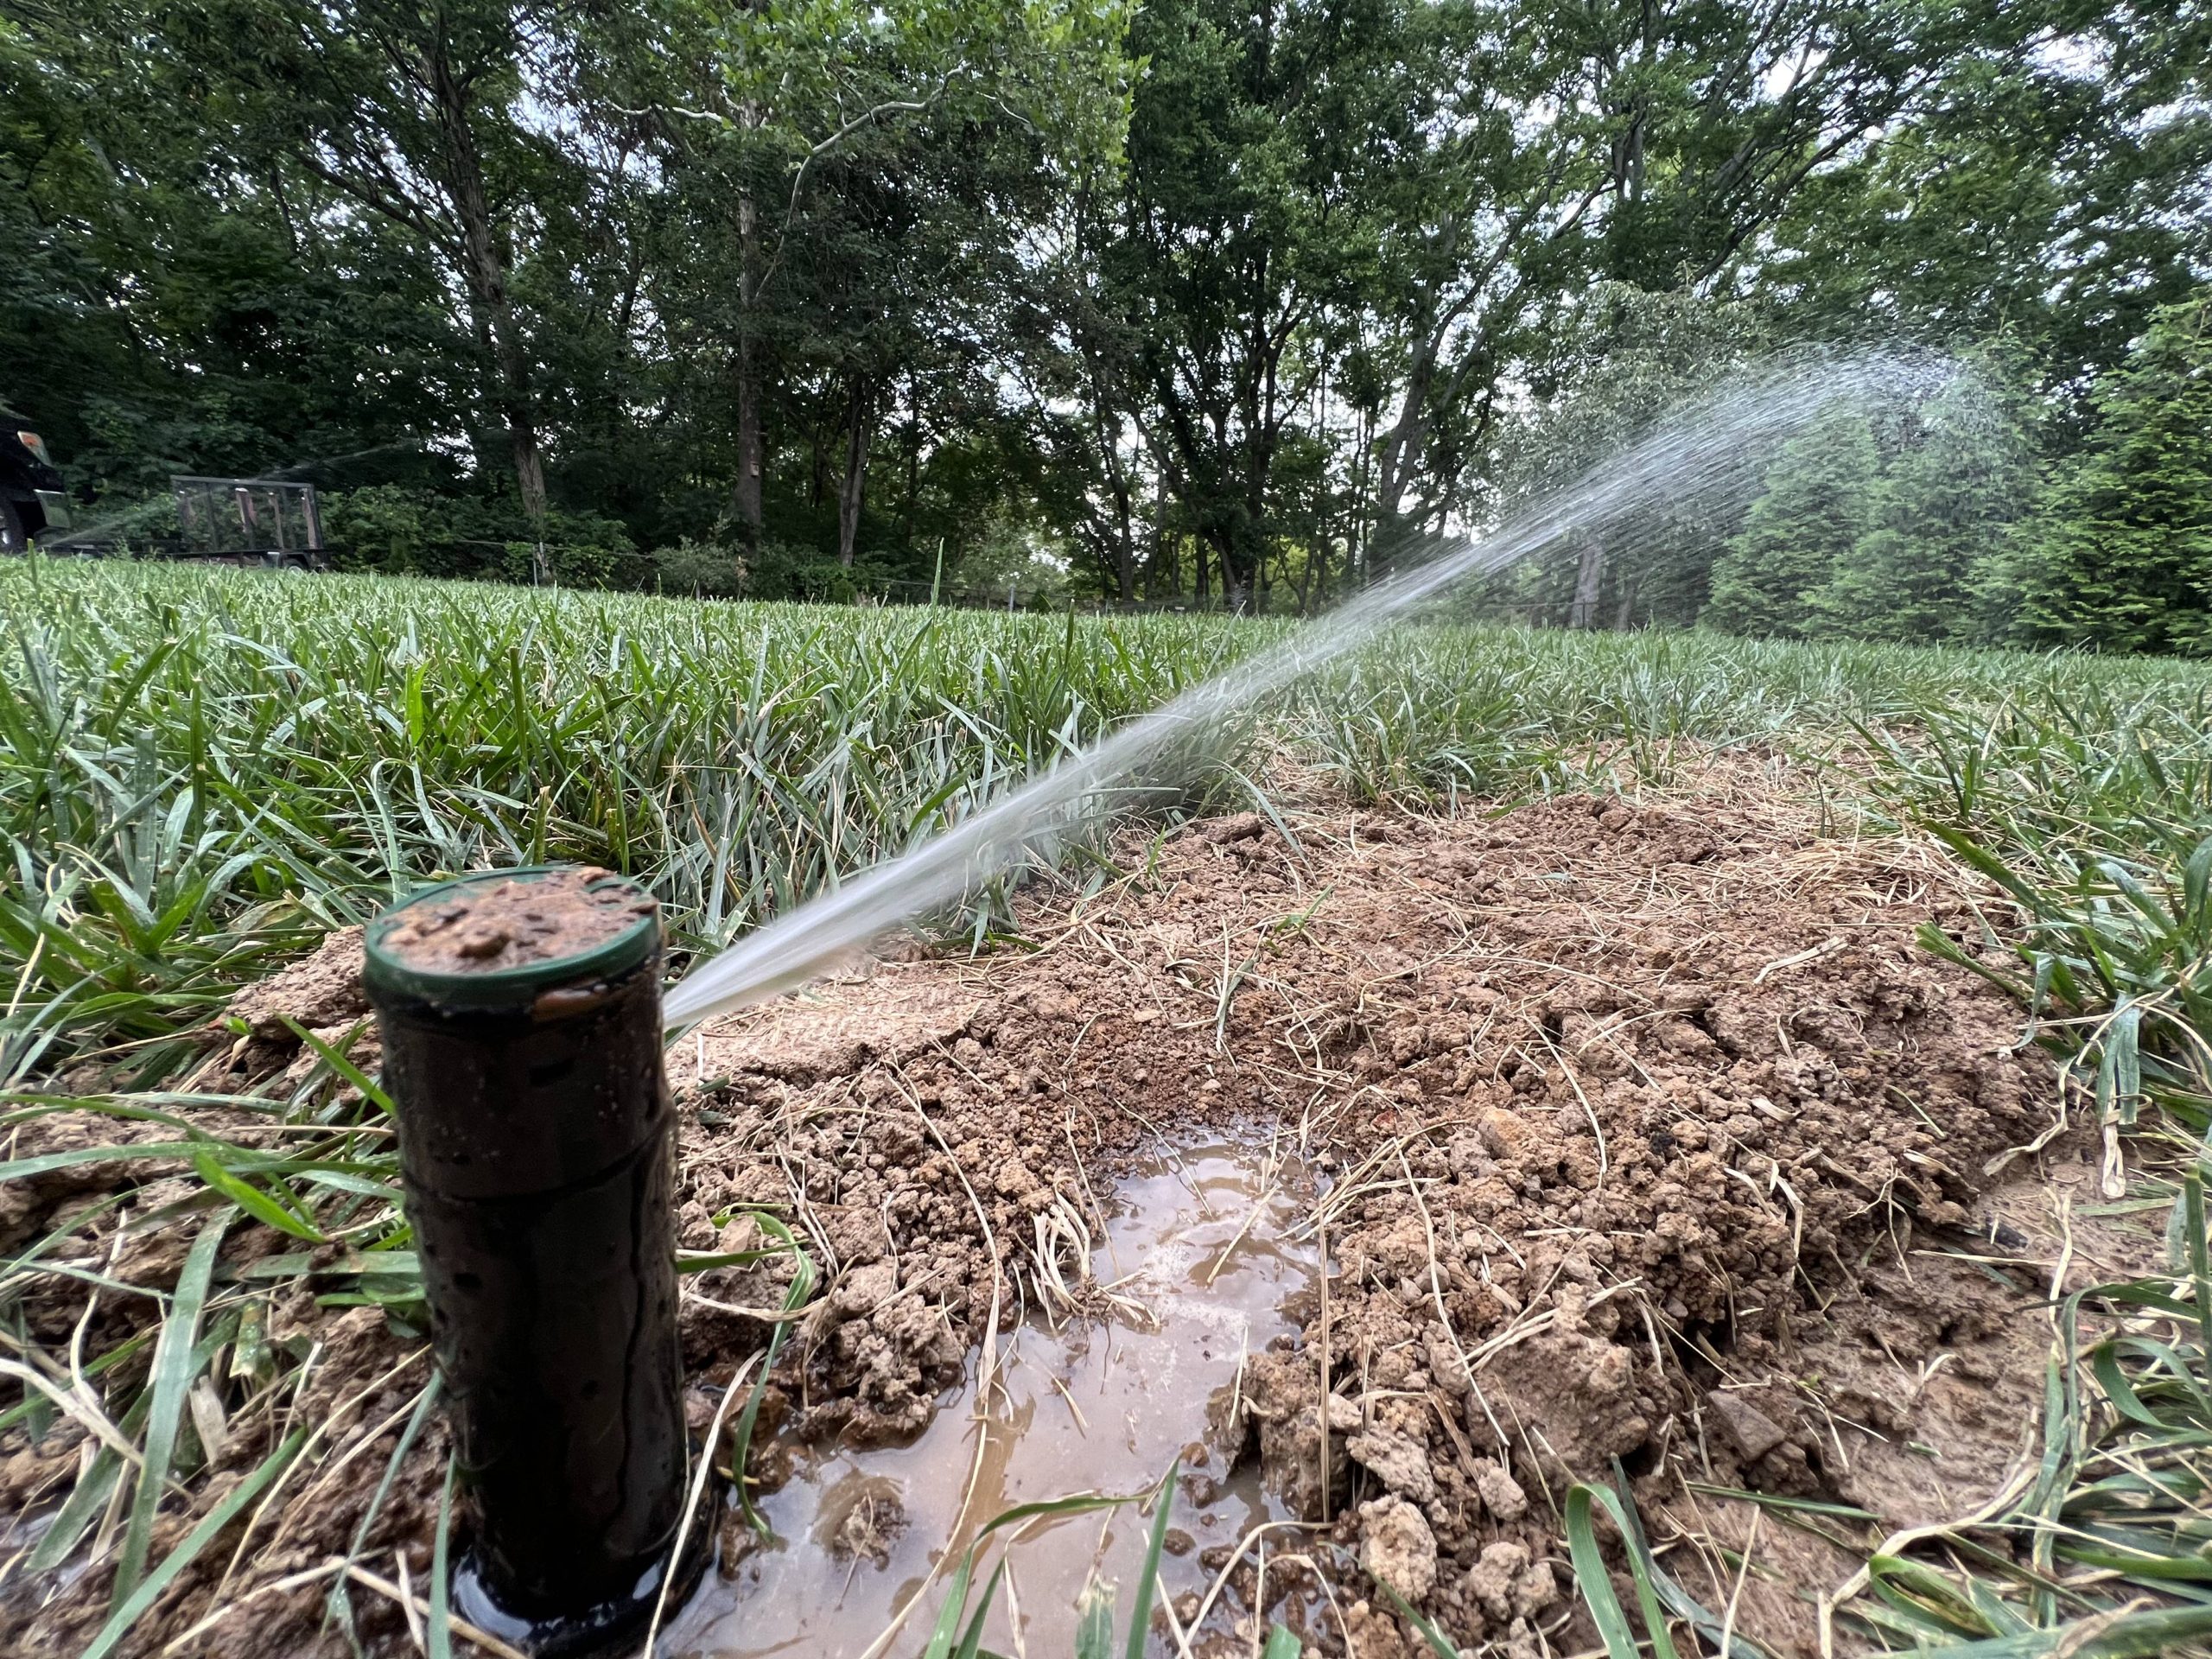
Before you dig, make sure the system works! Connect it to your hose and let it run. Make sure there aren’t any leaks and that each spring-loaded sprinkler head actually does its job. This is a critical time to make any last minute adjustments to the sprinkler range.
Pro tip: Make sure you get that head-to-head coverage on your sprinkler. This is recommended by Orbit to ensure you don’t miss any spots and can fully get your yard soaked.
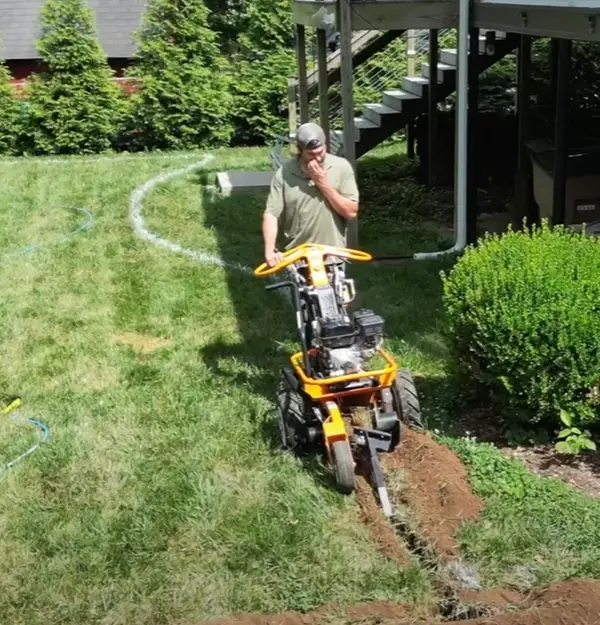
Step 8: Digging the Sprinkler System in
There’s a hard way to do this and a harder way to do this. The hard way is to rent a trencher and dig a nice trench to fill your hose in with. The harder way is to use a flat shovel and do it the old fashioned way. I chose to rent a trencher.
This process took quite a while, but was definitely better than doing it with a shovel. It also gave me super clean, evenly distributed trenches to drop the hose down into.
Pro tip: Dig 8-10 inches and put the pipe in for the best results.
Step 9: Refill the dirt
Once you’ve laid the pipe (no jokes, please), then simply test it out and then fill it back with dirt. This is another laborious process to get the dirt back into the hole, compact, and level.
Orbit In-Ground Sprinkler System Review: My Experience
After getting it all set-up, I’ve actually loved having this sprinkler system in my yard. I’ve got it set up with a timer to run super early in the morning. After I got it installed, I haven’t had to touch any of the sprinkler heads (although it has only been a few weeks).
Mowing for the first time wasn’t too much of a hassle and the grass is starting to come back in on the areas I dug up. I’ll report back after more time has passed, but so far I am extremely pleased with how the set up is going.
This $200+ dollar system is a small item that makes you feel like you are rich. A really cheap way to get a great looking yard without having to go out there with a sprinkler and do it manually.
Common questions and troubleshooting Orbit In-Ground Sprinklers
Here are some common questions I get (and had myself) when I first got my In-Ground Orbit System.
How do you adjust orbit in ground sprinklers?
You can adjust the range of the orbit sprinklers by opening the sprinkler head, pulling down the spring, and using a flathead screwdriver to adjust the range on the top of the sprinkler head.
How do I make my sprinklers shoot farther?
To get your in-ground sprinklers to shoot farther, you need to increase the overall water pressure in your hose faucet. Anything below 30 PSI will make for a very weak sprinkler.
Why is my Orbit sprinkler head not rotating?
If the Orbit sprinkler head is not rotating, there is likely dirt or debris stuck in the head. Open it up, clear it out, and ensure the appropriate rotation range settings are in place.
Why we review lawn tools
The reason we started this website in the first place was because we had so much trouble trying to find reasonable, understandable, honest reviews for lawn equipment. And it’s not cheap! After hours and hours of research, trying products and returning them, and messing up our yards – we started this site.
As people who had to learn the hard way, we want you to know exactly what you are signing up for before you purchase a piece of equipment. That’s why we are committed to providing honest, easy-to-understand reviews that mean something.
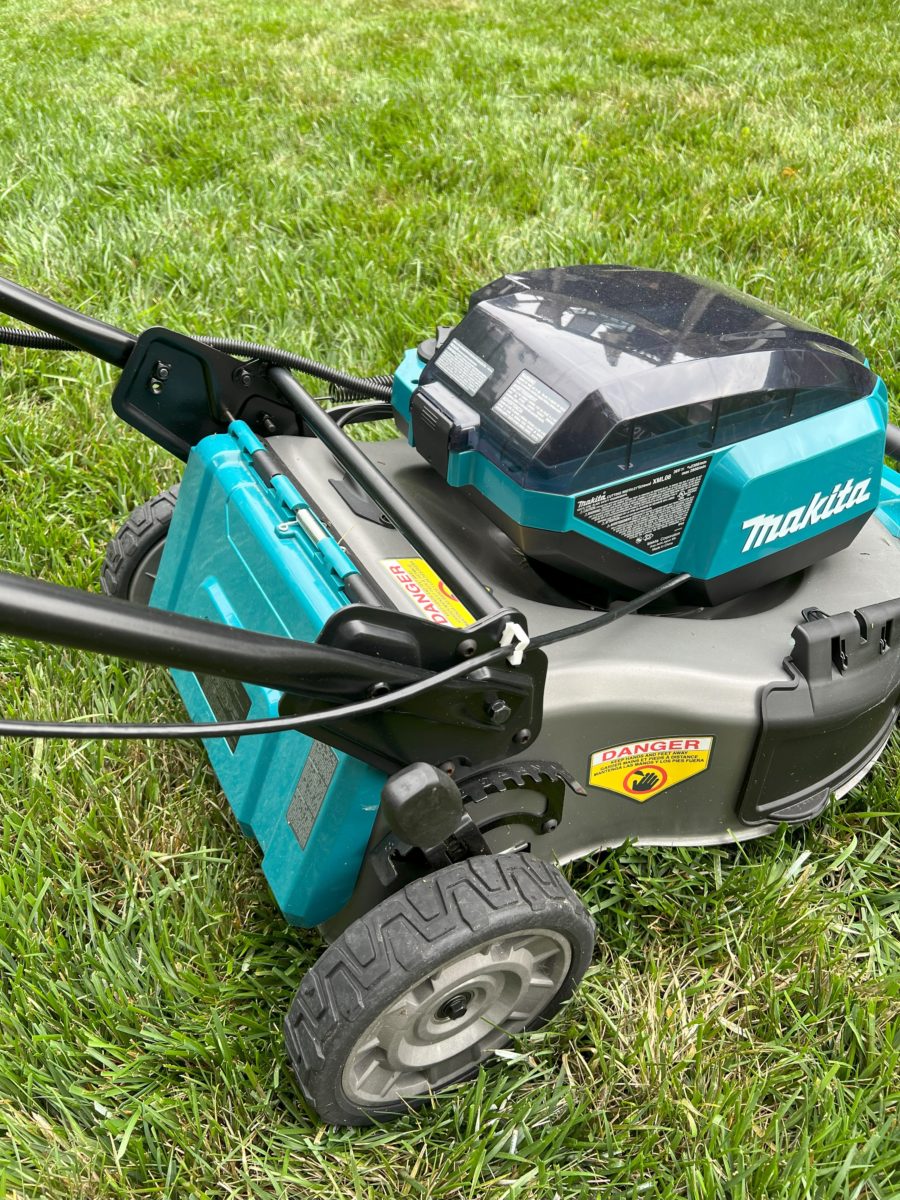
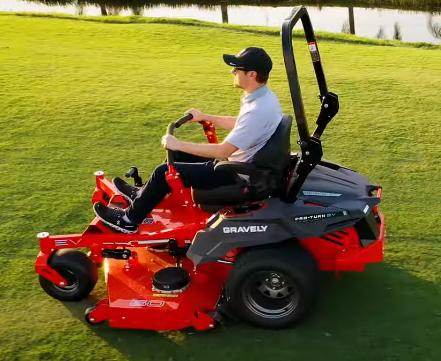
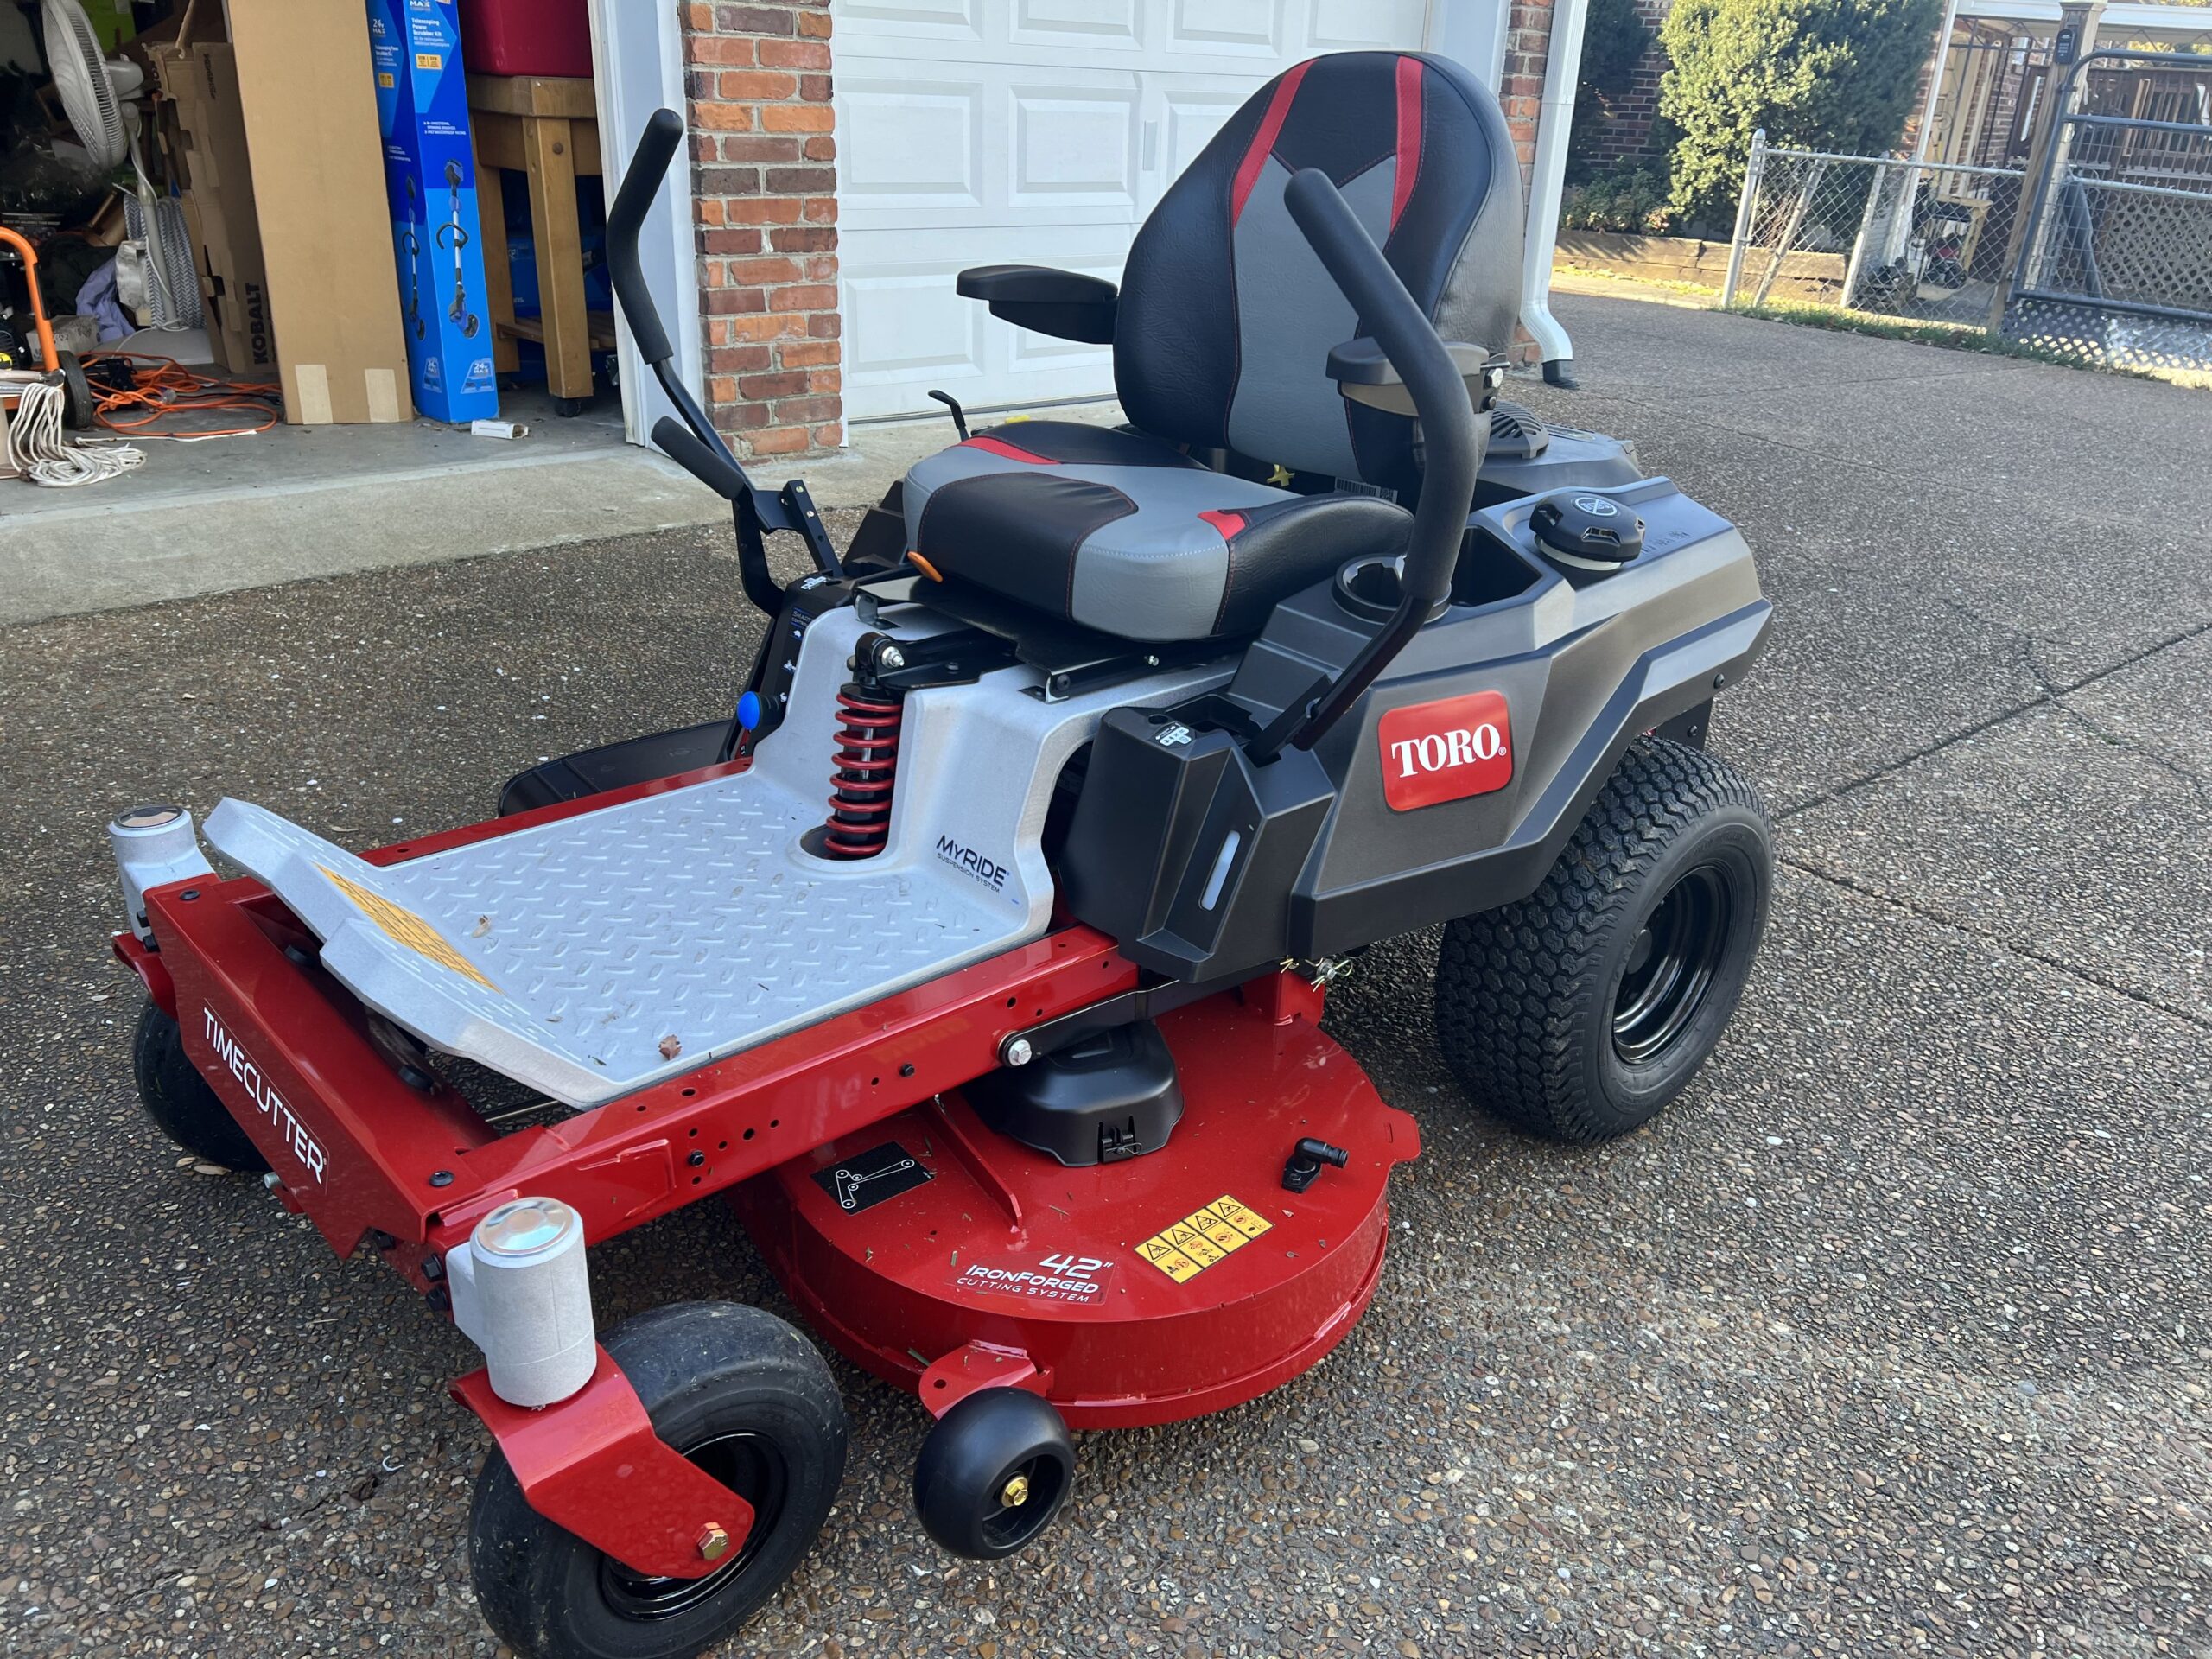
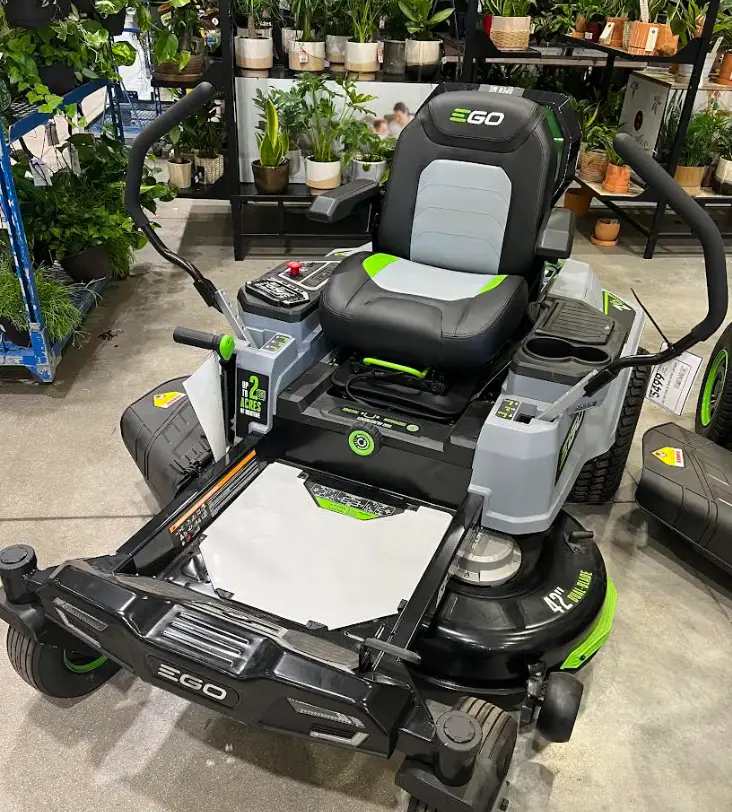
Your riding lawn mower, much like your car or truck, requires regular maintenance to perform at its peak. Neglecting your riding mower can result in unreliable operation, expensive repairs, and endless frustration.
No matter what make, model, brand, or size your riding mower is, there are some key maintenance tasks you should be performing on a schedule. Whether you’re a newbie or a seasoned lawn mower, follow these tips to keep your riding mower running smooth.
My Experience Using Riding Mowers
When I was a kid and it was my older brother’s turn to mow the lawn, I remember my parents screaming at him for having the speed all the way up to “bunny” when it should have been on “turtle”. The mower was dang fast and my brother took every chance he could to max that thing out.
And at the risk of sounding old, they don’t make them like they used to. But there are still some great brands out there that make awesome riding mowers. Between zero turns and lawn tractors, you can get a high quality piece of equipment that is still made with serious care. I’ve had the pleasure of using dozens of different mowers and have found consistencies across some that have stuck with me over the years.
Top tips for maintaining your riding mower
Let me break out the must-have riding mower maintenance tips that you shouldn’t forget if you spend the big bucks on a riding mower. Not all of these apply to every brand of riding mower, but these are generally good rules to follow.
Use Your Riding Mower Correctly
Whenever operating your riding lawn mower, follow the manufacturer’s instructions to ensure it runs safely and efficiently. Avoid mowing over debris that can harm you or the mower such as branches, metal, toys, and trash. A quick walk around the yard will help avoid costly repairs.
This may seem obvious, but I’ve seen riding folks basically use these as golf carts and take them all over the road and even off-road. Tip number one: use it to mow lawns.
Keep Track of the Oil
Oil is literally the lifeblood of your lawn mower’s engine. Literally. It must be maintained at the proper level at all times. Make sure you check the oil before every use to avoid expensive engine issues later. Oil changes are necessary for all gas-powered riding mowers.
How often to change the oil on your riding mower depends on the mower’s engine:
No oil filter? Change the oil every time you reach 25 hours of use.
Oil filter? After 100 hours of use, change the oil.
Use High-Quality, Low Ethanol Gas
You won’t use low-grade gasoline in your car, and you shouldn’t use it in your riding mower either. But, be careful about the fuel you use. Your car can handle E87, but it’s got too much ethanol for lawn equipment. Opt for E-10 to protect your mower’s engine.
Or if you’re a purist who only loads your truck with pure gasoline like me, then treat your mower the same. It will save you money in the long run even if it feels more expensive up front.
Keep Your Mower’s Engine Clean
Dirt and debris go with the territory when mowing your lawn. When it gets lodged in the spaces inside your ring mower’s engine, it’s more than a nuisance. Debris can block the airflow, causing your engine to work too hard, brush away dirt and remove grass clippings, leaves, and other debris after every use.
You’d be surprised at what can pop up and launch into parts of your mower that you wouldn’t normally expect. If you lift the hood up after a mow, you can find dirt, pollen, and small rocks. Mix that with some moisture, heat, and time and you start to get some serious problems. A quick wipe down can prevent a lot of trouble.
Keep a Clean Machine
Regularly wash your riding lawn mower using a hose or pressure washer and a mild soap and give it a good hand dry, just like your car. Be sure to get all those grass clippings from the blade area that have become stuck, otherwise they’ll hinder the mower’s performance.
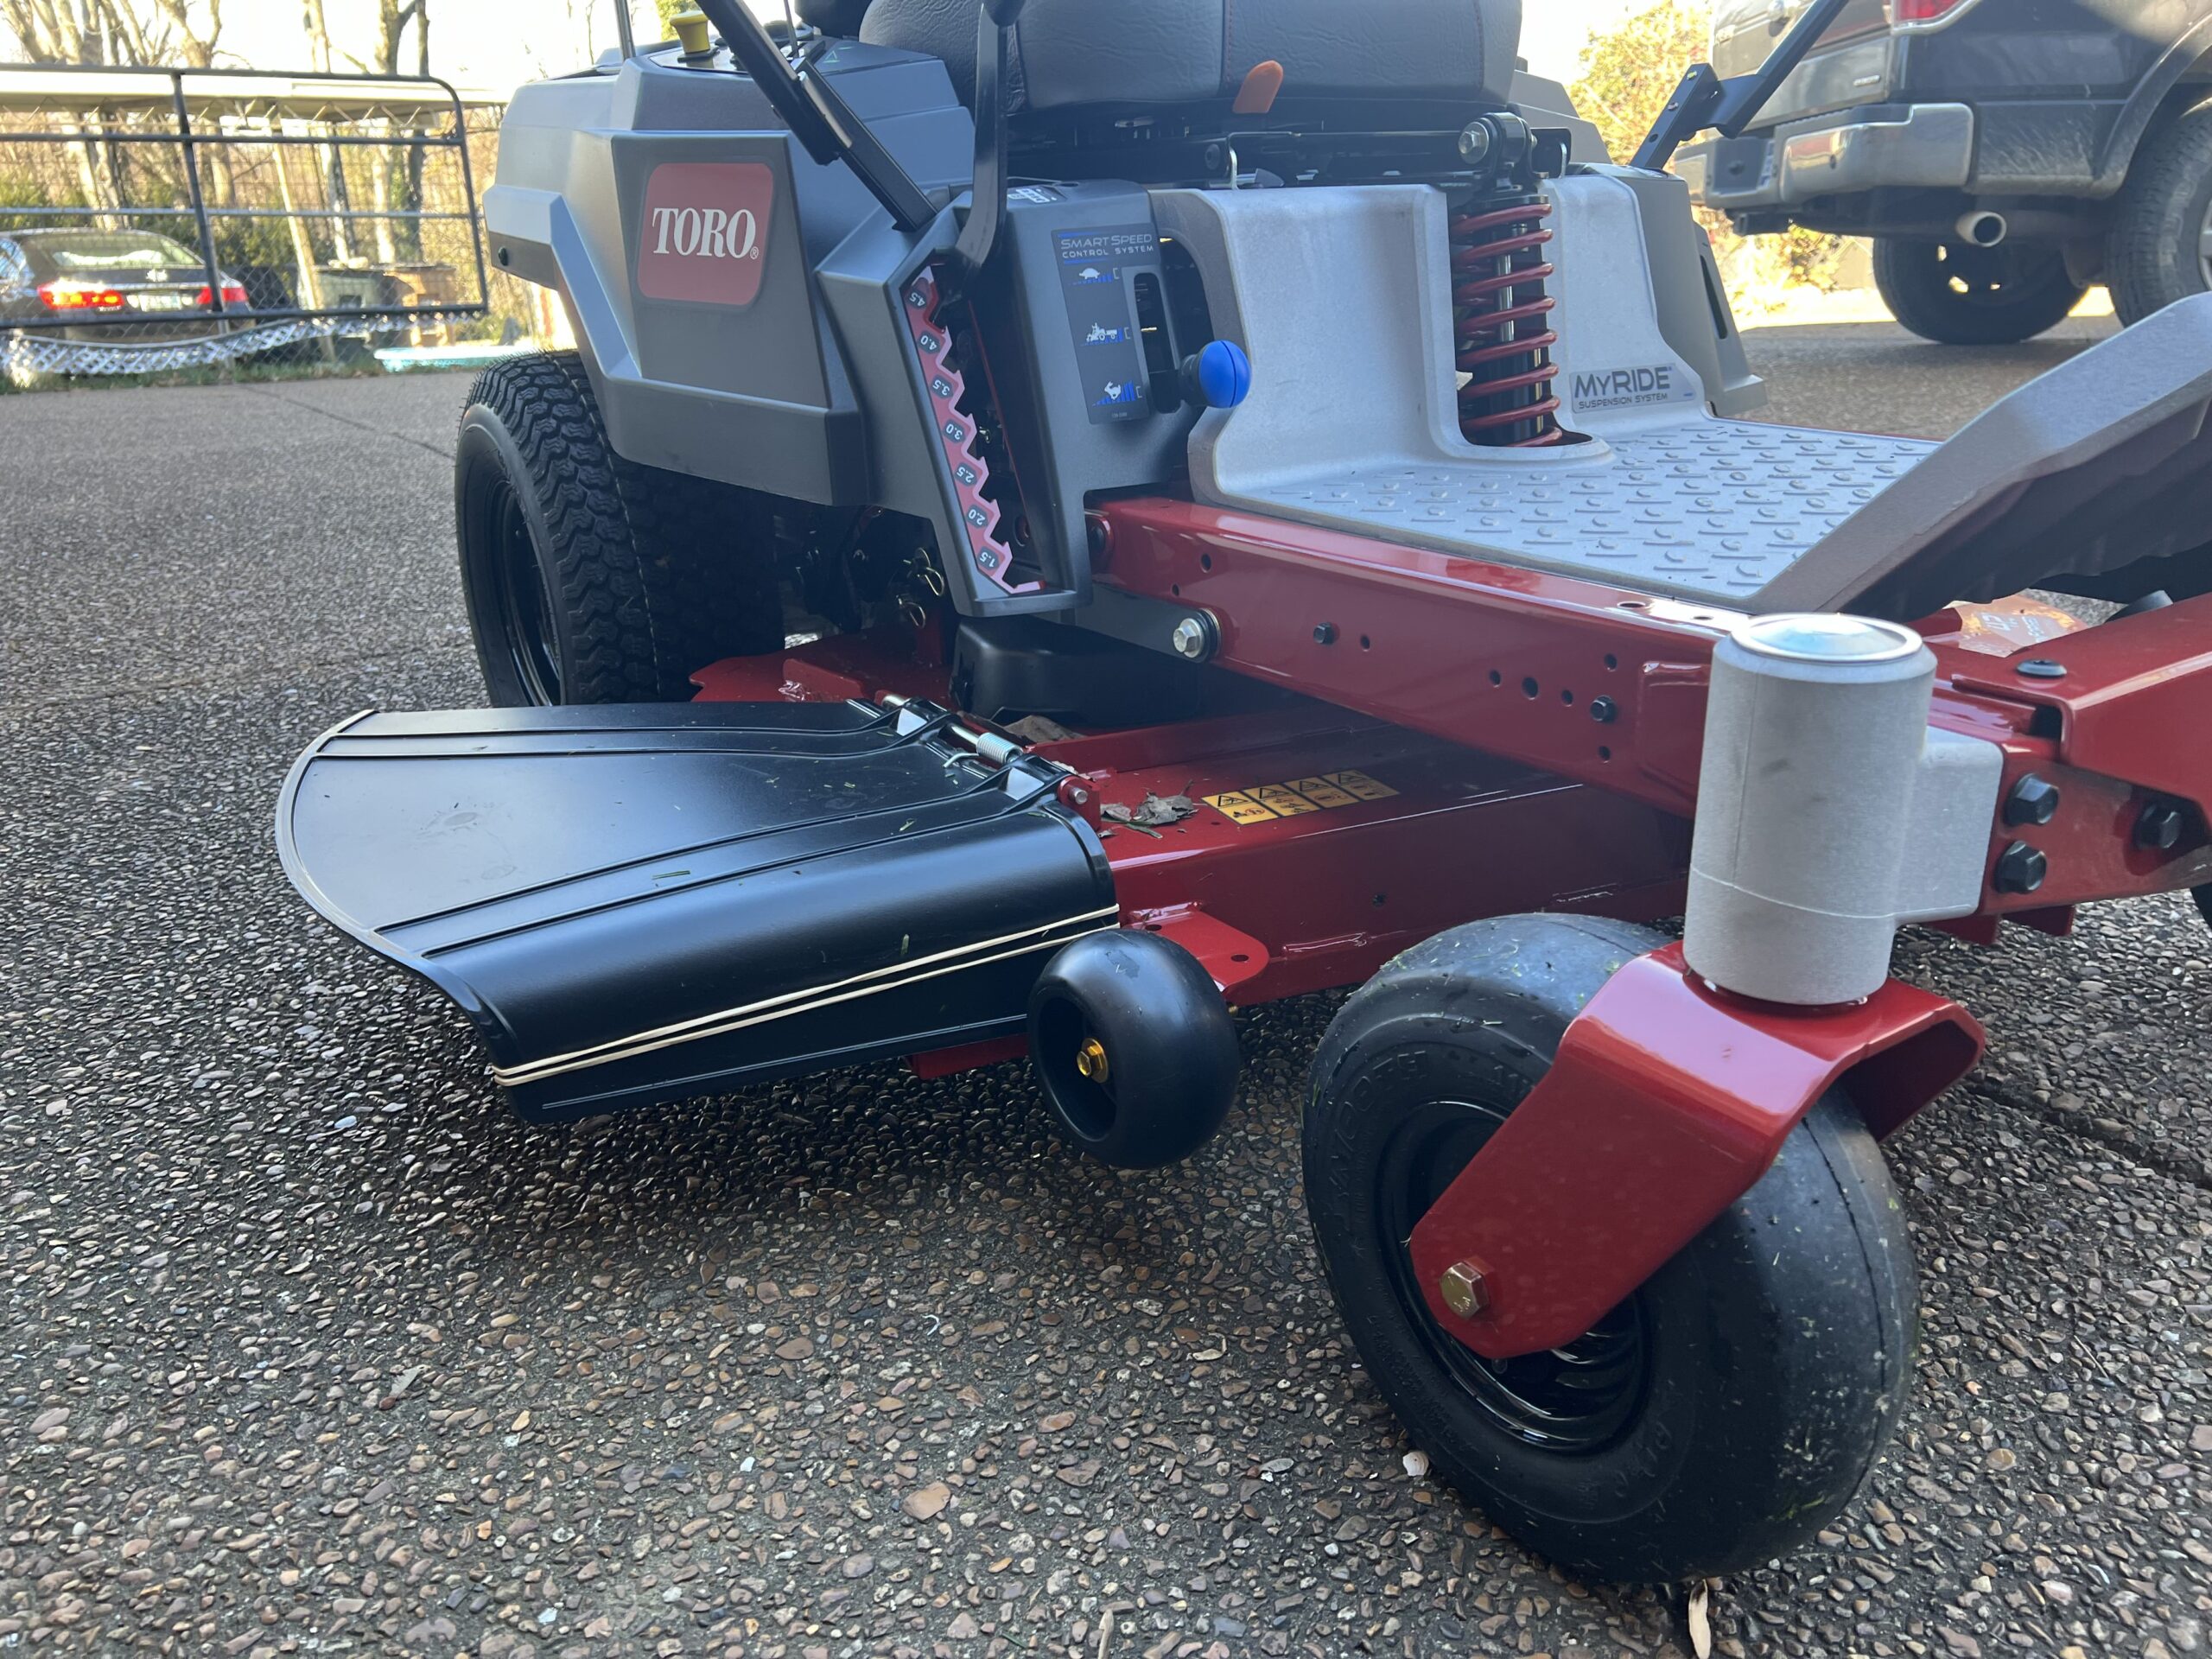
The deck wash port here is the black nozzle.
Many of these riding mowers have a deck wash port where you can connect your hose, run some water, and it will circulate water through the deck. This makes super quick work of cleaning out your cutting deck, which can be a really easy task to ignore. I mean it is generally the last thing I want to do after I’ve spent an hour mowing my grass. I want to water my grass, not my mower.
Lastly,clean the wheels to maintain good traction. I recently had a friend mow on a hill and the machine fell over, nearly killing him. Serious stuff here.
Store Your Riding Mower Properly
How you store your riding mower after each use, an in the off season, can impact its performance.Take care to keep it out of the harsh elements to protect the mower body and engine.Never leave your mower outside and don’t cover it with a tarp, or it’ll rust and corrode.. Store it in the garage or a weather-proof shed for maximum protection.
If you don’t have either, get a nice tarp and keep it covered. Whatever you do, keep it dry and try to keep it out of the sun. A car port or something similar can also work in a bind.
Use Your Best Judgment
Using a riding mower makes lawn work easy and fast, but you have to take care of it. Follow the tips above and remember, if the weather is comfortable for you, it’s also a good day to mow. On the other hand, leave your rider to rest when it’s hot and muggy or the engine, and you may overheat.
Why we review lawn tools
The reason we started this website in the first place was because we had so much trouble trying to find reasonable, understandable, honest reviews for lawn equipment. And it’s not cheap! After hours and hours of research, trying products and returning them, and messing up our yards – we started this site.
As people who had to learn the hard way, we want you to know exactly what you are signing up for before you purchase a piece of equipment. That’s why we are committed to providing honest, easy-to-understand reviews that mean something.
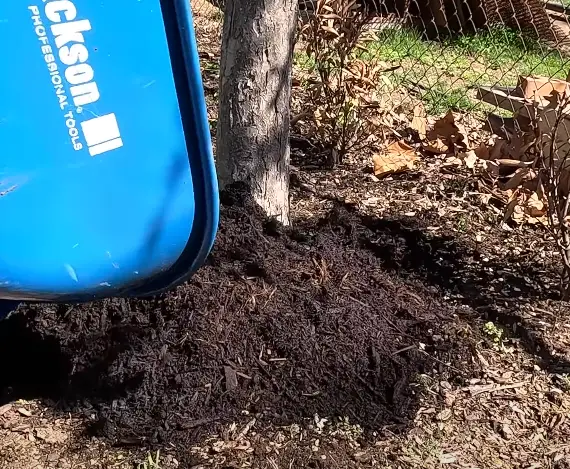
Mulching in the Spring is one of the single best things you can do for your lawn. If you don’t mulch your garden beds, you’ve got issues: weeds, decay, dead leaves, and overall poor lawn aesthetics.
Don’t just dump it!
I’ve been mulching in the spring for years and, truthfully, I only ever did it as a chore when I was a kid or to help out my mom when I was in college. I didn’t respect how beneficial mulch is for my garden beds and my lawn.
Now that I’m an adult (still a kid at heart 🙂 ), I’ve come to understand the value of mulching in the spring, before the heat comes in with the summer months.
And P.S. If you prefer video, I made a Youtube video walking you through the entire process, which you can find here: STOP Letting Your Lawn DOWN! [DO THIS]
3 Benefits of Mulching in the Spring
One of the main benefits is making your yard absolutely pop with color. The contrast between the dark mulch against your green grass, vibrant flowers, and masonry of your home gives it that zing that neighbors can’t really put their finger on, but they know you have a lawn that’s a step above everyone else. It’s subtle, but a big difference.
Another major benefit is the insulation effect from mulching. Springtime is a very dynamic and volatile time of year when it comes to weather and temperature. My born and raised southern accented momma told me that, “Spring comes in like a lion and out like a lamb.” Meaning in the first half of Spring, you have a hot week, then a cold week, then a bunch of rain and its humid and then it’s dry and on and on it goes. It’s all over the place. By the time you get towards the back half of spring, it’s calmed down and a little more predictable.”
With all that volatility, your plant’s root systems can get damaged or not develop well if they aren’t shielded properly. Mulch provides the insulation needed to protect your plants so they can develop strong roots and absorb water and nutrients all throughout the year.
Lastly, as long as you’re not using the rubber mulch or rock, and you’re preferably using shredded, hardwood mulch, the organic material from the mulch will break down and provide nutrients to the soil. If you’ve ever driven up to a mulch yard in the morning, you can see massive amounts of steam rising from the mulch piles. When the organic material breaks down, it produces heat, which is the steam you’re seeing. This effect provides both heat for the night to protect the roots and nutrients to help the soil grow your plants.
10 Key Tips for Mulching in the Spring
I created this guide to help walk through all the tips that I’ve learned over the year mulching my garden beds dozens of times.
Tip #1:Get shredded, hardwood mulch from a mulch yard.
Or smaller bags from Lowe’s or Home Depot’s mulch selection. Try to avoid the rubber mulch or the kind that is just dyed. Usually they are only a quick fix and they lose a lot of the benefit and color within a 1-3 weeks of laying it down. Plus, sometimes the bags of mulch of those knock off types can be a little suspect.
As a bonus tip, if you don’t know how much mulch to get, here’s an equation. Measure the length & width of your beds in feet, multiply those together, then divide by 81. That number will be how many “yards” of mulch you need to cover your bed.
Tip #2: Mark your plants before setting down mulch
Before you start, mark your plants with little orange flags. Do this so you don’t end up dumping loads of mulch on your plants that are trying to grow up in the spring and end up suffocating them. If you ever watch some of these landscaping companies that look more like a NASCAR pit crew, they’re flying through the job when applying mulch. But if you look closely, a lot of times they’re just dumping wheelbarrows full of mulch onto budding plants and end up killing them. Don’t be a flower murderer. Be a tree hugger.
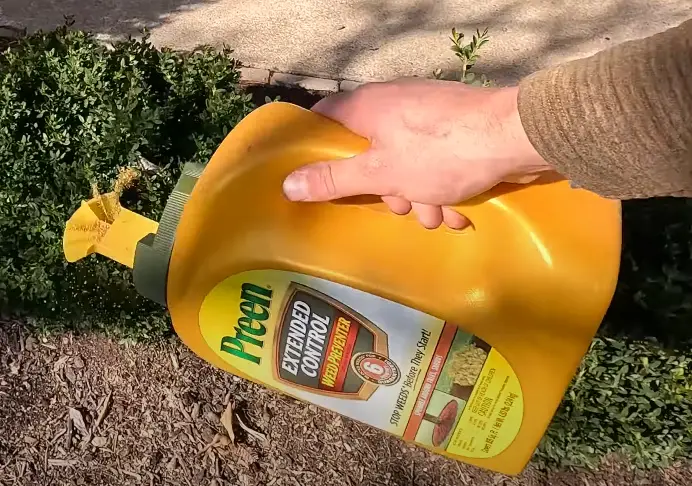
Prevent weeds from popping through the mulch. This stuff is great, it’s weed control specifically for garden beds that keeps your bushes and flowers alive while getting rid of unwanted clovers, dandelions, and other weeds. I like to use it before I lay down the mulch so it has a better chance of getting down to the weeds roots and getting rid of them before they become a bigger problem. I typically do this once every six months, being in the Spring and Fall.
Me using preen in my garden bed BEFORE mulching.
Tip #5: Make a crown, not a mountain
When mulching around plants, trees, & bushes – if you make a mountain with your mulch, meaning it just piles up to your plants, you will cause water to run away from your plants and deprive them of water. Use your hand to create a bowl or a crown, where the water will sit in the bowl and drain directly downward and into the root system.
Tip #6:Don’t overdo it.
If you’re creating a new mulch bed, sure, put down 3-4 inches of mulch to get started. That’s not necessary on existing beds. That would be incredibly expensive, time consuming, and potentially hurt your plants. The plants need oxygen, and if you keep laying it on thick year over year, your plant’s roots won’t be able to get the oxygen they need. Existing beds should only need a fresh ~1 inch layer to do the trick. Use your judgment on this one.
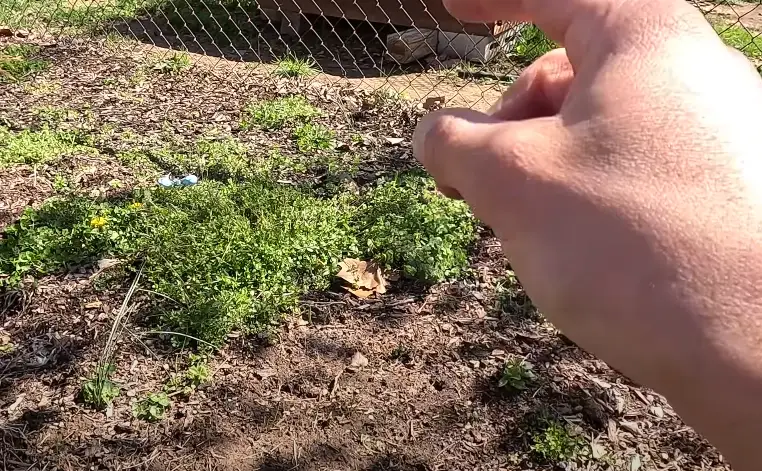
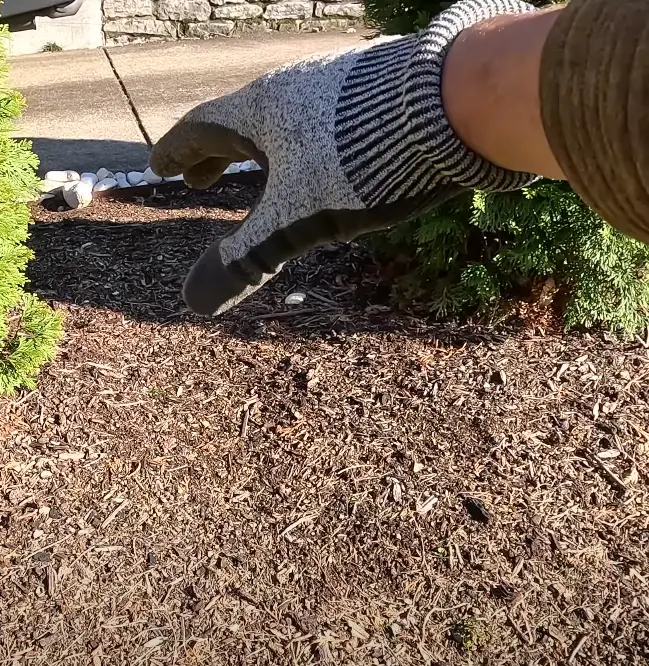
Tip #7: Pull weeds before you put down mulch
You don’t need to get every weed, but get the vast majority of them. You don’t want thick weeds and things popping up through your mulch. So get a clean canvas, pull the weeds, pick up any debris, big sticks, etc. before you get going.
Get rid of these BEFORE putting down mulch.
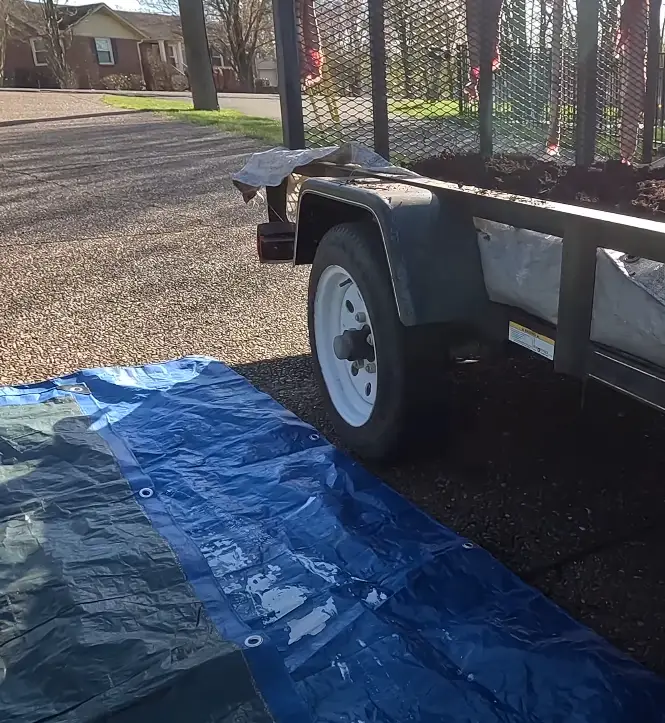
Tip #8: Load your wheelbarrow of mulch over a tarp
This makes cleaning up a breeze. After mulching all day, you probably don’t want to spend a ton of time just cleaning up a drive covered in dirt. Load over a tarp and you can easily dump the tarp into your beds.
The key to an easy clean up.
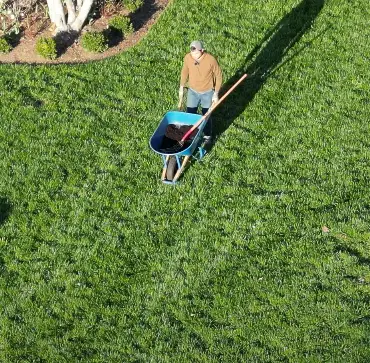
Tip #9: Don’t tread over the same turf when towing mulch
Even if it means taking the long route to where you’re going to apply mulch, you don’t want to walk over the same grass over and over and risk killing the grass when you use your wheelbarrow.
Never take the same exact path twice.
Tip #10: Work back to front with mulch
If you lay down mulch in the font, you’re then going to have to push the wheelbarrow or walk over the freshly laid mulch to dump it. Since it hasn’t had time to set, it can be harder to push over that. Plus, you don’t want to tread over your fresh layer. So go all the way to the back, dump it there, then work your way to the front.
Working back to front saves a lot of time and trouble.
Time to get mulching
There you go, 10 Tips for Mulching in the Spring. And hey, I threw in 3 benefits for you as a bonus… because I’m incredibly generous (and humble) like that.
I hope these tips help you cut down on costs, save some time in the yard, and most importantly, give you that curb appeal you desire.
If you want more tips, tricks, tool reviews, DIY guides, etc., make sure to subscribe to our Youtube Channel where you’ll get our latest content.
Til’ next time!
Why we created The Lawn Review
The reason we started the Lawn Review in the first place was because we had so much trouble trying to find reasonable, understandable, honest reviews for lawn equipment. And they aren’t cheap! After hours and hours of research, trying products and returning them, and messing up our yards – we started this site.
We take testing lawn tools seriously.
As people who had to learn the hard way, we want you to know exactly what you are signing up for before you purchase a piece of equipment. That’s why we are committed to providing honest, easy-to-understand reviews that mean something.
There’s tons of great resources out there for people who really like to nerd out on lawn care and get into the fine details and science behind lawn care. If that’s your jam, guys like Ryan Norr and Lawn Care Nut will be right up your alley.
As for me and most readers of this blog, we don’t need to know how the sausage is made. Just tell me which sausage (er.. Lawn tools) is best & how to use the sausage… (that’s what she said…? Idk, there’s an explicit joke in there somewhere)
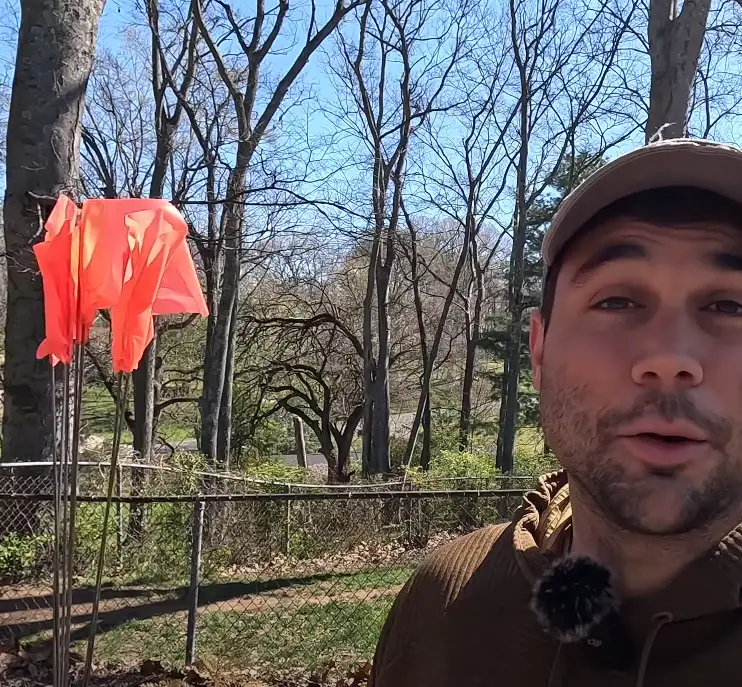
Early Spring Lawn Care sets the tone for the entire year. If you’re trying to have top notch turf, there’s really two times of year that you really need to put the work in. That being early spring and late fall. Hammer these two times of year and everything else will be smooth sailing and gravy.
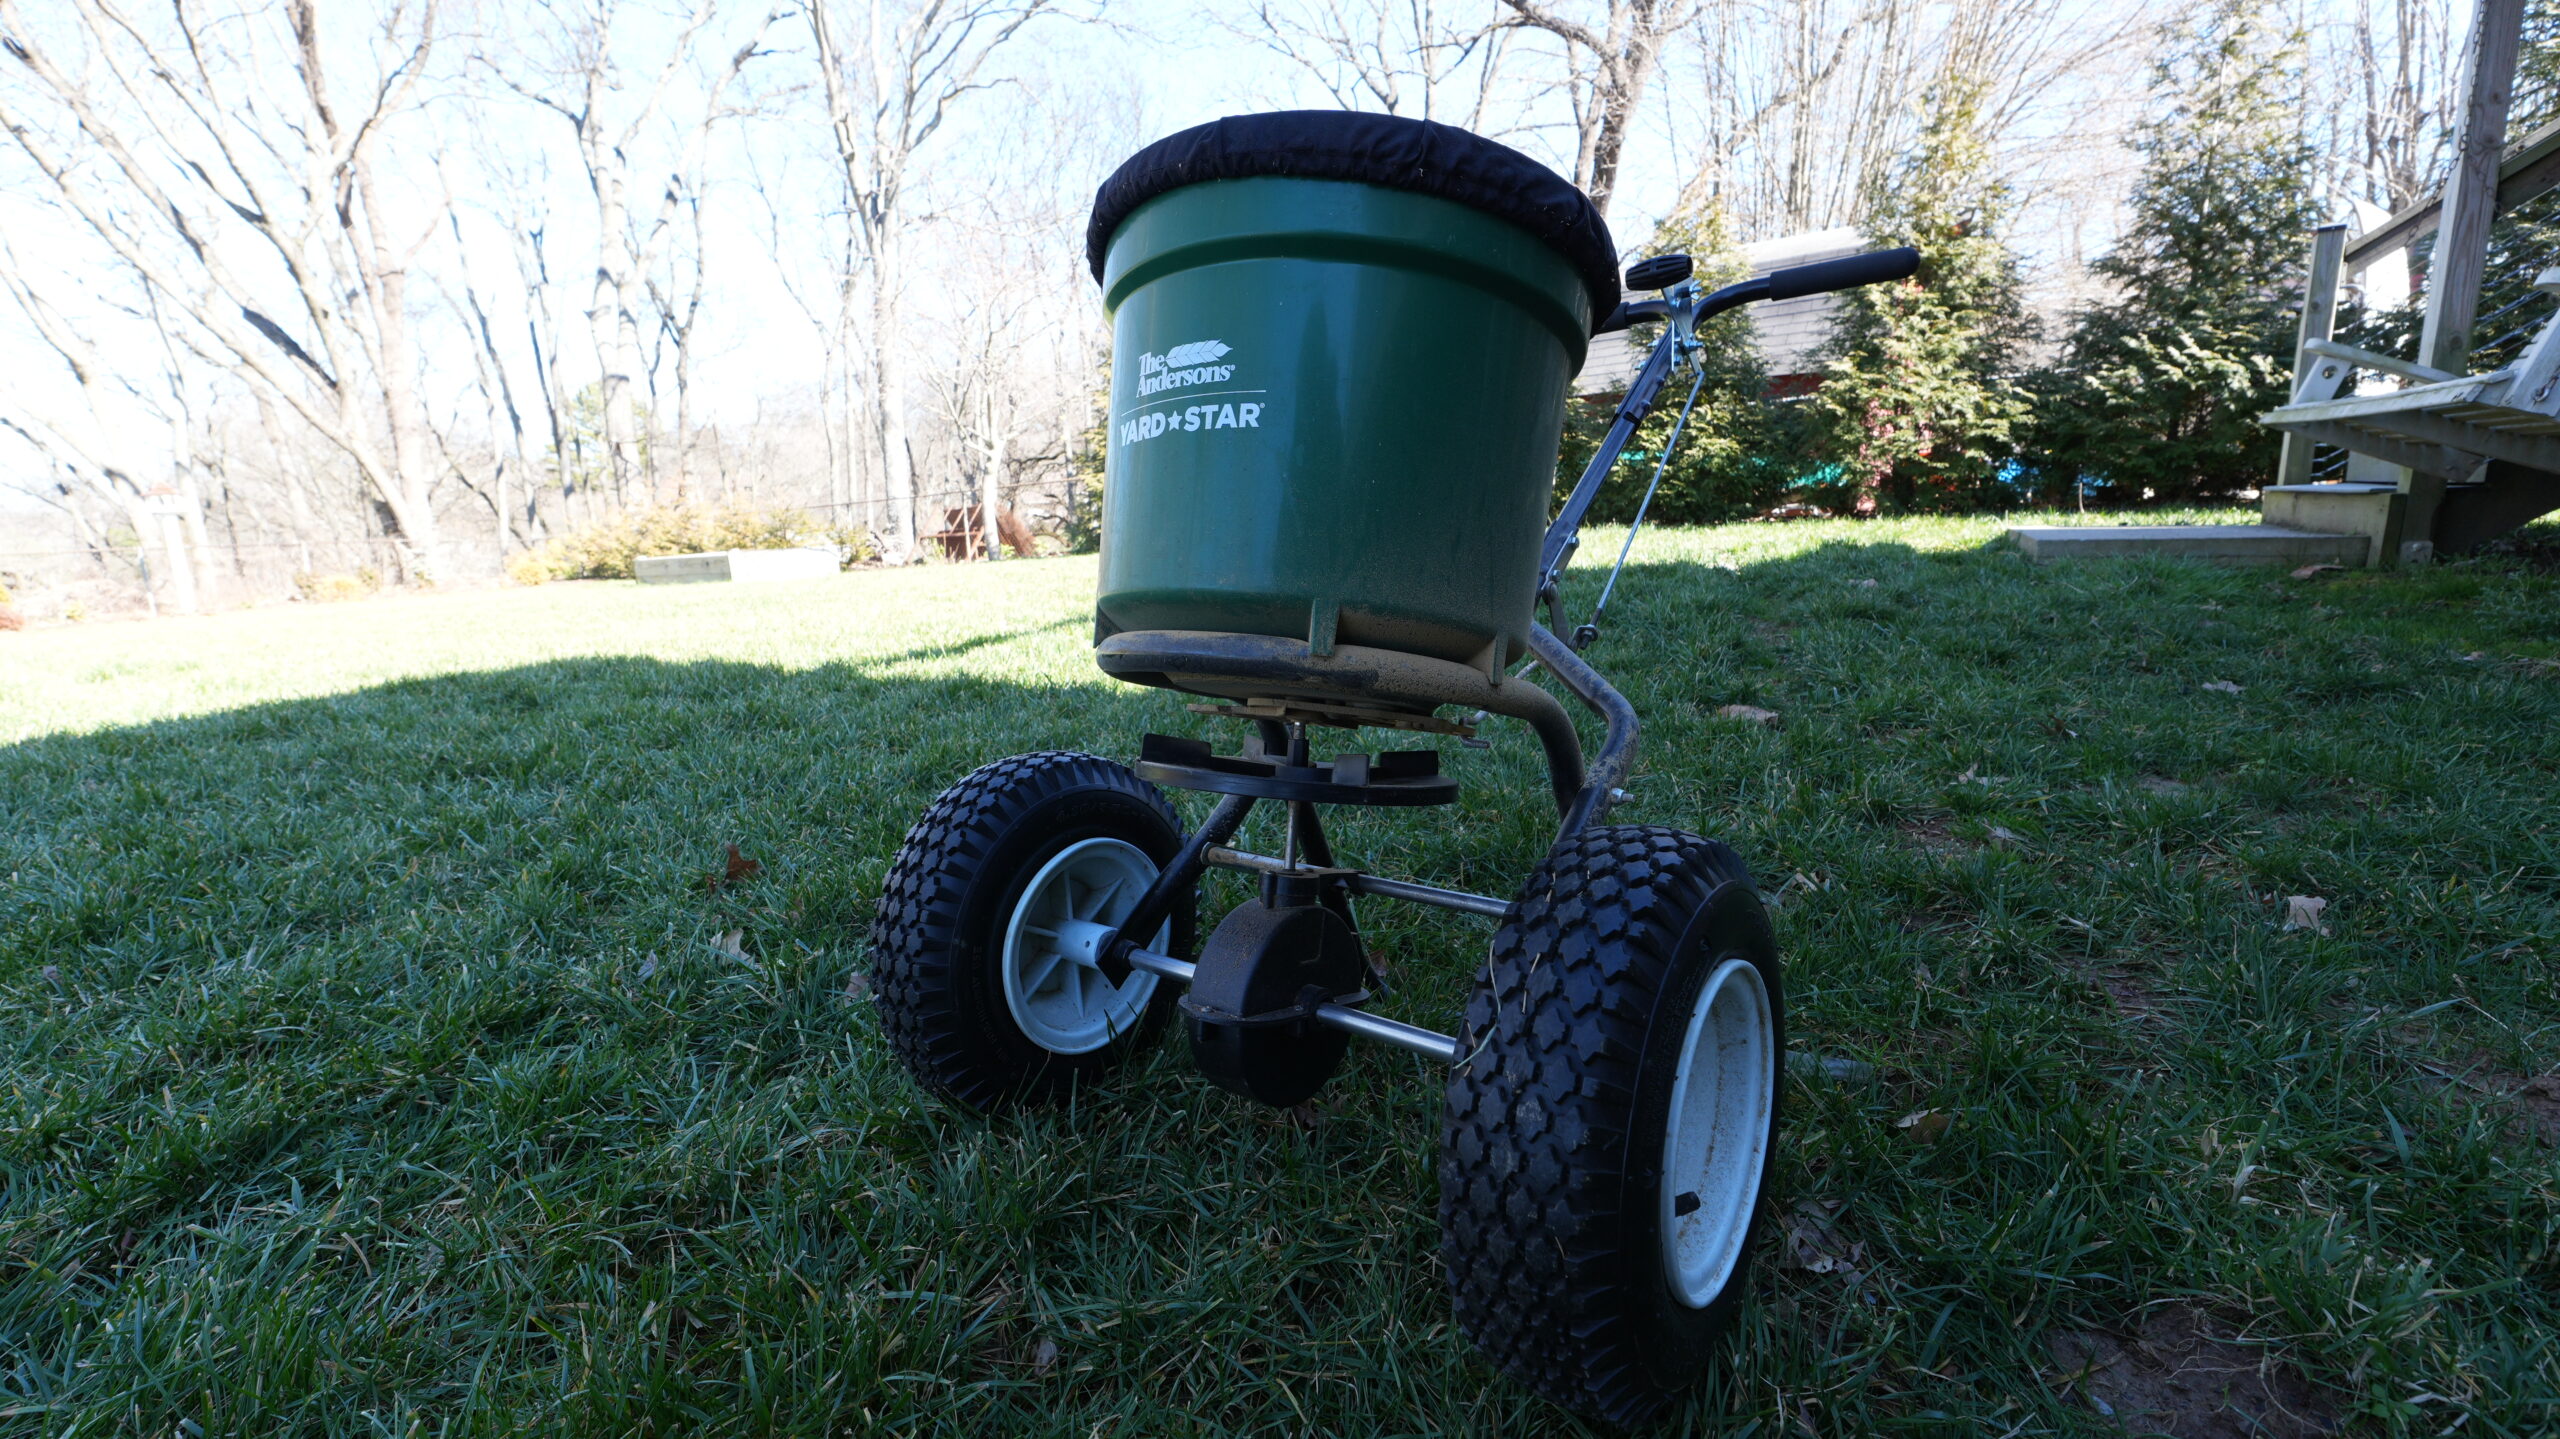
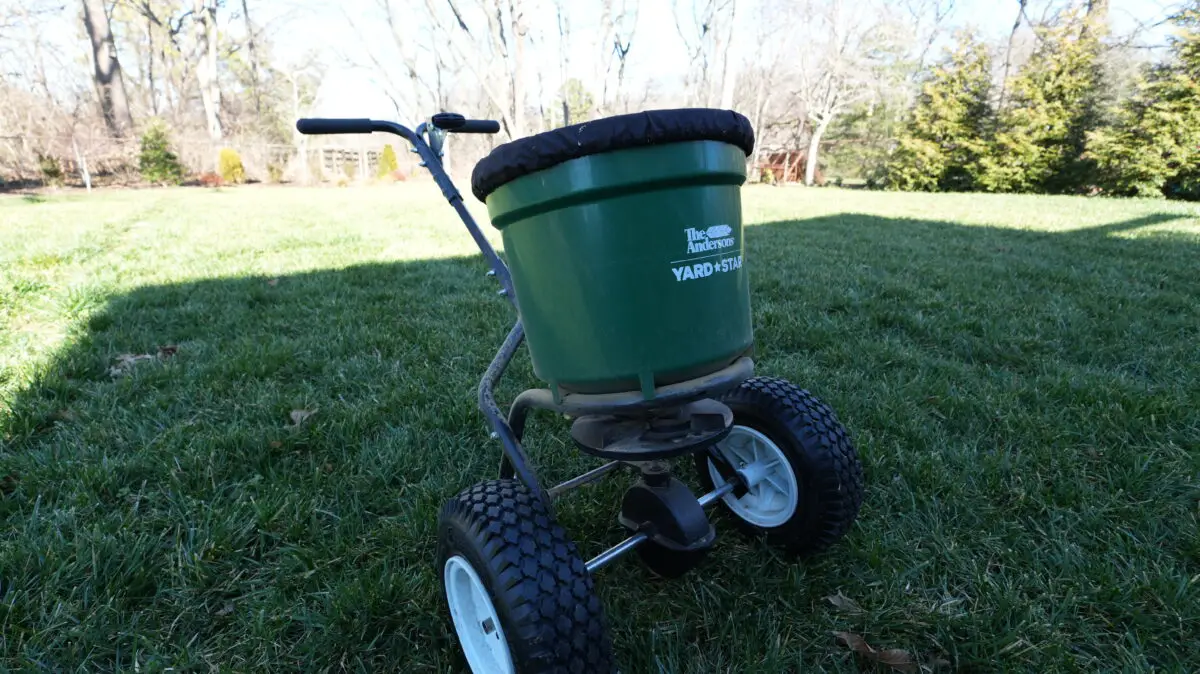
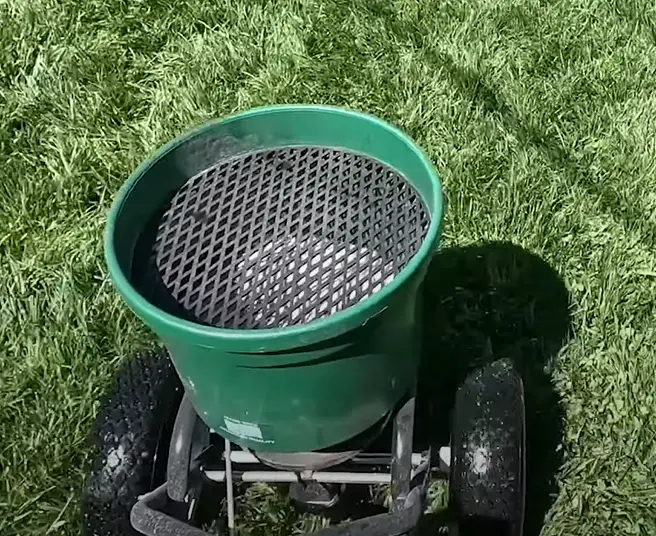
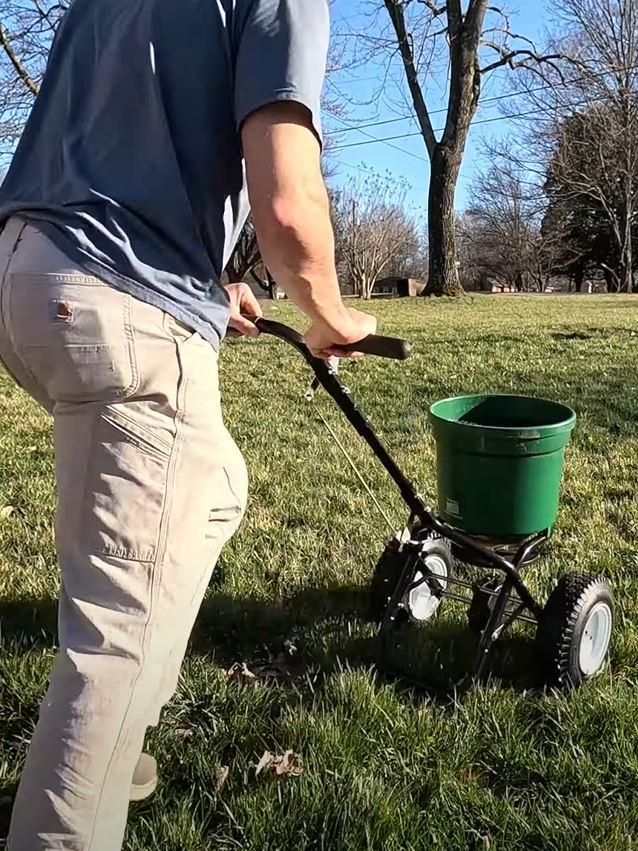
Using a spreader is the best way to get the pre-emergent out there.
But miss these times or don’t do the right application and you’ll be fighting an uphill battle the rest of the year. You’ll be working ten times as hard to keep your yard green, thick, and without weeds suffocating your beautiful grass.
That may sound intimidating, but it’s really simple and just a few quick steps to help you set yourself up for success for the year. In this article, I’m going to take you through my process for early spring lawn care.
And PS – If you prefer video content, I put together a video walkthrough on what I do on my Youtube Channel.
Here’s our quick step-by-step early spring lawn care routine:
If it is finally starting to warm up where you live and the snow is melting off your lawn – you’ve got work to do before the grass starts growing again. Below is our process for
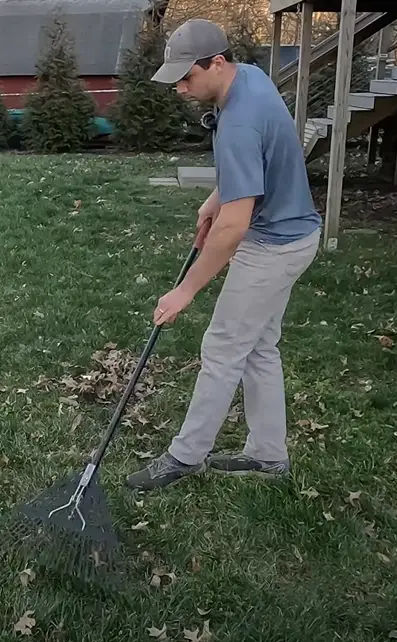
Step 1: Clear off any debris in your yard
The first step in your spring lawn care routine is to make sure your yard is ready to receive some of the pre-emergent, fertilizer, post emergent, and other products you’re going to lay down in the coming weeks.
Make sure to get that canvas blank.
To clear the canvas, grab a rake and scoop up any excess leaves that are laying on top of your yard. Make sure to pick up sticks, pine cones, dog doo, and whatever else might get in the way of your yard growing once things start germinating.
If it’s been more than 12 months since you’ve dethatched your yard, you may want to consider dethatching to pick up excess material on top of your soil. Some thatch is good, but too much can prevent your yard from taking up product.
Which leads us into step number tw0.
Step 2: Make sure your equipment is in top shape
Admit it. You’ve been there. You finally have one free weekend where you don’t have to be at a family function, or a holiday, or something else and you’ve dedicated a few hours to lawn care.
Only to realize that you don’t have gas for your tools, you forgot to charge up your batteries, or you have some kind of maintenance issue. Now you have to spend more time or money (or both) fixing those issues or waiting for batteries to charge.
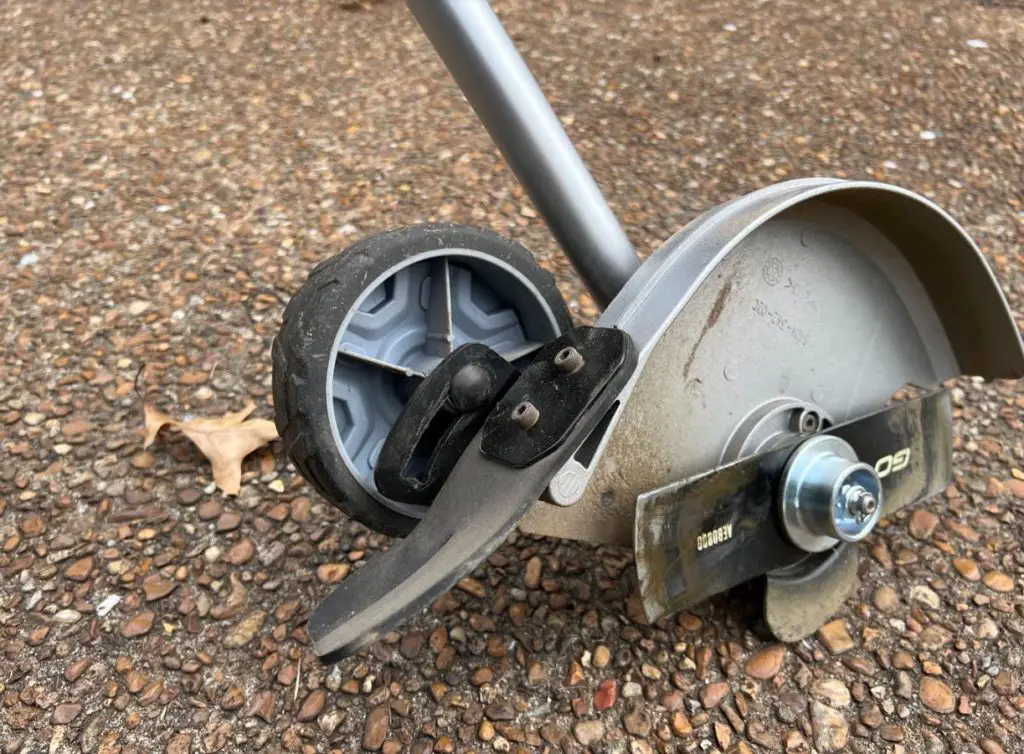
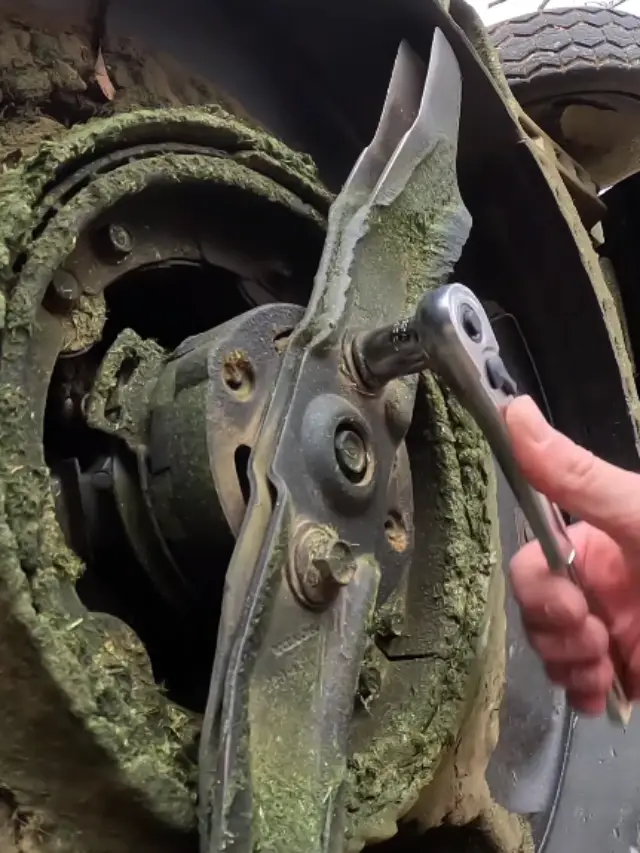
Pop these blades off and sharpen them.
Obviously you can do all this before step 1, but I like to spend the first weekend in early spring cleaning up the canvas and checking the equipment, then actually using the equipment and applying the product the following weekend. You can sharpen your mower blades as well to make sure they’re ready to go.
If you have gas powered equipment, make sure you’re emptying out old gas (you should do this at the end of a season anyway, so hopefully it’s empty). If you have battery powered equipment, make sure those are charged up ahead of time.
Step 3: Apply pre-emergent
This is arguably the most important step in this lawn care routine. That’s applying either a liquid or granular pre-emergent (PE). The timing of this step is crucial.
I’m in Tennessee, and in the south the biggest indicator when to apply PE is by looking at when you start seeing Forsythia buds. These pups tend to come out when it gets to around 55 degrees Fahrenheit. This is the temperature when things start to germinate, bud, and grow for the new season.
Photo cred: HGTV
In anticipation of this, I like to lay down my pre-emergent a little before this time, when it’s around 50 degrees and climbing.
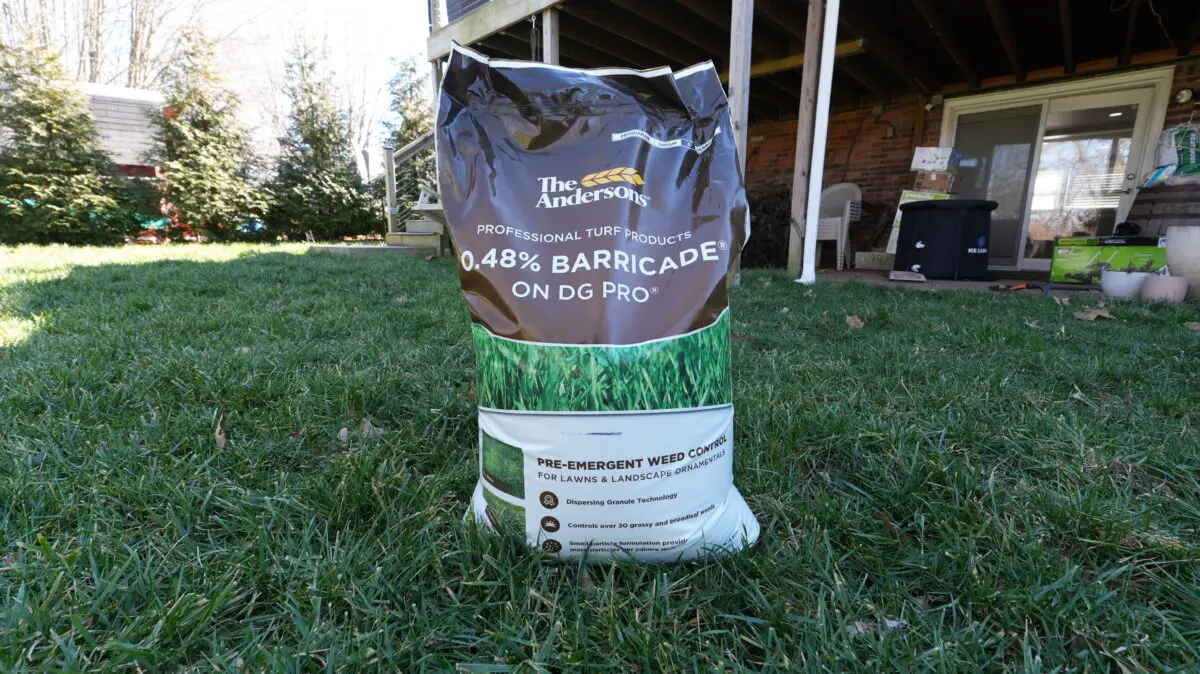
The pre-emergent I like to use is Barricade by The Andersons. I really like this product because it covers a broad range of weeds and unwanted grasses that we’re trying to keep out of the yard so we have a nice, uniform, green lawn. It prevents pretty much everything we don’t want, but it also doesn’t have any fertilizer product in it.
In the early spring and late fall, we’re really not trying to promote any growth. That will happen organically as the season goes on. What’s important is just preventing the unwanted weeds from taking a stronghold in our yards.
If you’re unsure of how much to use, a cool and free online tool is measuremylawn.com. This uses satellites see your house, then you can draw a perimeter around your yard, and it will tell you how much acreage you have. Then all you have to do is read the bag of pre-emergent, fertilizer, grass seed, post-emergent, or whatever else to see how much you need.
Once you know the size of your yard and how much product you’ll need, use a simple broadcast spreader to set out your pre-emergent and get to walkin’.
Step 4: Water in the pre-emergent
Now that everything is cleared and you’ve set our your pre-emergent, the final step is to just water in your yard. If you have an irrigation system, just set out your pre-emergent before your next cycle. If not, you can either set out some sprinklers, or just do step 3 a day or so before you know it’s going to rain. Around this time of year, most parts of the country tend to get a lot of rain, so this shouldn’t be too hard to do.
Not bad!
Bottom Line: Using our early spring lawn care schedule
To summarize the 4 step guide for early spring lawn care, all you have to do is check your tools, prep your canvas, lay out pre-emergent, and water it in.
Some tools you might need are a dethatcher (optional), a broadcast spreader, and maybe a sprinkler. Like I said before, I review lawn tools for a living and have done reviews on all of these products, so I’ve linked to each of our top articles reviewing these products too.
If you found this article helpful, make sure to subscribe to our Youtube Channel for more lawn care DIY tips, exclusive offers on products, and get heads up on deals.
Why we created The Lawn Review
The reason we started the Lawn Review in the first place was because we had so much trouble trying to find reasonable, understandable, honest reviews for lawn equipment. And they aren’t cheap! After hours and hours of research, trying products and returning them, and messing up our yards – we started this site.
We take tool testing seriously.
As people who had to learn the hard way, we want you to know exactly what you are signing up for before you purchase a piece of equipment. That’s why we are committed to providing honest, easy-to-understand reviews that mean something.
There’s tons of great resources out there for people who really like to nerd out on lawn care and get into the fine details and science behind lawn care. If that’s your jam, guys like Ryan Norr and Lawn Care Nut will be right up your alley.
As for me and most readers of this blog, we don’t need to know how the sausage is made. Just tell me which sausage (er.. Lawn tools) is best & how to use the sausage… (that’s what she said…? Idk, there’s an explicit joke in there somewhere)