Why We Stopped Using Miracle-Gro in 2024

miracle gro fertilizer

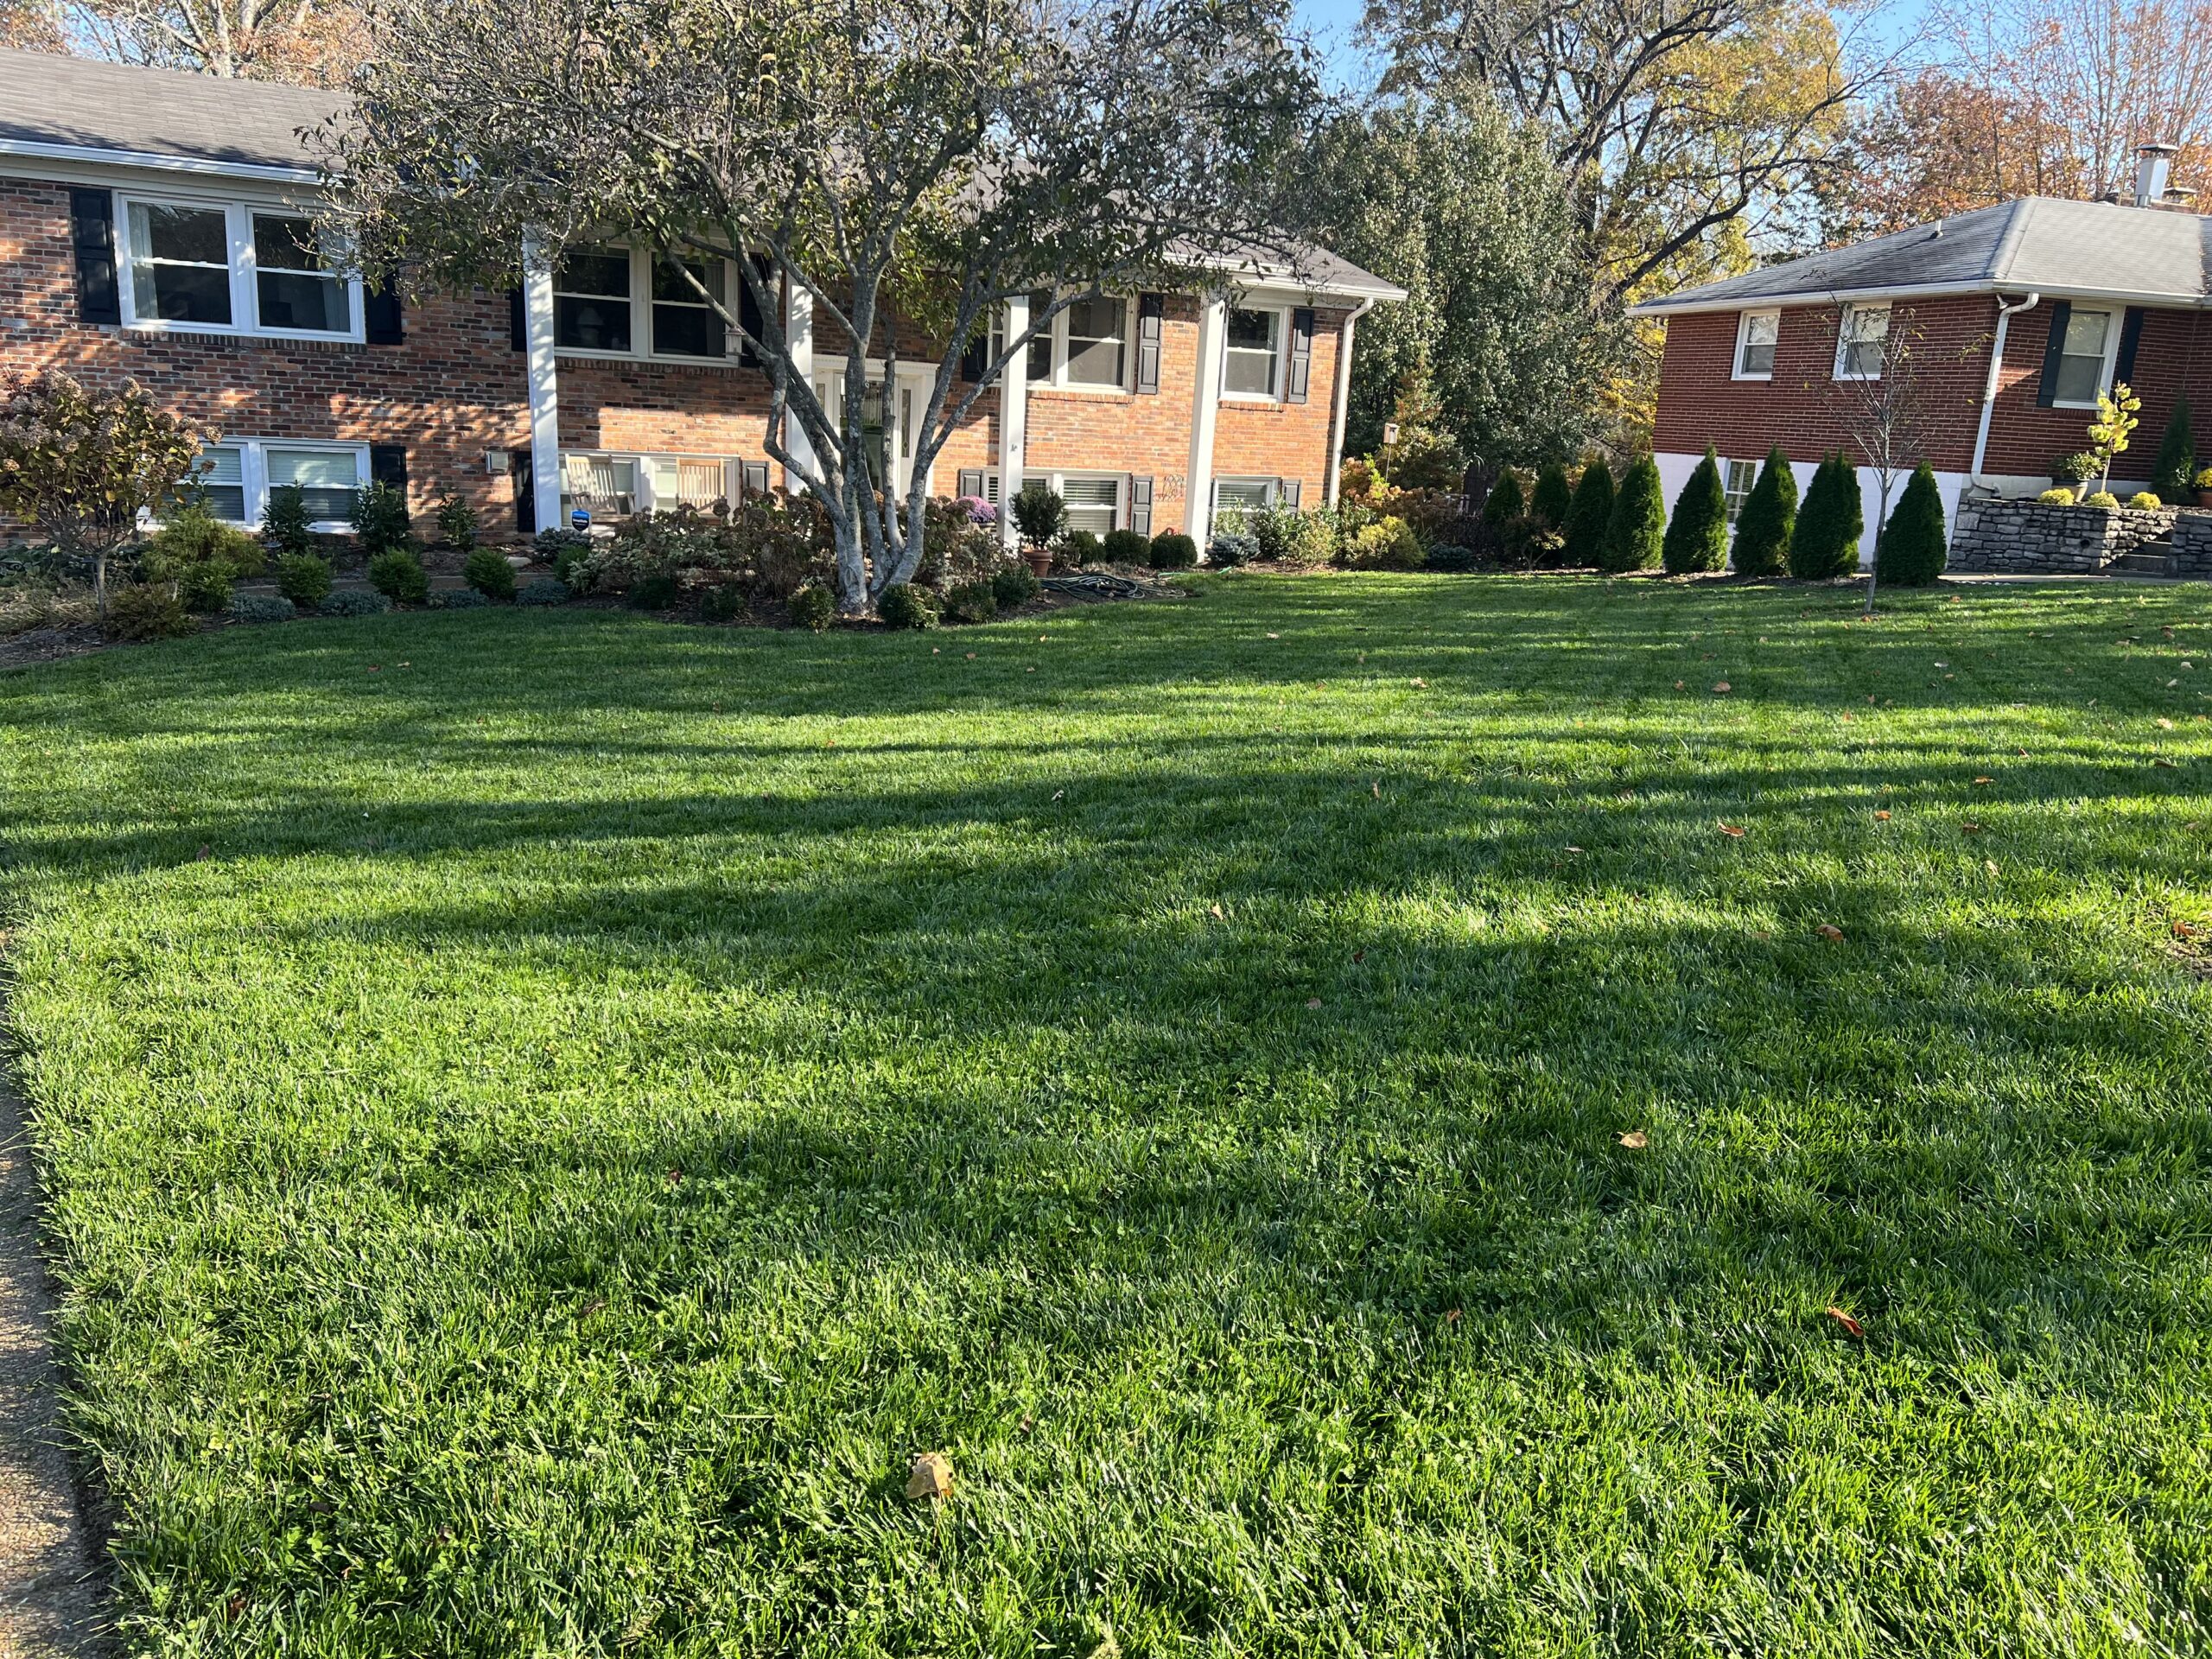
As a gardener, it is natural to constantly look for a way to make your plants grow stronger, taller, healthier, and happier. For a long time, people have used Miracle-Gro as the best way to make the most out of their plants. 

However, as with anything else in life, Miracle-Gro has its ups and downs. If you have been using Miracle-Gro without any sense that it isn’t the best thing for your plants, then this may be an important life lesson.

Composting means focusing on the quality of your soil. You can organically do this without turning to chemical additives as a solution. 

The organic way is always environmentally friendly, cheaper, and can be way easier. But, if you have your heart set on using plant nutrition from the store, make sure you understand its pros and cons.

Jump ahead:

Fertilizers 101 and where Miracle-Gro fits in

You can choose between an organic or chemical fertilizer to use in your garden. There is a difference between the two – just like when you get produce at Whole Paycheck.

Some other types of commercial fertilizers

Organic plant foods are created from manure (yum) or compost – any type of animal or plant source. On the other hand, chemical plant foods undergo a certain process where there is a manufactured formula, and ingredients are added to the soil conditioner you love and buy. Think science dorks in a lab.

There are always some pros and cons whenever we talk about organic or chemical plant additives. 

Pros to organic fertilizers

The organic one is excellent in the long run. It is safe for children and pets, and it does not have a salt buildup. It contributes to the environment and is overall a good choice. Organic fertilizers are focused on the health and longevity of the plant, not so much the immediate results

Organic vs Chemical fertilizers

But organic fertilizers work slowly, so you would need a lot more time to see some results. On the contrary, chemical plant foods act much faster, and they are easy to apply to the soil. They are filled with essential nutrients that your garden needs.

On the other hand, these soil conditioners create salt buildup. The nutrients you add to the soil can diminish very quickly, and you may even end up having some burnt plants on your hands. Also, they are a little more expensive.

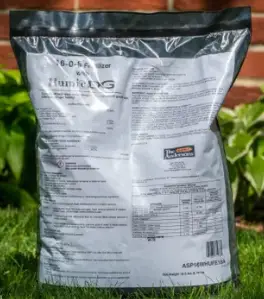
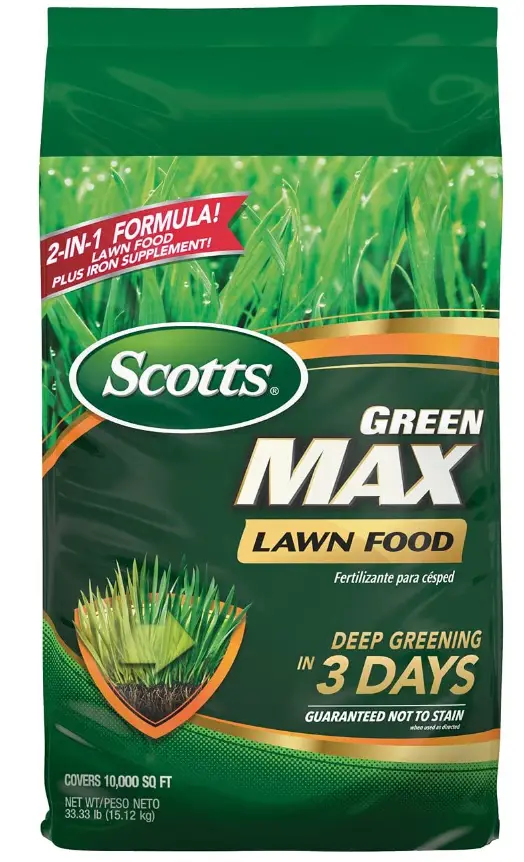
So Is Miracle-Gro Bad?

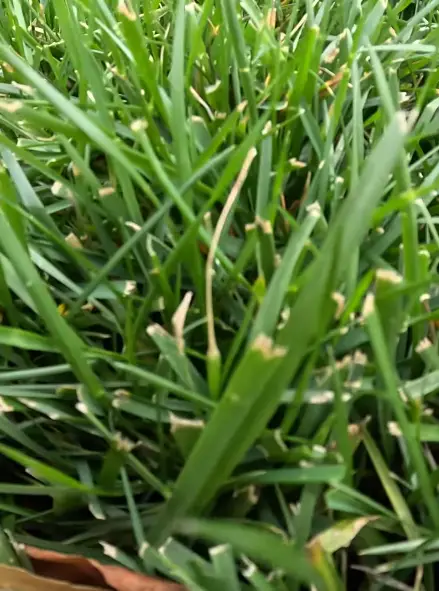
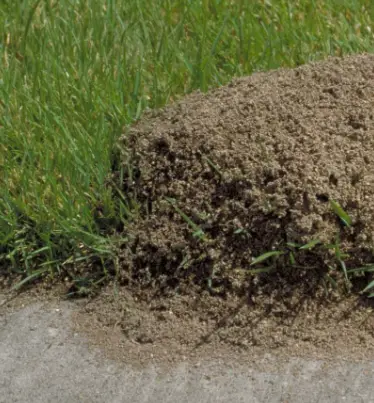
Are you using Miracle-Gro already? Some conditioners have an increased salt rate, and over time, this can result in stripping the soil from essential nutrients, leaving your plants with nothing more than an empty patch of land.

And here’s a note for all those new gardeners – don’t think that more is better! Adding more fertilizer to your soil can lead to some terrible results and can put your plants in grave danger.

My plants after taking Miracle-Gro.

Miracle-Gro is kind of like taking steroids. Looks good but has major side effects to your health.

What to consider before using Miracle-Gro

When it comes to Miracle-Gro, there are a few things you should consider:

  • If you put too much soil conditioner on your plants, you may make your plants sick. This means they will be more prone to cold and hot weather and diseases too.
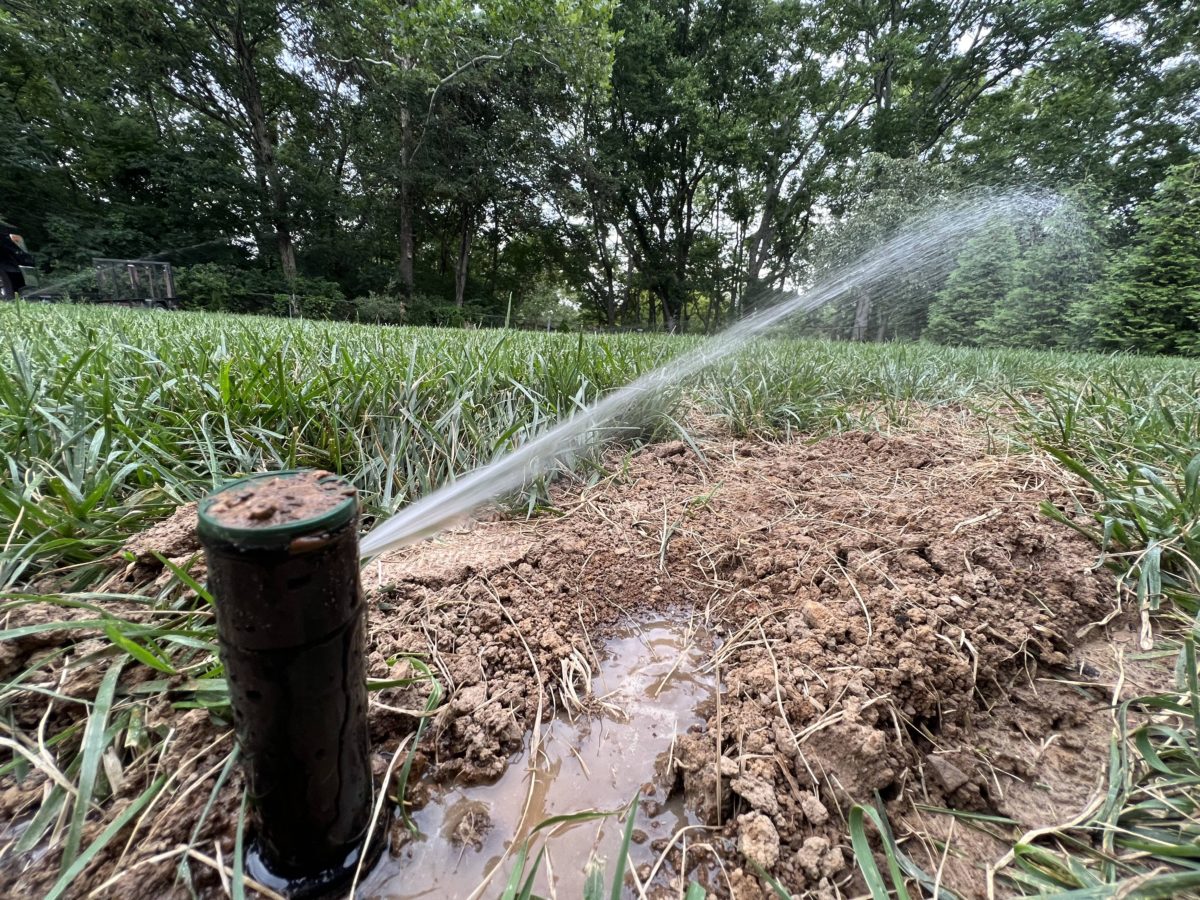
  • If you apply the fertilizer when the weather is rainy, the rain may wash it away, leaving almost nothing for the plants.
  • Make sure to carefully follow the instructions when you are applying chemical plant food. Once you apply too much of it, it may result in killing or burning your plants.
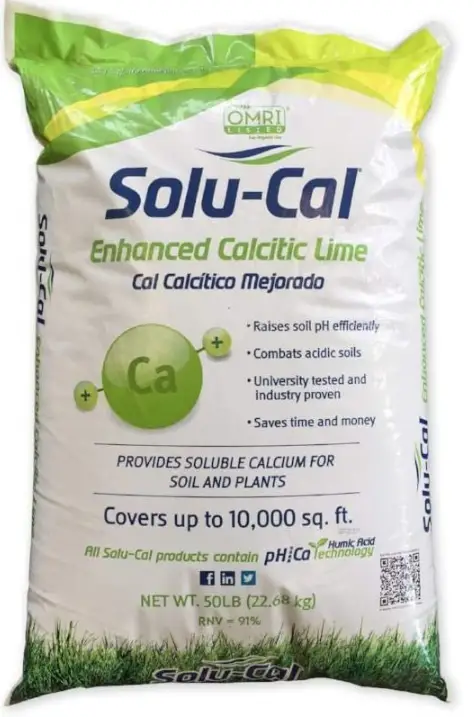
  • Think about the environment too. It is, after all, a chemical soil amendment, meaning that it can do a lot of damage to the environment. Even though the organic options can’t give some swift results, they may be the better option for your lovely patch of land.

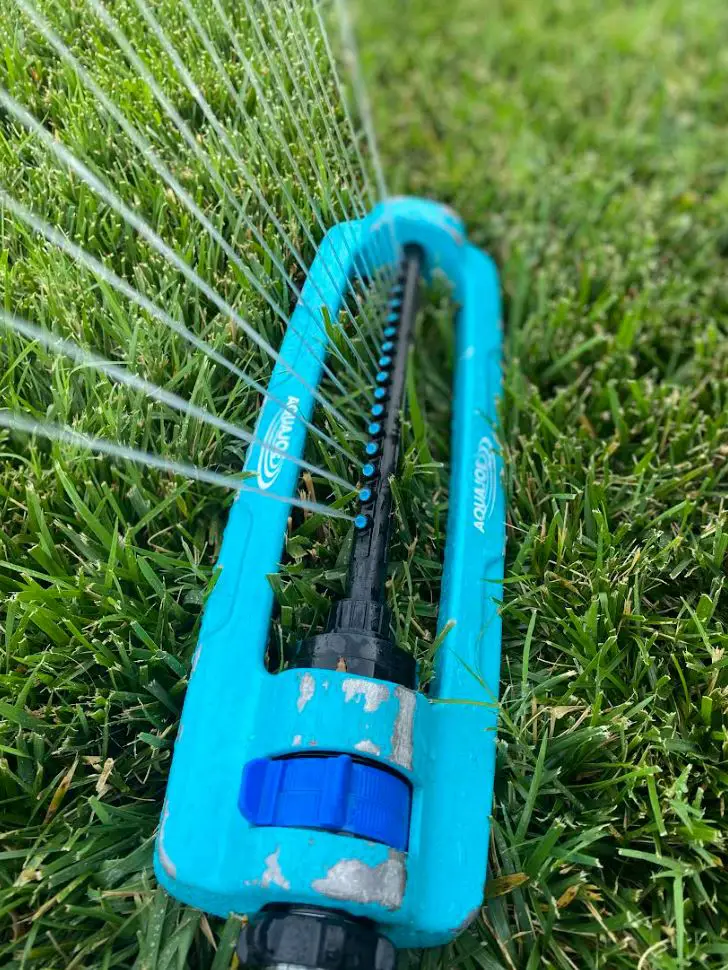
Using Miracle-Gro safely

As we already mentioned, Miracle-Gro can be an excellent fertilizer if you know how to use it in moderation. In these cases, it is bound to help the plants in their growth process and keep them happy and healthy by dumping nitrogen straight into their veins.

Remember these?

However, it is still a very concentrated growth enhancer. This means that you can easily kill a plant while using it if you overdo it. The main issue with this fertilizer is that it contains a lot of nitrogen. This component comes from synthetic materials, which produce chemicals potentially harmful to the soil and the plants that aren’t listed as active ingredients. Fillers, if you will.

This is why there is a general rule that too much of anything is not good. The same applies here. Too much Miracle-Gro can hurt the plants, and it can result in the death of the plant. All you need to do is know how to properly apply this growth enhancer, and you are golden. Your plants will thrive and get the proper, balanced amount of all the right nutrients.

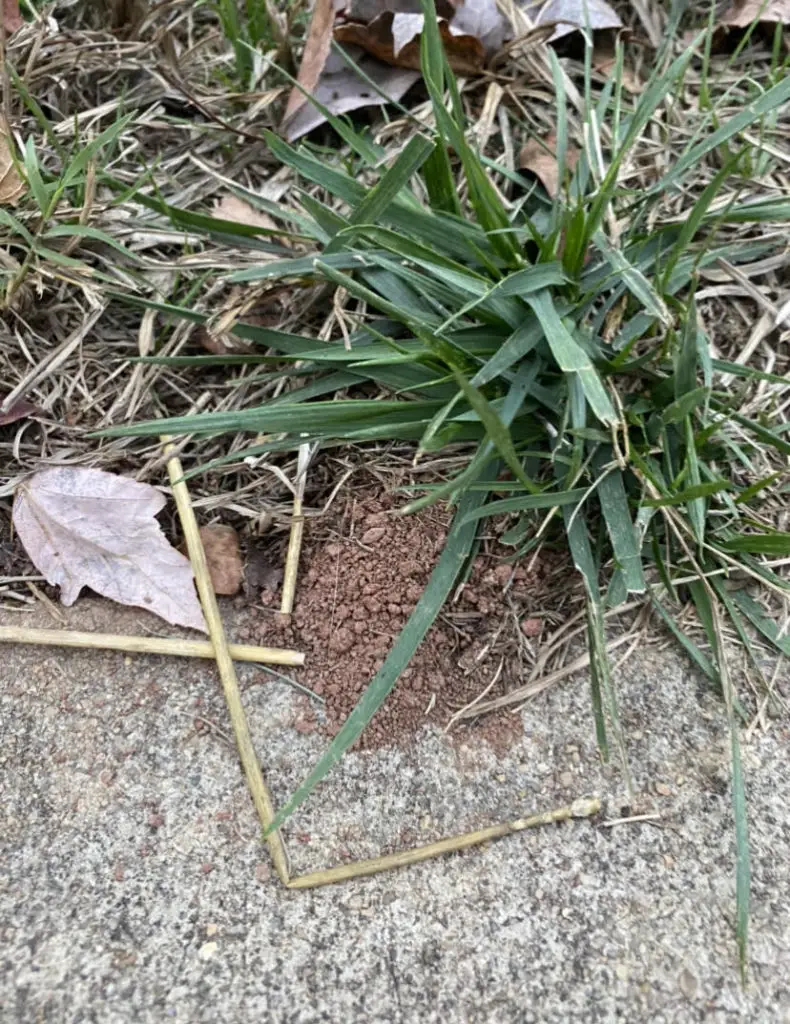
How to know if you’ve overused Miracle-Gro

If you are looking for signs of overfertilization, watch for the following:

  •  Wilted foliage
  • Not enough leaves
  • Smaller leaves
  • Developing leaves in a different color (yellowish)
  • Dead branch tips
Make sure to prune the wilted ones.

Organic alternatives to Miracle-Gro

Think about how you can use something that you already have. If you have been lucky enough to have a large garden filled with trees, then the answer to all your worries is probably staring you in the face.

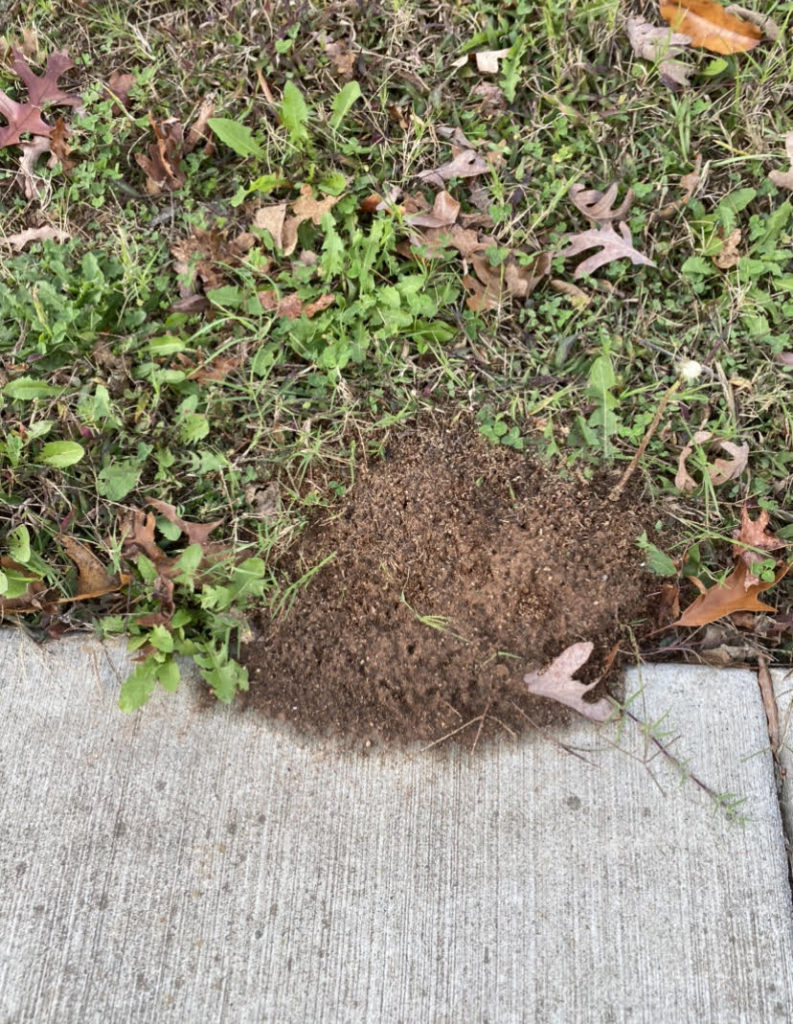
Wanting to move away from Miracle-Gro and turning to something more organic is a good choice – probably the best one you can make. No need to dwell on it – you can use leaf mulch! The perfect growth enhancer tool! When decomposing, leaves release micronutrients and nutrients not normally found in commercial fertilizers. 

Just drop them in and let it whirl!

Potassium, magnesium, calcium, and other essential nutrients are only the beginning of the list. Considered a true gift to gardeners worldwide, the leaves are a great addition to your landscape. There is a way to use them rather than throwing them away.

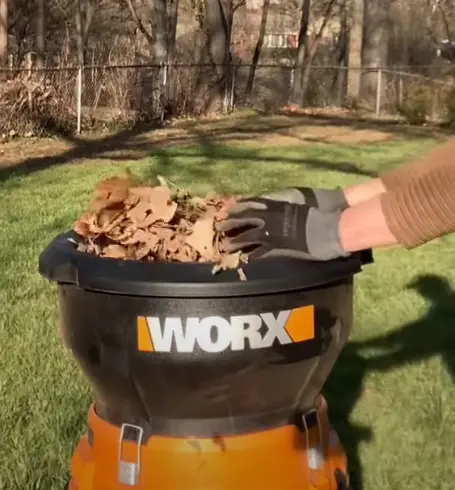
All you need to do is take a look at a leaf mulcher, like this mulcher from Worx we reviewed, and see if this is something you could use. We consider it a necessity when it comes to the health of the soil and plants in our gardens.

Final words about Miracle-Gro and plant sustainability

Growing your fruits and vegetables has never been easier than it is today. Opt for the right material that can help you get there. You can choose between the non-organic option that includes products such as Miracle-Gro. You can also opt for an organic option, such as compost or leaf mulch. The decision is yours to make.

Why We Started The Lawn Review

The reason we started this website in the first place was because we had so much trouble trying to find reasonable, understandable, honest reviews for lawn equipment. And it’s not cheap! After hours and hours of research, trying products and returning them, and messing up our yards – we started this site. 

We roll up our sleeves and take this seriously!

As people who had to learn the hard way, we want you to know exactly what you are signing up for before you purchase a piece of equipment. That’s why we are committed to providing honest, easy-to-understand reviews that mean something.

How To Prune Knock Out Roses (5-Leaf Secret)

Pruning roses is not only a metaphor for the many difficulties of life, but also a necessary task to keep those babies coming back every year. Roses are an essential part of every garden and every episode of The Bachelor. 

They have a long-standing tradition of being the centerpiece of every backyard, so naturally, after some time has passed, they are considered an institution. But, there is a trick to keeping them lush and beautiful. It all comes down to how you prune them.

Taking pride in some knockout roses in your garden will make you feel like you are sitting on top of the world. To achieve that, you should know how to properly groom them, and do this every year so you can get the most out of them. Keep on reading and find out how to take care of your roses.

Jump ahead:

How to prune a rose (especially a Knockout rose)

Here are the steps to prune roses:

  1. Look for a wilting rose
  2. Find the first set of 5-leaves from the bloom
  3. Prune at a 45-degree angle an inch above the 5-leaf set
  4. Repeat the process shaping the bush, removing dead stems
  5. Remove other branches to improve airflow 
  6. Don’t remove more than ⅓ of the size of the bush

The basics of rose pruning

The knockout rose bushes are incredible, and they grow very fast! Once you start dealing with them, you should know that they must be pruned yearly. By doing this, you will create some wonderful bushes, and get the best roses that aren’t just visually appealing, but super healthy.

Don’t you just love it?

First, you should know that roses are extremely persistent, even in the coldest of weather. They can thrive even under temperatures below zero. It is the main reason why they are so popular – you can find them in any garden. They can easily adapt, and they look wonderful.

They are also extremely welcomed by spouses – especially if you’re in the dog house.

Best time to prune rose bushes

The best time in the year to prune roses is late winter or early spring. In other words, once you start noticing that your knockout rose has a few new shoots, it is time to start pruning. Make sure that the frost is over, and you are good to go!

As soon as the bush reaches 4 feet in height and 4 feet in width, you can trim it. Think of it as a ritual that you should do every year. Thinking about when to prune your rose bushes? Well, if you are hesitating, think of it this way – you need to measure the bush every once in a while

They bloom several times per year.

Don’t get us wrong, you can trim your rose bushes in the fall too, but if you want the best results, then early spring is the right time. This way, you will get better blooms.

How to prune knockout rose bushes – step by step

There are some specific bits of equipment you need whenever you want to groom your rose bushes. 

Step 1: Gather your tools

First of all, you will need hand pruners, then you will need hedge shears, and of course, gardening gloves so you can protect yourself during the process. Remember that you should disinfect the tools before you cut back the bushes. You can do this with alcohol (probably not beer, though).

These are the things you need!

Once you step into your garden, you might end up being amazed by the view – your knockout rose bush has tripled in size! This is only natural, since these roses grow large and fast.

Step 2: Get rid of the dead branches first

Start the process by removing the cross branches from the bushes. Look carefully. Do you see any weak, extremely thin, or maybe even diseased or dead branches? Start by cutting them right off. What you want to focus on is creating some thick and strong branches on your knockout rose bushes.

Dead branches are easy to spot.

Step 3: Identify the wilted roses

Look for ones that are starting to wilt or completely wilted. Easy targets.

Pull the stem out a bit.

Step 4: Find the first set of five leaves from the flower

Once you have identified a wilted rose, work down the stem and count the leaves. When you have reached a set of five leaves, get your pruners ready.

Five leaves around the stem.

Step 5: Cut about an inch above the first set of five leaves

The first set of five leaves is a great landmark because it highlights a healthy area for the next bloom to sprout from. If you just pull the head of the rose off, it may not grow back because the stem immediately beneath it may be dying as well.

One inch above, at a 45 degree angle.

Step 6: Repeat the process, ensuring proper aeration of the bush as well

Continue to use the first set of five leaves as a landmark for pruning more roses. After you’ve completely pruned the roses and the dead branches, ensure there is proper airflow to the base of the rose bush.

Get the whole thing!

Key tips while pruning a rose bush

To go a little deeper on the last step, always make sure that there is enough air circulating the knockout rose. 

What do we mean by this? 

The inside of the rose bush should be aerated at all times. So, when you start pruning, make sure to create an open space within the bush too. By practicing this, you will help the knockout rose bush avoid some serious diseases.

As soon as you start pruning, don’t be afraid to go all in! Cut back as much as you can! The knockout rose will grow back and look glorious, so don’t be afraid to cut off all extra branches.

Keep your tools sharp and clean

There are several aspects to this. First, by keeping your tools sharp, you will decrease the time you need to prune the bush. It will not take you hours to do that because your tools will work perfectly. Second (and more importantly), when you make a clean cut, it is also better for the rose. Instead of butchering it each time you cut a branch, making a clean cut will help the knockout rose heal faster.

Cut the branches at a 45-degree angle

If you want to promote fast and new growth of your rose bushes, the best way to prune them is to use this technique. Why cut them at this angle? Creating an angled cut will help the water run off the stem and reduce the chance of fungal rot.

How to know where to cut the branches? The ideal spot is located right above the first set of five leaves. If you are uncertain of where to cut the branches and want to avoid cutting here, there, and everywhere, then this is the best advice you can get.

Refrain from fertilizing your rose bush right after pruning.

Give it some time to heal before you add the fertilizer. The specific rose fertilizer has a high potassium level, which is important to keep an eye on so you can give your bushes everything they need to grow tall and strong. You can also keep the bugs away with Bioadvanced solutions.

If you’re looking for something more organic, mulched leaves work really well as an alternative to things like Miracle-Gro!

Why we prune roses: the bottom line

Pruning is a vital step in the process of maintaining a knockout rose bush healthy and strong. It does more than encourage the growth of healthy stems. It makes the plant produce more flowers, and it keeps disease and infections at bay. For successful pruning, all you need to do is follow the tips we have laid out for you. When it is time to prune, review them and get to work!

A final note – even if you over-prune the rose bush, it will grow back strong.

If you have some more questions, we can answer all of them! Take a look at our YouTube channel and get all the info you need!

Why we started The Lawn Review

The reason we started this website in the first place was because we had so much trouble trying to find reasonable, understandable, honest reviews for lawn equipment. And it’s not cheap! After hours and hours of research, trying products and returning them, and messing up our yards – we started this site. 

We take tool testing seriously!

As people who had to learn the hard way, we want you to know exactly what you are signing up for before you purchase a piece of equipment. That’s why we are committed to providing honest, easy-to-understand reviews that mean something.

Best Fertilizer For Every Grass Type (2024 Guide)

The best fertilizer for your yard varies on where you live, but a nice balanced fertilizer like a 4-1-2 is great for most yards.

In order for your lawn to have a thick, lush green look naturally, you’ll need to provide it with some TLC. Fertilization is a significant aspect of this and probably the most important one. 

Like all plants, grass needs certain nutrients to promote healthy and strong growth, and these are provided with the help of fertilizers. However, you should be aware that not every fertilizer is suitable for all grass types.

Believe it or not, this was news to me at one point.

For first-time gardeners, we understand that this can be tricky but we’ve broken it down by each type of grass. Don’t know your grass type? Keep scrolling…

Jump ahead to your specific grass type:

Lawn Fertilizer: NPK Ratio Explained

Additionally, all fertilizers contain a specific N-P-K (nitrogen-phosphorus-potassium) ratio, with each number specifying the richness of the nutrient. Furthermore, fertilizers typically come in a liquid or granular form – the former provides results usually in 2-3 days, while the latter is slow-releasing. 

This can help you identify your grass.

For that reason, if you’re starting up a lawn, you should pick out a grass fertilizer rich in phosphorus to establish healthy roots. In contrast, you’ll find that most fertilizers are rich in nitrogen since all of us are aiming toward a flourishing lawn. Nonetheless, you should pick one with a ratio that best suits your grass type – which we’ll get into later.

Best time to fertilize your lawn

Finally, you should be aware of the ideal fertilization time. Keep in mind that the time varies whether you’re starting up your lawn or nurturing your existing one, as well as the grass type. With that said, early spring is ideal for using starter fertilizer which is heavy in phosphorus. In addition, cool-season grass, like Fescue grass, benefits from fertilization during this time, including early fall. 

On the other hand, warm-season grass, such as Bermuda and Zoysia, is best to be fertilized during the summer months, when their growth is very much in effect. Almost all grass types benefit from late summer to early fall fertilization – including in May, June, September, and October.

Identify your zone!

Oh – and make sure to water your lawn consistently after application. Follow that link for our watering schedule that we use.

Best Fertilizers for Every Grass Type: 2024 Update

Now that we’ve covered the basic grounds of a grass fertilizer, the next step is finding the ideal one for your specific grass type. Below you’ll find an in-depth look into the best fertilizer for various kinds of grass. 

Best Fertilizer For St. Augustine Grass 

St. Augustine grass requires a balanced N-P-K ratio fertilizer, typically 3-1-2 or 4-1-2. Remember that the ratio can vary depending on the soil conditions, climate, and other factors that are specific to your area. Additionally, it is best to use a slow-release fertilizer in contrast to a liquid one to help maintain a consistent level of nutrients in your soil and prevent excessive growth, pests, and diseases. However, if your St. Augustine grass is already established, a quick and regular spray of liquid fertilizer rich in nitrogen will give your lawn a lush, green look.

In terms of fertilization time, use a grass fertilizer in the early spring when the grass starts to green up or late summer when it goes dormant.

A great fertilizer for St. Augustine Grass is Andersons 16-4-8 (which follows the 4-1-2 guideline). You can grab it from Amazon for a good price as well.

This one is a great all-around fertilizer and will fit many grasses.

Best Fertilizer For Centipede Grass

Compared to other grass types, Centipede grass generally prefers a lower nutrient level in order to thrive. For that reason, you should use a grass fertilizer with a lower nitrogen count and a higher potassium content. The ratio you need to look for is typically 1-0-1 or 2-0-1. Since this type of grass benefits from lower nitrogen levels, you should avoid using liquid-based fertilizers. Instead, go for slow-release formulas that will provide long-lasting nutrition.

The best time to fertilize your Centipede grass is in the early spring and once again in the early fall for optimal results. Be careful not to overuse it, though, since it can lead to thatch buildup – which will cause you to bust out the dethatcher.

You can grab a nice 16-0-8 fertilizer from Andersons for a really good price straight from their website.

This one is great for Centipede.

Best Fertilizer For Zoysia Grass

If there is one thing you should know about Zoysia grass, it is that it definitely loves its nutrients! That said, you should pick out a grass fertilizer that’s very rich in nitrogen and has moderate phosphorus and potassium levels. Aim for those who have a 3-1-2 or 4-1-2 N-P-K ratio, similar to the fertilizers for St. Augustine grass. 

While Zoysia can benefit from a quick-release formula for instant greenery, it’s recommended that you use slow-release grained fertilizer to prevent overgrowth. Additionally, make sure to test out your soil before you fertilize, since this type of grass prefers acidic soil. Therefore, you may need to include an amendment like sulfur to lower its pH level.

Like most grass types, Zoysia grass mainly benefits from fertilization in the early spring and late summer. 

Zoysia fertilizer can be found in the appropriate ratio using Andersons PGF complete – which you can buy on Amazon if that’s more convenient.

Best Fertilizer For Fescue Grass

Like St. Augustine and Zoysia grass, Fescue grass typically grows in the same conditions; hence it benefits from the same formula of fertilizers. With that in mind, you should pick out a fertilizer with high levels of all the essential nutrients, typically with a 3-1-2 or 4-1-2 ratio. Furthermore, if you’re establishing a lawn with Fescue grass, you may want to pick up a grass fertilizer that’s amped up with potassium and phosphorus to ensure a healthy root system. We highly recommend using a slow-release formula to provide a steady supply of nutrients over time.

To prevent Fescue grass from weeds and overgrowth, fertilize it during the spring months, generally every three to four months. Make sure to give your lawn plenty of water at least once a week!

I’ve got fescue in my front yard.

Usually around early March and late September (after aerating, dethatching, and overseeding), I’ll bust out some Andersons fertilizer and use that to get my lawn started. I get mine off on Amazon for a great price.

Best Fertilizer for Bermuda Grass

As with its other counterparts, Bermuda grass thrives in lots of nitrogen which it uses to form its thick, green blades. Therefore, you need to pick out a fertilizer rich in this specific nutrient and potassium. The optimal ratio for this specific grass type is 3-1-2; however, if there’s no chance of frost, you can use fertilizers with higher nitrogen levels.

The timing of fertilization for Bermuda grass is of utmost importance. Generally, it’s recommended to fertilize it every 4 to 6 weeks while growing during late spring until early fall. But, you should stop about 6 weeks before the expected fall frost, in order to prevent growth that can be damaging during the winter.

Some people love it, some people hate it.

For Bermuda Grass, the best fertilizer to use is Andersons PGF complete – which is available straight from Amazon.

Wrapping it up: Finding the right lawn fertilizer

I hope that this guide will serve you in picking out the ideal grass fertilizer for your lush lawn. If you want to read more articles related to taking care of your yard, check out some other posts, like how to get rid of invasive grasses in your lawn.

Or if you’re looking to find a nice spreader to evenly distribute the fertilizer, check out our post about broadcast spreaders vs drop spreaders.

Why we started The Lawn Review

We started The Lawn Review out of frustration. We couldn’t find clarity around what type of products were actually good and reliable. All the fertilizers we tried didn’t work. We ended up with a dying lawn, wasted time, and wasted money.

We take our tool testing seriously!

So we started buying and reviewing lawn tools and figuring out which ones were the best. And now we’ve moved onto actually keeping that lawn looking nice all year around. 

We’ve spent thousands of hours building this content for people just like you and me – normal people.

Essentials of lawn fertilizer

As we stated earlier, all plants require nutrients to thrive, with the three essentials being nitrogen, phosphorus, and potassium. Each of these essentials plays its own vital role – nitrogen is responsible for the outside look or the greenery of your lawn; phosphorus promotes healthy root growth, while potassium provides an all round-coverage. 

In terms of lawn care, you’ll mostly want to look for a nitrogen-rich grass fertilizer in order to achieve vigorous, lush green growth. On the other hand, phosphorus and potassium can be already found in your soil (depending on your region), and overfertilization in these nutrients can do more harm than good.

With that in mind, it’s best to find out your type of soil beforehand to choose the best fertilizer. Lawn fertilizer is different from fertilizer used for plants, like rose bushes.

How to Sharpen Your Lawn Mower Blades: 2024 Guide

Sharpening your lawn mower blade is one of those underrated tasks that you do every few years to revive your yard. I noticed pretty recently that my lawn had some split ends. If you know what I’m talking about, then it makes a lot of sense. 

Sharpening your lawn mower blade is the ultimate “tinkering in the garage” activity. The kind of thing you do when there are no sports on TV and you’ve really got nothing better to do. But for those of us that are perfectionists with our lawns, sharpening your mower blades is a huge necessity.

Let’s get started! Here are the basic steps to sharpening your mower blade:

How to sharpen your lawn mower blade

We actually made this blog post originally as a Youtube short – a less than one minute video that covers all the high points. Here is what we recommend:

Step 1: Prepare the materials

You’re going to need a few tools to get this done the right way. The most important tool in this is the angle grinder. We use (and recommend) the Ryobi angle grinder, which we grabbed off of Amazon for a great price. With the angle grinder, you will want to be sure to have eye protection – so grab some safety glasses and gloves as well. 

Next up you’ll want some way of holding the blade in place. We used a bench clamp to really tighten the  blade in place, but you can also keep it on the ground with weights if you’re really looking to MacGyver it. 

You may also need a socket wrench (we did) to remove the bolt that is holding the mower blade to the mower. 

Because stuff is going to be flying everywhere, make sure you have some rags handy for a clean up and quick blade polish. You may also want a face mask to keep out any fragments from getting in your mouth or lungs. 

Bench clamps rock.

Step 2: Remove the mower blade

The next step in this process is to remove the blade(s) from the mower. If you have a gas-powered lawn mower, start by removing the spark plug. This is a safety measure to avoid  the blades somehow getting activated while you’re down there taking them off. I liken this safety measure to turning your car off when you get gas. (This is a Honda HRN mower).

Next, lay the mower on its side. 

Lay it down gently.

Then use a socket wrench to remove the bolts holding the blades to the mower.

Pop those bolts off to remove.

While you’re down there, give your decking a nice power wash to get off all the old grass and prevent rusting. 

Step 3: Use the angle grinder to sharpen the blade

Once you’ve removed the blades from the mower, it’s time to sharpen these puppies. First, make sure to really clamp the blades down so they don’t move during the angle grinding process. We used a bench clamp to keep it held in place. If you don’t have one, try to find some way to keep it extremely secured down during the grinding process.

Next up, grab your angle grinder. We used the Ryobi angle grinder mentioned earlier with a 60 grit sandpaper disk. 

Grab the angle grinder and get to work.

Once you’ve got the grinder set up, get it spinning and follow along the natural edge of the mower blade. You can move back and forth to get it completely polished and sharpened along the edge. There isn’t a super exact science to doing this other than closely following the edge, making sure to sharpen the entirety of the blade from the tip all the way to the center. 

Step 4: Balance and reattach the sharpened mower blade

One last step that is often overlooked is making sure the blades are balanced. It’s as easy as setting it on a hanging nail to make sure you don’t have a lopsided blade. Balanced blades are important for keeping an even cut. 

If they aren’t balanced, then you can likely shave down the side that’s heavier with the grinder until you find it becoming more even. If that doesn’t work – it may be time for a new blade.

Perfectly balanced. As all things should be.

Overview of steps to sharpen lawn mower blades

  1. Get your tools together:
    • Eye protection
    • A few rags
    • An angle grinder 
    • Safety gloves
    • Bench clamps
    • KN95 face masks to protect yourself from dust
  2. Lay your lawn mower on its side 
  3. Remove the spark plug and mower blades
  4. Use an angle grinder with a sandpaper wheel to sharpen the slanted side of the blade
    • Make sure to grind at a natural angle to avoid damaging the metal
  5. Balance the blades
  6. Put the blades back on the lawn mower the same way you took them off
Reattach that sucker.

Once you finish sharpening the blades, you’ll notice that your grass looks much cleaner after mowing. Nevertheless, one of the most important parts of sharpening a blade is the grinder you use (and how you use it). A subpar grinder can leave you with a lawn that looks even worse than before. Therefore, I recommend choosing a high-quality angle grinder to sharpen your lawn mower blades and achieve the best result. 

Frequently Asked Questions

Want to learn more about what it takes to sharpen lawn mower blades? Here are my answers to the most frequently asked questions. 

How often should you sharpen lawn mower blades?

As a general rule of thumb, you should sharpen a mower blade after 25 hours of use. If it takes an hour to mow your lawn and you mow it once per week, you need to sharpen the blades after 25 weeks.

How do I know when to replace my lawn mower blades?

Telltale signs that you need to replace your lawn mower blades include patchy spots in the grass or visible damage to the blade (dents, chips, etc.).

Can you sharpen lawn mower blades without removing them?

Yes, you can technically sharpen mower blades without removing them from the mower. However, keeping them on the mower while you sharpen them isn’t the best approach. Using an electric grinder, you could easily sharpen the blade at the wrong angle and ruin it OR the blades could start spinning and cut your hands off. However, using a tool to file the blades manually isn’t as risky.

How do you sharpen a lawn mower blade by hand?

You can sharpen a lawn mower blade by hand with a file. I personally like the Kapoua Needle File Set with six metal pieces. Alternatively, you could get an electric grinder and finish sharpening the blade in a fraction of the time. 

The Bottom Line: Sharpening mower blades

Sharpening lawn mower blades is fairly simple. To recap, you’ll want to remove the spark plug before getting to work. After removing the spark plug, put the lawn mower on its side and remove the blade (either one or two blades, depending on the mower). Place the blades on nails to keep them balanced and sharpen them using an angle grinder or file. Once you’re finished sharpening the blades, put them back on the lawn mower the same way you removed them.

You should sharpen the blades after 25 hours of use or when you notice patchy grass after mowing. 

Why we review lawn tools

The reason we started this website in the first place was because we had so much trouble trying to find reasonable, understandable, honest reviews for lawn equipment. And it’s not cheap! After hours and hours of research, trying products and returning them, and messing up our yards – we started this site. 

How we spend our time now.

As people who had to learn the hard way, we want you to know exactly what you are signing up for before you purchase a piece of equipment. That’s why we are committed to providing honest, easy-to-understand reviews that mean something.

Why you should sharpen your mower blade

You start to see brown tips on your grass where the blade just doesn’t perform like it used to. After mowing you look through your yard and it doesn’t look crisp. You miss some spots. Mowing your lawn took longer than it used to.

Lawn is looking like Guy Fieri with the frosted tips!

These are the signs of a dull blade.

A dull lawn mower blade gives your yard a ragged appearance. If you don’t sharpen your lawn mower blade, you’ll end up with shredded or clumpy grass that looks unkempt. 

Thankfully, sharpening a lawn mower blade only takes a few minutes and doesn’t require a professional. The best time to sharpen the blade is at the beginning of mowing season, around early March. This preps it for the new season without it sitting through the winter season and getting dull. However, you can also sharpen the blades throughout summer and spring if you notice them becoming dull and have the time.

The best time to sharpen your mower blades is right before the cutting season – sometime in early spring as part of your preparation schedule.

How Long Should Lawn Sprinklers Run?

We recommend letting your sprinklers run for about 30 to 40 minutes per watering session, two to three times per week.

Unless you live on the lush Big Island of Hawaii, you probably have to water your lawn throughout the year. Chances are, you have impact, oscillating, or stationary sprinklers that keep your lawn hydrated and green. 

But watering your lawn doesn’t always mean you’ll have the best-looking yard on the block. For example, overwatering your lawn can lead to suffocation and stunted root growth. In other words, watering your lawn too much can leave it looking like a swamp. On the other hand, not watering your lawn enough will leave you with a brown yard.

What’s the happy medium?

The Ultimate Lawn Sprinkler Run Time

We recommend letting your sprinklers run for about 30 to 40 minutes per watering session, two to three times per week. Therefore, you should let your sprinklers run a minimum of one hour per week and a maximum of two hours. This obviously doesn’t apply to winter months when your lawn is covered in snow, nor does it apply if you receive a decent amount of rainfall.

The key here is to let the water saturate the soil so that roots can grow deeper. This gives you a better looking lawn but also a much healthier root base for your grass.

It’s also a good idea to turn on your sprinklers earlier in the morning when it’s cooler, making it easier for the roots to absorb the water.

If you’ve recently placed down sod, then check out our guide on how to care for a new sod lawn. You want to lighten up on the sprinkler run time so that you don’t build up fungus in the sod. 

The 4 Best Budget Lawn Sprinklers for 2024

Now that I’ve revealed the secret of how long lawn sprinklers should run, I will share the best lawn sprinklers for 2023. A new year, a new sprinkler – is that how that saying goes? 

1. Aqua Joe Oscillating Sprinkler

If you want the best bang for your buck, you can’t go wrong with the Aqua Joe Indestructible oscillating sprinkler. This sprinkler comes in two sizes – a 16-inch and 20-inch option. The 16-inch device covers up to 3,600 square feet of lawn, and the 20-inch alternative covers 4,400 square feet. Aqua Joe claims that the sprinkler’s size has the largest size-to-spray distance ratio on the market. I love that the sprinkler doesn’t clog and it doesn’t overspray, meaning no more wasted water. 

It’s indestructible.

I’ve also dragged this thing across my yard more times than I can count and it is banged up but  still works beautifully. It’s also super easy to set up and find the right spray pattern for your yard.

I recommended this one to my dad recently because he was in the market. He got it off Amazon for a ridiculous price and has loved it for his front yard. You can grab it on Amazon here like we did.

2. Segomo Tools 360 Degree Automatic Rotating Garden Sprinkler

This Segomo does a 360 as it sprays every corner of your yard. A single sprinkler covers 3,600 square feet, but you can also get your hands on a two-pack for 7,200 square feet of coverage. I don’t know about you, but I’ve dealt with tons of sprinklers that seem to wobble with every gust of wind. The Segomo sprinkler doesn’t have that problem thanks to its heavy-duty premium ABS material and solid base. Basically, it is solid and heavy.

To add the cherry on top, the sprinkler comes with two rubber gaskets and a 1 x ½” quick hose connector.

Riding spinners – they don’t stop.

The cool thing about this is that you can just plop it in your yard and let it go crazy. This is definitely for Type B people who just want to get their yard covered without being precise. 

I like it because it is kind of crazy and you can get it for a great price on Amazon.

3. Kadaon 360 Degree Garden Sprinkler

Another contender in the 360-degree category is the Kadaon 360 Degree Rotating Lawn Sprinkler. I’ll preface by saying that this product isn’t as highly rated as Aqua Joe, but it is a great budget sprinkler set up. These types of sprinklers aren’t going to last forever, but have the benefit of doubling as an awesome sprinkler for your kids or pets (my dog used to try to fight the sprinkler). 

It’s cheap and it works.

So, what’s all the hype? This sprinkler features a three-arm design with an ABS plastic rotary. It boasts a patented water-saving design and a large coverage area. This sprinkler isn’t just for watering your grass either; it makes a great pass time for kids.

This thing is a dang steal. It’s really similar to the 360 spinner up above, but it sticks into the ground, is slightly weaker, but is an insanely cheap price on Amazon.

4. Melnor 65074-AMZ XT Turbo Oscillating Sprinkler

This Melnor sprinkler actually went into a face-off with our Aqua Joe indestructible sprinkler. The results were confusing.  Both have a similar spray pattern and  similar coverage. I like that the Melnor is slightly better for being precise with spray patterns, allowing you to expand the spray pattern horizontally to adjust the width. 

I like the Aqua Joe because it is heavier, simpler, and truly indestructible. 

It was a close battle.

So it’s a tough one. The Melnor oscillating sprinkler here is a great sprinkler (I own both), so you really can’t go wrong with it. To me, it just comes down to price. Both go on sale frequently on Amazon, so check the price of the Melnor to see which is better.

Frequently Asked Questions about lawn sprinklers

Curious to know more about lawn sprinklers and watering your yard? Here are some of the most commonly asked questions we get about lawn sprinklers.

How much does it cost to have in-ground sprinklers?

Depending on the size of your property, you can expect to pay between $1,500 to $3,000 for inground sprinklers. Fortunately, in-ground sprinklers can help increase your home’s value because they operate efficiently and keep up your curb appeal. 

What time of the year should you water your grass?

Most homeowners in the United States water their lawns after winter – when the snow melts and the grass underneath slowly reappears. However, you may not need to water your grass during the spring if you live in a moist climate, such as the Southeast or Midwest. The same is true in the summer. Summer is a time of sporadic weather, and sometimes there are dry spouts, while other times there are endless days of rain. 

In summary, you should water your lawn starting in spring through the fall, but can you scale back on the watering if there are higher-than-normal levels of precipitation

Can you water your grass too much?

Yes, you can easily water your grass too much if you aren’t careful. If you notice water running off your yard, there’s a good chance you’re overwatering. In addition, overwatering your grass can cause it to feel spongy and promote weed growth. Worst of all, creepy crawlers will flock to your lawn, which may require an exterminator visit.

How Long Should Lawn Sprinklers Run: A Recap

The general rule of thumb is that lawn sprinklers should run two to three times per week and for 30 to 40 minutes per session. However, this rule isn’t exactly set in stone. You may need to water your grass more during a drought or less during periods of high precipitation. And if you don’t have the right sprinkler for your yard yet, be sure to check out my list of the best lawn sprinklers for 2023. 

Why we started this site

We started The Lawn Review out of frustration. We couldn’t find clarity around what type of products were actually good and reliable. All the fertilizers we tried didn’t work. We ended up with a dying lawn, wasted time, and wasted money.

So we started buying and reviewing lawn tools and figuring out which ones were the best. And now we’ve moved onto actually keeping that lawn looking nice all year around. 

How we spend our time.

We’ve spent thousands of hours building this content for people just like you and me – normal people.

Best Lime for Lawn: 2024 Buying Guide (+ Tips)

Lime for your lawn? Is it margarita season? Always.

The best lime for your lawn is Espoma Lightning Lime Fertilizer. You can grab it here on Amazon or keep scrolling and read about some of the runner-ups.

When you hear the word “lime,” you probably think of the green citrus fruit that goes well with a handcrafted cocktail. Well, lime doesn’t just describe a tart fruit – it’s also a soil amendment formulated with limestone rock. 

It doesn’t sound so tasty now, unless you’re Fred Flintstone. Your lawn would beg to differ – lime is full of nutrients that keep grass lush and vibrant in color. Not only that, but lime helps grass maintain an ideal pH level (5.8 – 7.0). 

Why I use lime on my lawn

The great thing about lime is that you don’t have to apply it very often (unlike fertilizer). In fact, most homeowners only have to apply lime every three to five years. In contrast, some people use fertilizer a couple of times per month. 

Photo cred: Target – who is known for their limes?

Best of all, lime is cheap and readily available on the internet and in your local brick-and-mortar gardening or big box store, like Home Depot or Lowe’s. With that said, I’m a big fan of buying lime on the internet and getting it shipped straight to my house (I’m lazy). 

The Best Lime Products for Your Yard

If you’re ready to apply lime to your lawn or just want to stock up, you’ve come to the right place. Lime is not all made equally, however. While the active ingredients are generally the same, how they are made, the size of the package, and the price are all major considerations when looking to buy the BEST lime for your lawn.

Here’s a look at some of the lime products I considered for my lawn when I was doing my search. After you get a chance to review my list of the top products, be sure to keep reading to learn about the best way to apply lime.

Espoma Lightning Lime Fertilizer

Perhaps one of the most popular lime products on the planet is Espoma’s Lightning Lime Fertilizer. At first glance, I was a bit skeptical of the use of “lightning”. 

I thought to myself, “will my lawn transform into a luscious green retreat in the blink of an eye?”.

Well, not so fast, the lime adjusts pH levels in six to eight weeks. Certainly not lightning fast, but still a viable option. Remember, we are in it for the long haul when it comes to lime, knowing that it is a 2-3 times per decade application for most folks. Let’s dig some more.

Photo cred: Amazon.

Espoma claims the lime is safe to use around kids and pets. The safety element of this product comes from how it is treated. The organic product is treated with natural humic acid. And given the package’s 30-lb size, you get around five bags of regular-sized lime as compared to some of the others.

So far, so good. Comparable products take up to 14 weeks to do the job, and Espoma slices that in half (pun intended).

Additionally, Espoma claims that this lime is less dusty than other products on the market, making it easier to handle and less messy when opening. One consideration here is that this thing can cover 5x what a normal bag of lime can cover, so you need to make sure you have the right setting on your broadcast spreader (instructions are on the bag).

You can grab this bad boy on Amazon for a really good price.

Earth Science Fast-Acting Lime

We all have busy lives, so I picked another “fast-acting” lime for the list. Earth Science Fast-Acting Lime covers 5,000 square feet of yard and comes in granular form. 

Like traditional lime products, it raises the pH level to promote nutrient absorption. Similar to Espoma’s lime, the Earth Science formula is also safe around kids and pets. While this product dubs itself “fast-acting,” I couldn’t find an exact time frame. But on the bright side, the packaging says the lime is 100% guaranteed and keeps working all season. 

Although this one is a bit more expensive per square foot of coverage than the Espoma lime, it does highlight that it is able to cover what is traditionally covered by 4 bags of lime. 

Looks science-y. Photo cred: Amazon

Compare this claim to Espoma, which mentions that they can cover 5 bags of lime. This one is 25 lbs, Espoma is 30 lbs, so the formula is likely very similar. 

At about the same price as Espoma, I have to say that this one is going to be a little costlier, but a great alternative for someone who doesn’t need as much lime. It’s also available on Amazon for just over $30.

Solu-Cal Enhanced Calcitic Lime

Don’t panic; Solu-Cal isn’t a soul catcher. Despite the rather cryptic name, Solu-Cal Enhanced Calcitic Lime is a relatively new product with a different formula. 

This product’s formula is unique in that it combines pellet limestone with calcium to produce results as quickly as a few weeks. It seems a little far-fetched at first glance, doesn’t it? Imagine giving your grass some milk (this was actually my fourth grade science fair project and it rotted).

Solu-Cal photo from Amazon.

It’s a really good lime product for large yards, as it covers up to 10,000 square feet per bag. Other than the additional bio-available calcium, this is your run-of-the-mill lime. Nothing bad to say about it, nothing particularly great to say about it. It will do the job just fine, it just comes in a larger quantity.

This one is also available on Amazon in a much larger quantity for a really great price.

Hoffman Garden Lime

Last but not least is Hoffman’s Pelletized Garden Lime. I wanted to throw this product in as an option because it is designed for gardens. It’s a solid supplemental product to purchase alongside the products I’ve highlighted above. The lime comes in an 8-lb package and “sweetens” the soil while increasing nutrient availability to plant roots.

I probably would just get a larger bag and use some on my lawn and some in my garden instead of specifically buying an overpriced bag. But if you don’t have a lawn and just want to get some lime in your garden, then this is a nice alternative. 

It’s available on Amazon for about $20 for an 8lb bag.

The Bottom Lime (No Pun Intended)

Lime is an important component of lawn care. And even though you only have to apply it every few years, choosing the right product can make or break your lawn. Fortunately, you shouldn’t have to spend more than $150 on lime, depending on the size of your yard. However, you need a tool to apply the lime to your yard with a tool (from my own personal experience, I don’t recommend using your hands).

Before you hit the ground running with your new bag of lime, make sure you get your hands on a spreader. My favorite is Scotts Elite Spreader, which is available on Amazon for a deal. 

The spreader features dual rotor technology and holds up to 20,000 square feet of product. It also has an ergonomic handle (kiss those pesky blisters goodbye). I also recommend Scotts EdgeGuard Broadcast Spreader, which I’ve written about extensively.

Your yard will thank you no matter which lime or spreader you use. You’ll also thank yourself after your lawn transforms into lush and vibrant grass that leaves the neighbors envious.

Why we started this site

We started The Lawn Review out of frustration. We couldn’t find clarity around what type of products were actually good and reliable. All the fertilizers we tried didn’t work. We ended up with a dying lawn, wasted time, and wasted money.

How we spend our time now.

So we started buying and reviewing lawn tools and figuring out which ones were the best. And now we’ve moved onto actually keeping that lawn looking nice all year around. 

We’ve spent thousands of hours building this content for people just like you and me – normal people.

Best Time To Aerate and Overseed Lawn: 2024 Update

Learning how and when to aerate and overseed your lawn is critical to a beautiful lawn that makes your neighbors jealous. Remember: you reap what you sow. And the window for sowing the perfect lawn isn’t open year-round.

Today we are going to walk through the difference between aerating and overseeding, when is the best time aerate and overseed, and give you some insight on how we get this done each year.

Jump ahead:

Let’s get started!

Aerating vs Overseeding

Aeration consists of perforating soil with small holes, allowing nutrients and water to seep inside and reach the roots of the grass. This technique promotes healthy and nourished grass, leaving your lawn green and lush. If you don’t aerate your lawn, the soil can become compact, which can deprive the grass of the key nutrients it needs to flourish. Grass that isn’t aerated is particularly susceptible to the elements (extreme heat and drought, for example). 

You can use a big time aerator like this one we rented from Home Depot.

You can decipher whether your lawn needs aeration by examining the soil. If the soil is hard or has a spongy texture, it’s time to aerate. Thin grass losing color is another telltale sign that you need to aerate your lawn.

Overseeding generally accompanies aeration. You add grass seeds across the entire yard when you overseed your lawn. The goal of overseeding is to regrow grass in areas where it is damaged or thinning. Now you may wonder, “do I have to aerate my lawn before I overseed it?”

The answer is yes; it’s best to aerate your lawn before overseeding because aeration helps the soil absorb nutrients and gives it fresh, overturned soil to thrive in. Aerating after overseeding can be massively disrupt to new seedlings.

Overseeding using a broadcast spreader.

The Best time to Aerate and Overseed

If you have cool season or transitional grass, the best time to aerate and overseed your lawn is the early fall. During the early fall, the temperature is cooler while the soil is still warm. This combination allows your lawn to recover quickly and see the most benefit from the aeration and overseeding. Cool season grass truly thrives during the fall months and gives your seeds the best chance of survival.

A general guide to grass zones.

If you have warm season grass, early-to-mid spring is the best time to aerate and overseed your lawn. Warm season grasses thrive in the summer so you want to give them time to germinate. This allows a root system to begin to form and for the grass to start living it up when the warmer temperatures arrive.

Don’t know your grass type? Reference this!

If you are noticing your grass starting to have brown tips, check out our guide on how to sharpen your mower blades.

Do-It-Yourself Lawn Aeration

While lawn aeration is typically a job left to the professionals, it doesn’t have to be. In fact, you can take lawn aeration into your own hands (literally). But before you hit the ground running, you should understand the cost of DIY aeration techniques and the effort required.

Our process is typically:

  1. Scalp your lawn – cutting it very short allows for the best preparation for overseeding and will allow more soil to be dug up through the aeration process. Make sure to bag the clippings to not choke your yard.
  2. Use a dethatcher to dig up all the dead grass off of the surface of your yard. Dethatchers and aerators are different, but compliment each other very well.
  3. Rent a gas-powered aerator from Home Depot. It helps to go in with a few neighbors to rent one and split the cost. There are also lawn tractor pull-behind aerators that work really well, too.
  4. Use the aerator to go over every square inch of your yard, pulling up old

One of the most popular DIY dethatcher products is the Sun Joe Dethatcher. This electric aerator and dethatcher is extremely satisfying and works wonders despite looking kind of dinky.

The Kobalt dethatcher attachment.

If you’re looking for a great workout and to be made fun of by your neighbors, you can also aerate your lawn with DenForste Lawn Aerator shoes, also available on Amazon. I’ll preface by saying you’re in store for a serious workout if you use these shoes. I definitely don’t recommend using them for a larger yard and suggest aerating when the temperature drops in the evening. On a positive note, the shoes have a solid aluminum base and spikes that won’t bend. And while the idea of aerator shoes sounds far-fetched, Amazon reviewers seem to dig these shoes.

Want to learn more about the difference between an aerator, dethatcher, and scarifier? Check out my guide that explains the difference between the three and how to use them. 

Do-It-Yourself Overseeding

Do-it-yourself overseeding is a lot easier than aeration. But remember, depending on the soil quality, you may need to dethatch or aerate your lawn first.

Once your lawn is ready-to-go, I recommend getting your hands on a Scotts Turf Builder Broadcast spreader. This handy device makes it mind-blowingly easy to overseed your yard and holds up to 15,000 square feet of product.

You can also use a handheld spreader if you have a smaller yard or only need to overseed a few concentrated areas of grass.

We recommend using Anderson’s seed for your lawn based on personal experience. Scotts has some good cheap stuff, but we’ve found it typically is contaminated with random grasses or weeds (and it says so on the bag)

Frequently Asked Questions about Aerating and Overseeding

Everyone has some natural curiosity about aeration and overseeding. If you’re eager to know more about the ins and outs of this all-important lawn care technique, take a look at some of the most frequently asked questions below.

How Much Does It Cost to Aerate Your Lawn?

You can expect to shell out anywhere from $150 to $230 to aerate your lawn, depending on where you live and the size of your property. If you’d like a more precise cost estimate, multiply every thousand square feet of lawn by $17. For example, if your yard measures 5,000 square feet, you will pay around $85 to aerate your lawn (5 x 17). 

How Much Does It Cost to Overseed Your Lawn?

The cost of overseeding is about double the cost of aeration alone. In other words, a lawn care company that charges $150 to aerate a yard will charge $300 to aerate and overseed it. If you’re lucky, they may also throw in some fertilizer. 

Can You Aerate and Overseed Your Lawn by Yourself?

Yes, you can aerate your lawn by yourself using an at-home aerator or aerator shoes. However, these methods are much more labor intensive and may not be as effective as hiring a professional to do the job.

How Often Should You Aerate Your Lawn?

Most lawn care professionals recommend aerating your yard annually. However, some people can get away with doing it once every two or three years if they have sandy soil and healthy grass.

Lawn Aeration and Overseeding: A Final Glance

Aeration and overseeding help your lawn absorb healthy nutrients and regrow in areas that are thinning or damaged. Aeration costs between $150 to $230, while aeration and overseeding together double the price of aeration alone. The general rule of thumb is to aerate and overseed your lawn once per year. The best time to aerate and overseed your yard is the early fall because the temperature is starting to cool, but the soil is still warm. 

Rest assured, lawn aeration and overseeding may seem slightly inconvenient, especially if you attempt to do it on your own. Nevertheless, the pros of aeration and overseeding far outweigh the cost involved. You’ll have vibrant and evenly-distributed grass that boosts your home’s curb appeal and makes the lawn much easier on the eyes.

Why we started The Lawn Review

We started The Lawn Review out of frustration. We couldn’t find clarity around what type of products were actually good and reliable. All the fertilizers we tried didn’t work. We ended up with a dying lawn, wasted time, and wasted money.

So we started buying and reviewing lawn tools and figuring out which ones were the best. And now we’ve moved onto actually keeping that grass nice and healthy all year around. 

How we spend our time now.

We’ve spent thousands of hours building this content for people just like you and me – normal people.

The Best Lawn Fertilizer Ratio for Summer: 2024

Lawn fertilizer in the summer? Fertilizing your lawn in the summer can be a great idea if done correctly.

Summer is a season of extremes – drought, torrential rainstorms, and intense heat. It’s important to keep your lawn healthy and protected during the summer, no matter what the season brings. Using a fertilizer designed for summer use is one of the best ways to maintain your lawn, ensuring that it stays lush and green.

However, before picking out an ideal fertilizer, you must first understand the NPK ratio and why it matters.

The Best Fertilizer Ratios for Summer 

The best fertilizers ratios for summer are rich in nitrogen and may or may not contain potassium. A healthy dose of nitrogen is important during the summer because it promotes growth. Remember that you shouldn’t fertilize cool-season grasses during summer (unless the grass would die otherwise). On the other hand, warm-season grasses do need fertilizer in the summer. However, they don’t need excessive amounts of potassium or potash.

The best NPK Ratios for summer: 

  • 10-0-4
  • 15-0-8
  • 6-0-0

Below, we reference some that match or come close to matching these ratios pre-packaged. You can buy these ingredients separately and disseminate the perfect ratio, but the ones below make it easier.

The Best Lawn Care Fertilizers for Summer

I know you have a lot of options when it comes to choosing the best lawn fertilizer for summer. With that said, you should consider the fertilizer’s NPK ratio when looking for the optimal product. Now, it doesn’t have to be exactly 10-0-4, 15-0-8, or 6-0-0. Variations of these ratios are fine – you just want to aim for a fertilizer higher in nitrogen and lower in phosphate and potash. 

Ready to spruce up your lawn this summer? You can’t go wrong with any of these summer fertilizers:

Scotts Turf Builder Summer Lawn Food

You’re probably familiar with the Scotts brand if you’ve wandered around the lawncare section of any big box store. But there’s a good reason for that – Scotts fertilizer uses unique Eyedrop Technology that keeps your lawn thick and protects it against extreme summertime elements (i.e., drought and scorching temps).

This stuff will work.

I think Scotts Turf Builder Summer Lawn food is an awesome choice if you want to keep your lawn green while minimizing water use. This product is available in two sizes – 4,000 and 12,00 square feet. You can use it on all grass types; the results last up to six weeks. However, water your grass immediately after using the Turf Builder if the temperature is above 85 degrees.

As long you follow the instructions that come with the fertilizer, this product is foolproof. It’s available on Amazon for a great price, too!

Simple Lawn Solutions Liquid Fertilizer

Another solid summertime product is Simple Lawn Solutions Liquid Fertilizer. This fertilizer is high in nitrogen, with an NPK ratio of 16-4-8. You can get your hands on this fertilizer in two sizes – one gallon and one quart.

For reference, a gallon of liquid fertilizer can cover 12,800 square feet. Like Scotts Turf Builder, Simple Lawn Solutions works on all grass types – Buffalo, Bahia, Kentucky Bluegrass – you name it. 

Photo cred: Amazon

While all the fertilizers on my list are great at nourishing your yard, Simple Lawn Solutions Liquid Fertilizer has a unique blend of seaweed and fish (don’t worry; it doesn’t stink). The fertilizer’s high nitrogen density will keep your grass vibrantly green during the summer and encourage healthy growth. On the other hand, potassium enhances turf hardiness, while a small amount of phosphorus promotes strong roots.

If you think Simple Lawn Solutions Liquid Fertilizer is a good fit for your lawn (and I’m confident it is), check it out on Amazon. Since it comes in a concentrate, you’ll want to water it down and spread it with a backpack sprayer.

Milorganite Organic Nitrogen Fertilizer

Milorganite claims its Organic Nitrogen Fertilizer has been used on golf courses for decades, and I believe it. The fertilizer has a 6-4-0 NPK ratio, meaning it’s rich in nitrogen and ideal for summertime use.

We’ve written extensively about Milorganite and it’s role in supporting and promoting grass growth.

It works!

Milorganite product comes in a 36-pound bag with an organic composition. And like Scotts Turf Builder Summer Lawn Food, Milorganite fertilizer reduces the need for watering, which is great for summer droughts. In addition, the slow-growth formula means less mowing (I certainly won’t complain about that). 

Milorganite Organic Nitrogen Fertilizer is a great choice if you want an easy-to-use product that keeps your yard green all summer. Check it out on Amazon to stock up as summer approaches. 

Scotts Green Max Lawn Food

I couldn’t end the list without choosing another product from Scotts. The brand’s Green Max Lawn Food can be used during the spring, summer, and fall.

If you’re in Florida, you’re in luck – Scotts has a special lawn food designed exclusively for Florida residents. There’s also a standard option that’s suitable for all other states. Depending on the size of your lawn, you can choose between a 5,000 or 10,000-square-foot package. 

Definitely can get your lawn green in a pinch!

Applying Scotts Green Max Lawn Food is pretty straightforward and requires either a Scotts broadcast, rotary, drop, or Wizz Spreader. The best part about this fertilizer is that you’ll see results as soon as three days. Not only does this fertilizer produce quick results, but it also lasts up to three months. It’s available on Amazon for a great price.

The Bottom Line: Summer fertilizers

Not all fertilizers are suitable for summertime use. You should aim for one with a higher nitrogen concentration (preferably one of the NPK ratios noted above). If you’re unsure which fertilizer is right for your lawn, I highly encourage you to check out the four products on my list. These fertilizers are all excellent for summer use and work well on different types of grass.

Why we started this site

We started The Lawn Review out of frustration. We couldn’t find clarity around what type of products were actually good and reliable. All the fertilizers we tried didn’t work. We ended up with a dying lawn, wasted time, and wasted money.

So we started buying and reviewing lawn tools and figuring out which ones were the best. And now we’ve moved onto actually keeping that lawn looking nice all year around. 

How we spend our time now.

We’ve spent thousands of hours building this content for people just like you and me – normal people.

What is the NPK Ratio?

If you’re familiar with the periodic table, you may already be familiar with N, P and K. Pick up any pack of fertilizer, and you will see a three-digit ratio known as the NPK ratio.

The NPK ratio indicates the proportion of nitrogen, phosphate, and potash the fertilizer contains by weight. For example, a fertilizer with a 10 10 10 ratio has equal amounts of nitrogen, phosphate, and potash. Now, you may wonder, “what’s so important about these three nutrients?” 

Study up!

Nitrogen, phosphorus, and potassium play a vital role in grass development and health. Nitrogen promotes growth and gives grass its color. Phosphorus helps strengthen roots, making for a lush and thick yard. Potassium, on the other hand, keeps your yard alive and thriving thanks to its disease-fighting abilities. 

While these three nutrients are important for your yard, that doesn’t necessarily mean a fertilizer product needs to contain them in equal amounts. During the blistering summer months, you’ll want a fertilizer that’s dense in nitrogen. 

If you need to improve the pH of your lawn, which promotes deeper root growth, try adding in lime to your lawn as an amendment.

How to Get Rid of Ants in Your Lawn (Without Killing Your Grass)

Getting rid of ants in your yard WITHOUT killing the grass is like pulling out the table cloth while leaving all the dishes intact. I’ll go ahead and give away the sauce – I use baking soda and vinegar to get rid of them just like the classic science fair experiment.

Some can be hidden!

The exponential number of ants colonizing Earth shouldn’t be a surprise, as myrmecologists (nerds) estimate there are over one quadrillion (one million billion) ants on Earth. When there’s one ant in your lawn, there are thousands more nearby, living inside secluded nests underground or in the trees. And unless you live in Antarctica, there’s a good chance that hundreds of ant species call your community home. 

But seriously.

Your backyard is likely a breeding ground for thousands of eusocial insects.

Let’s face it: Spotting a single ant in your yard usually isn’t cause for alarm. However, when one ant turns into two, and two turns into four, Houston, we have a problem. 

At this point, you’ll have to resist the urge to whip out the flamethrower (which we did in this YouTube short). Despite common belief, you can remove ants from your lawn without killing your grass (or damaging it, for that matter). But before proceeding, there are a few considerations that we must remember: 

  • Why does your lawn have ants in the first place? We can temporarily eliminate the ants, but if we don’t find the root of the problem, they’ll keep coming back.
  • How do you identify ants in your yard? There are more than 12,000 ant species in the world. Are you sure they’re ants or a species that looks similar?

How to Get Rid of Ants Without Killing Your Grass

Follow these techniques to get rid of ants infestations while preserving your grass:

Diatomaceous Earth is a natural way to get rid of ants

Diatomaceous Earth removes many bugs, including ants, fleas, silverfish, and roaches. The formula attracts the pests and causes them to dry out and die within 48 hours. Best of all, insects don’t build up immunity to Diatomaceous Earth, making this product highly effective.

You can apply Diatomaceous Earth on ant mounds, in areas with high moisture, and alongside your house for best results. Rest assured, Diatomaceous Earth is compliant in the use of gardening so that it won’t destroy your grass. 

I would buy this just for the roaches NGL.

It’s super easy to use and can be found on Amazon for a reasonable price.

Use vinegar to kill ants in your lawn without killing grass

Mixing a 50/50 solution of vinegar with water is a popular DIY technique to eliminate ants. After mixing the two liquids in a spray bottle, spray the mixture on top of the ant nests in your yard. You can also spray the mixture around your patio and against windows and doors for extra protection.

Guarantee you have this in your pantry!

While this concoction will certainly kill ants, you may need a little more fuel. If that’s the case, consider taking advantage of baking soda’s unique ant-killing abilities. 

Try Baking Soda to kill ants without killing grass

There’s a good chance you already have baking soda in your cupboard. You probably didn’t realize that it doubles as a baking ingredient and ant killer. 

In order to kill ants, you must sprinkle baking soda on top of an ant nest and other areas with high populations of ants. You should also create a barrier around your outdoor living spaces and entry points to your home (doors, windows, etc.). 

Moreover, you can combine baking soda with powdered sugar if you have a serious ant issue and want to bait ants into eating the baking soda and powdered sugar death trap. 

Just make sure not to combine with an egg, flour, and chocolate chips and heat at 350 for 17 minutes – otherwise you will have just made a chocolate chip cookie.

Natural Bug, Insect, & Pest Killer

Natural Amor Store’s Natural Bug, Insect, & Pest Killer is a proven way to kill ants outdoors and indoors. It comes with an easy-to-use spray bottle perfecting for targeting large mounds.

The formula is also all-natural, featuring a formula of peppermint, clove, and vinegar.

This pest killer doesn’t just get rid of ants; it keeps them away for up to 12 months. Good with us!

The Bottom Line: Ants dead, grass alive

On the one hand, ants can destroy your yard if you let an infestation go unnoticed. On the other hand, removing ants using harsh products can kill your grass. The suggestions we’ve detailed above are a great starting point if you want to get rid of ants naturally without harming your grass. 

If your grass is looking rough, it may be because you need to sharpen your mower blades.

Why Do Ants Live in Yards?

Have you ever thought, why me? I do that all the time when I’m looking in the mirror.

 Why did ants flock to my yard but not my neighbors? Chances are three things attract them to your yard: Food, water, and protection. 

Let’s go deeper.

Ant food in your yard

It’s only a matter of time before ants find a food source in your yard. Ants love to munch on smaller insects, including termites and fly larvae. They’ll also group and feast on larger, dead insects.

Ants enjoy human food, too, so you should ensure your yard is free of food or easily-accessible waste bins. After clearing food from your yard, there’s one more thing to look for: decaying plant matter, including dead trees and weeds. You can get rid of a lot of decaying grass by using a dethatcher.

Ants adore decaying plant matter and come in armies to have a meal.

Water – grass loves it, so do ants

Like mosquitoes and cockroaches, ants are commonly found in areas with high moisture. When it comes to your yard, ants flock to rain puddles and all sorts of things that accumulate water, such as rain collection barrels. If you have leaky pipes or a broken dehumidifier, you can find them inside your home.

Protection for ants

At the end of the day, your yard provides protection and shelter for ants. Most ants will build their mounds directly on top of your soil, while others will find more discrete shelters. Your yard might be attractive to ants if it has tall grass, rocks, and debris, making it easy to set up a shop. 

So often they are bordering sidewalks like this.

How to Identify Ants in Your Yard

If you think you have a case of ants in your yard, there’s a good chance you do. But how do you know for sure, considering these small bugs can measure less than 3mm in length?

Here are some telltale signs that you might have an ant problem in your yard:

  • You have physically spotted ants roaming around your lawn
  • There are sawdust trails surrounding your home (these trails come from carpenter ants)
  • You notice ant mounds scattered throughout your yard
  • Ants have started to make their way into your home
  • You spot more ants in moist areas inside and outside of your home
  • Ants are prevalent around your indoor and outdoor trash bins

If you’re experiencing these telltale signs of a lawn ant infestation, it’s time to get ready for some ant-killing action. After all, you’ve probably spent hundreds (or thousands) of dollars to get the best lawn on the block. 

But not so fast – how do you kill ants without obliterating your yard? Fortunately, we have some tricks up our sleeves to get rid of these pesky insects without killing your belove

Ultimate Rubber Mulch Buying Guide: 2024 Update

Rubber mulch is one of those weird things in the landscaping industry that makes a lot of people suspicious. Why use rubber mulch when there is an abundance of wooden mulch?

Photo cred: Wikipedia.

Bottom line on Rubber Mulch: Rubber mulch has quite a few benefits, but really is optimal for only a handful of scenarios.

Today, I am going to walk you through what the heck rubber mulch is, when to use it, where to get it, and more.

But before we get started, let’s be clear – rubber mulch isn’t for everyone. In fact, most homeowners aren’t even aware of its existence. Buckle up, because you’re about to have your mind blown.

Jump ahead:

Rubber mulch vs wood mulch

Rubber mulch and wood mulch are both used for similar purposes. Beyond the aesthetics, mulch has a number of meaningful functions that provide a safe environment for plant growth.. 

Let’s check it out.

Classic bagged mulch at Lowe’s.

Similarities between rubber and wood mulch

Below are some similarities between rubber mulch and wood mulch:

  • Aesthetics: from a distance, rubber mulch looks just as good as a fresh mulching with wood-based mulch. 
  • Weed control: although this remains a subject of contention, both rubber and wood mulch provide protection against weeds. Many folks argue that it requires a lot of rubber mulch to fully choke out the weeds, but so does wood mulch. It probably just “feels” like more mulch since it spreads so differently.
  • Temperature regulation: rubber mulch retains heat decently well and can provide a decent level of protection, as does traditional wood mulch.
  • Durability to soil: both wood and rubber mulch provide a level of durability to wherever they are laid. This helps prevent soil runoff, is more forgiving when people or animals walk through it.

Differences between rubber and wood mulch

While they look the same and provide many of the same benefits, there are definitely differences between a synthetic and an organic substance. Let’s take a look:

  • Water retention: rubber mulch may provide some benefit to water retention, but only marginally when compared to wood mulch. The density of wood mulch allows it to act like a sponge for water. 
  • Decomposition: wood mulch breaks down over time and provides nutrients to the soil, allowing it to benefit from the mulch. Rubber mulch breaks down over 50 to 80 years and provides no nutrients to your soil. 
  • Replacement frequency: wood mulch needs to be replaced every 1-3 years due to its decomposition. Rubber mulch can last for 10 years (or more). 
  • Price: Wood mulch is pretty cost efficient and can be picked up in bulk or in bags. Lowe’s has 5 bags of mulch for $10 on sale every year and Home Depot also has a mulch sale where you can get mulch for a great deal.

Does Rubber Mulch smell?

Remember the days in gym class when they would take everyone out to the track and make you run a few laps? The running wasn’t the tough part, it was the smell.

Some people like it – but mostly due to the nostalgia of running track or playing on a turf football field. But if you expect to have a rubber mulch yard, you will definitely get whiffs of rubber. 

Heat can definitely make the smell a little more potent, but it truly isn’t a super noticeable smell.

AND regular mulch has a smell as well – so there isn’t a totally smell-free choice.

How long does rubber mulch really last?

Most folks say that rubber mulch will last over 10 years. While most wood mulches fade in color and decompose, rubber mulch keeps its color and doesn’t break down. Additionally, the maintenance is minimal – only requiring occasional raking. 

What is rubber mulch made of?

Believe it or not, rubber mulch is made of recycled tires. Yep, they take all the old tires from cars, trucks, farming equipment, and construction equipment then shred it down to a consistent size. 

It then gets dyed with whichever color you choose, bagged, and shipped to whichever place you grab it. 

What are the benefits of rubber mulch?

Rubber mulch has a bunch of benefits that make it popular at upscale resorts, playgrounds, and other commercial properties. 

  1. Prohibits weed and fungal growth: part of the reason people pick rubber mulch is that it doesn’t store water or contain nutrients the way that rubber mulch does. This means that fungus is not going to grow in this soil. 
  2. Keeps insects and mice away: again having an artificial environment makes it an unattractive place for insects or mice to get their food. Keep pests away from your house with rubber mulch.
  3. It’s super low maintenance: weeds don’t grow in it either because they can’t germinate in the soil below if they never make it. That means weeding is super rare and you only have to give it the occasional rake to keep the sun-exposed pieces mixed in with the others. Oh yeah – and you only have to change it every DECADE.

So what are the problems with rubber mulch?

Sounds too good to be true? Well, it can be. There are definitely some drawbacks. For starters, rubber mulch doesn’t have as much of the “smothering” effect that wood mulch has. With wood mulch, you can use it to crush and kill weeds. With rubber mulch, you’ll really want to clear the weeds beneath and do what you can to keep them dead. Once the rubber mulch is down however, you shouldn’t have problems.

Ever heard of a tire fire? Well, rubber mulch is flammable just like rubber tires. Which is an absolute nightmare. I’ve never heard of this happening personally, but it is definitely a possibility.

Lastly, rubber can leach chemicals into the soil and surrounding environment. Recycled tires tend to soak up other chemicals they get exposed to during their lifetime. If the tires that are now in your garden were exposed to high levels of zinc or other minerals – they can leach into the soil and kill some plants. During the rubber breakdown process, there are other chemicals that can accumulate and leach into the soil as well. At high concentrations, these have been found to be harmful. 

Rubber mulch for playgrounds

Nothing like a transition from the dangers of rubber mulch to its applications in children’s playgrounds! Nevertheless, rubber mulch can have great applications in playgrounds. I say this because it does such a good job of absorbing falls.

Yeah, I could have used this as a kid.

Although rubber mulch can have a tough texture and not necessarily feel good to fall on to, it gives much more bounce to kids when they fall down. Another beauty to rubber mulch for playgrounds is that you don’t get the natural erosion that you see with wooden mulch playgrounds. You know the areas under the swings that form holes and fill with water? Rubber mulch really won’t do that. 

Lastly, rubber mulch on playgrounds is way less messy. That means you can save a bit on laundry by letting your kids have a blast in their playground without becoming completely covered in mud. 

Where to buy rubber mulch near you

Both your local Home Depot and Lowe’s sell bagged rubber mulch. Rubber mulch is much more expensive than traditional wood mulch, with costs being nearly 3-4x higher per cubic foot.

For example, you can grab this rubber mulch at Home Depot for not an insane price.

Photo cred: Home depot. They sell bagged rubber mulch!

As a reminder, you have to replace rubber mulch every 10-12 years, so you will definitely save money in the long run.

Sold at home depot!

If you’re looking to buy bulk rubber mulch for a larger area, there are places like RMP USA and Mulch Direct that can ship large quantities directly to you for cheaper than bagged mulch. 

Yikes….hopefully they clean this up!

Installing rubber mulch

Installing rubber mulch is actually a breeze! I’ll make it super easy and go step-by-step.

  1. Clear the area you’d like to apply mulch. I recommend laying down weed killer a week or so in advance, then completely tilling the soil. Once it is tilled, rake it to be completely flat. We basically want this area to be dead….forever. 
  2. Once you have a flat, dead area of land – measure it out to understand exactly how much rubber mulch you need. For most gardeners, 1-2 inches deep is all you will need. If it’s a playground, I would go a little deeper just to give your kids some buffer.
  3. Calculate how much rubber mulch you need and go grab it from your store of choice.
  4. Over the area where you’d like to lay down the rubber mulch, lay down some landscaping fabric. You can get it for a really cheap price on Amazon.
  5. Once the fabric is down, you may want to secure the perimeter with some landscape edges. Some people use bricks, but you can also grab some nice edges for the exterior. I personally use this one that I got on Amazon and installed in like 5 minutes.
  6. Then, simply load in all the mulch and rake it to a nice, level surface.
  7. Go inside and pat yourself on the back!
Simple landscaping edging. Photo cred: Amazon

It really is that simple and will make you feel so accomplished.

Final thoughts on a rubber garden

Rubber mulch is great for many people, but not for everyone. Make sure you understand the downsides to using rubber mulch before diving  in head-first and making the investment. If you aren’t totally sold, start with a small area or even a potted artificial plant to see if it smells or if you like the way it looks.

If you’re looking for the best time of year to put down mulch, check out our tips.

Why we started this site

We started The Lawn Review out of frustration. We couldn’t find clarity around what type of products were actually good and reliable. All the fertilizers we tried didn’t work. We ended up with a dying lawn, wasted time, and wasted money.

How we spend our time now.

So we started buying and reviewing lawn tools and figuring out which ones were the best. And now we’ve moved onto actually keeping that lawn looking nice all year around. 

We’ve spent thousands of hours building this content for people just like you and me – normal people.

Exit mobile version