Easily Transform Your Lawn With Mulch: 2024 Guide

mulch

Putting down mulch is a must-have for any nice looking yard. A fresh set of mulch is the ultimate game changer for curb appeal – the instant “pop” that sets your yard apart. 

And it’s easy, right? You just grab a couple bags and throw them on. 

But how many bags? How much mulch? How often do you mulch? When is the best time to mulch? Do you remove the old mulch? Do you have to prepare the ground for mulch? Do you water mulch?!

Don’t let it overwhelm you! Mulching can be super therapeutic and you really can’t beat the results.

So let’s get started!

What is mulch?

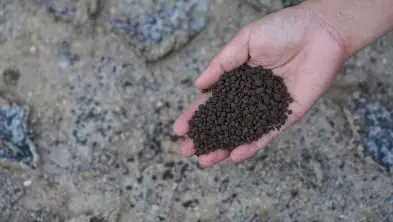
Mulch is mostly made of bark or shredded wood. Some of the most common types of mulch are made from shredded Cyprus or other hardwoods. Other inexpensive brands are a blend of random woods, which can sometimes look like dyed shredded plywood. 

A common bagged mulch sold at Home Depot.

Mulch goes on top of existing soil as a protective layer to help insulate the soil. Mulch has a ton of benefits, including:

  1. Inhibits weed growth
  2. Retains water better than soil alone
  3. It helps nourish soil as it decomposes
  4. It helps regulate temperature
  5. Mulch adds a level of durability to your soil, whether it be heavy rain, footsteps, or animals

How often to put down mulch

Mulch should be replaced no more than once per year. 

If you live in an area with heavy rainfall or snow, you may have to replace mulch yearly. For others that don’t get as much exposure to elements, your mulch may last a lot longer – even 3-4 years in some places.

If your mulch looks like this…time to reset it!

You will know if you need to replace your mulch if it has caked together into clumps or developed a white fungus. You may also notice that your mulch needs to be replaced if it has lost some color or faded. 

I replace my mulch in my front yard every year. It is black and gets full sun for most of the day. It takes a beating and fades from black to charcoal-grayish colored. Needless to say, I like having a nice black mulch that contrasts against our lighter-colored brick and grass. 

In my backyard, I replace the mulch every other year. It is a really large area that is mostly shaded and we use brown mulch. It holds its color really well, and we only replace it because it mostly gets washed away after two years. 

Best time of year to put mulch down

Hands down, the best time to put mulch down is in the spring.

Spring is when everything starts to bloom again which means two things:

  1. Weeds are also going to bloom
  2. Your yard needs to look its best

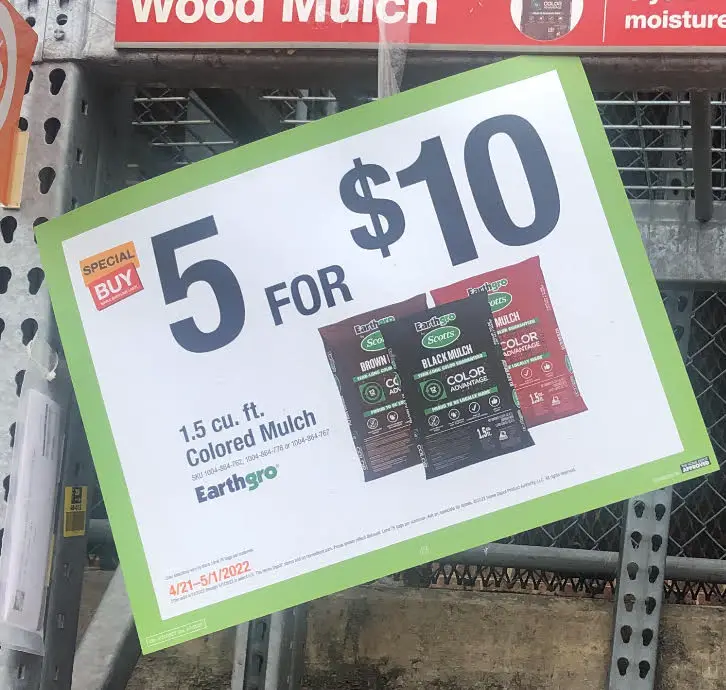
Mulch will help solve both of these issues. It is also when mulch goes on sale at Lowe’s for a great price, 5 for $10.

This is from Home Depot’s mulch sale, which happened at the end of April last year.

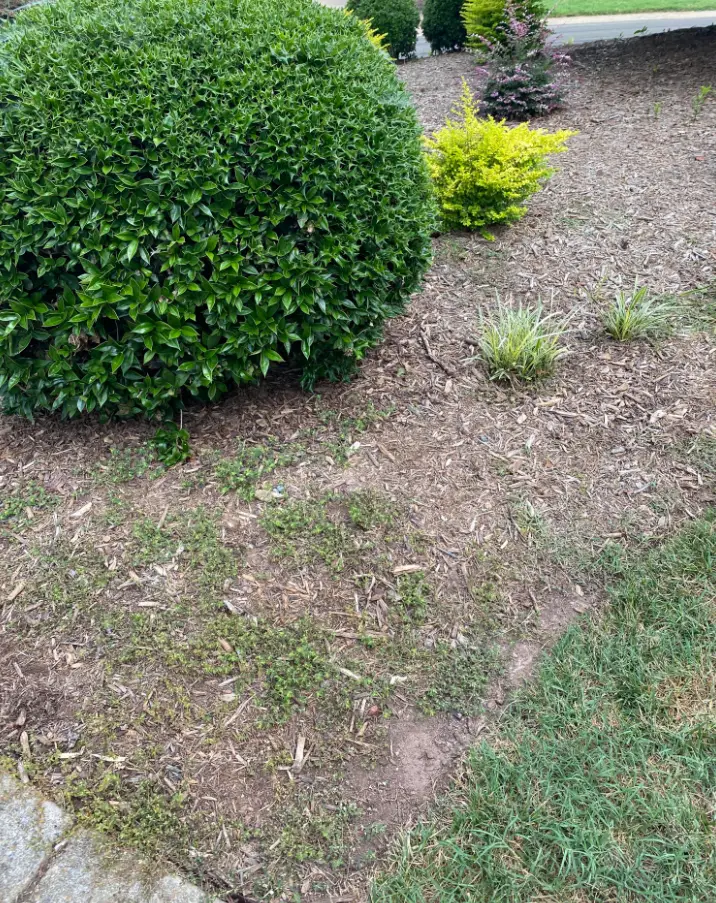
How to prepare your garden for putting mulch down

The easiest way to prepare to put down mulch is to keep one basic framework in mind – you want to put it down over dirt. Obviously, you still want it to wrap around bushes and plants, but essentially you want it to go down with nothing underneath but dirt.

A tiller like this can help dig up the soil.

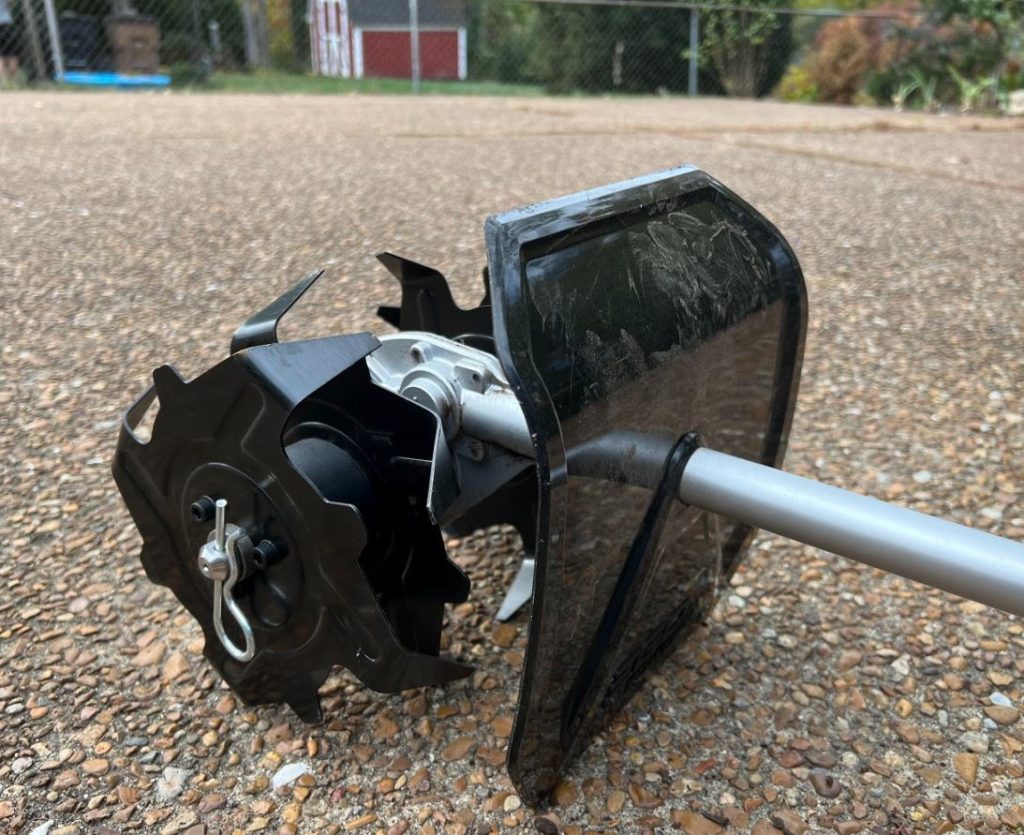
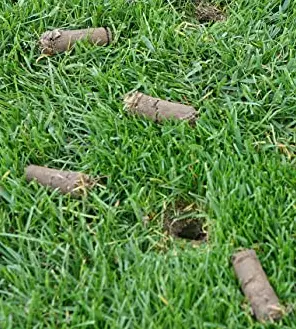
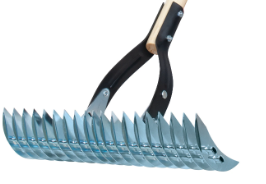
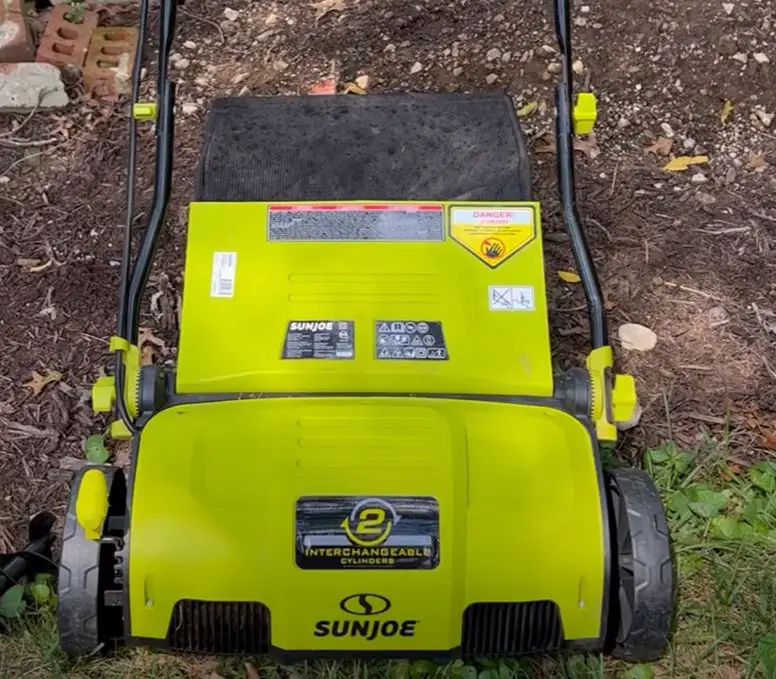
So to prepare your garden bed for mulch, make sure to clear out any grass and weeds. I do this in two ways: I use a weed killer spray like RoundUp to get rid of the weeds and then use a nice tiller to get any grass or dead weeds up.

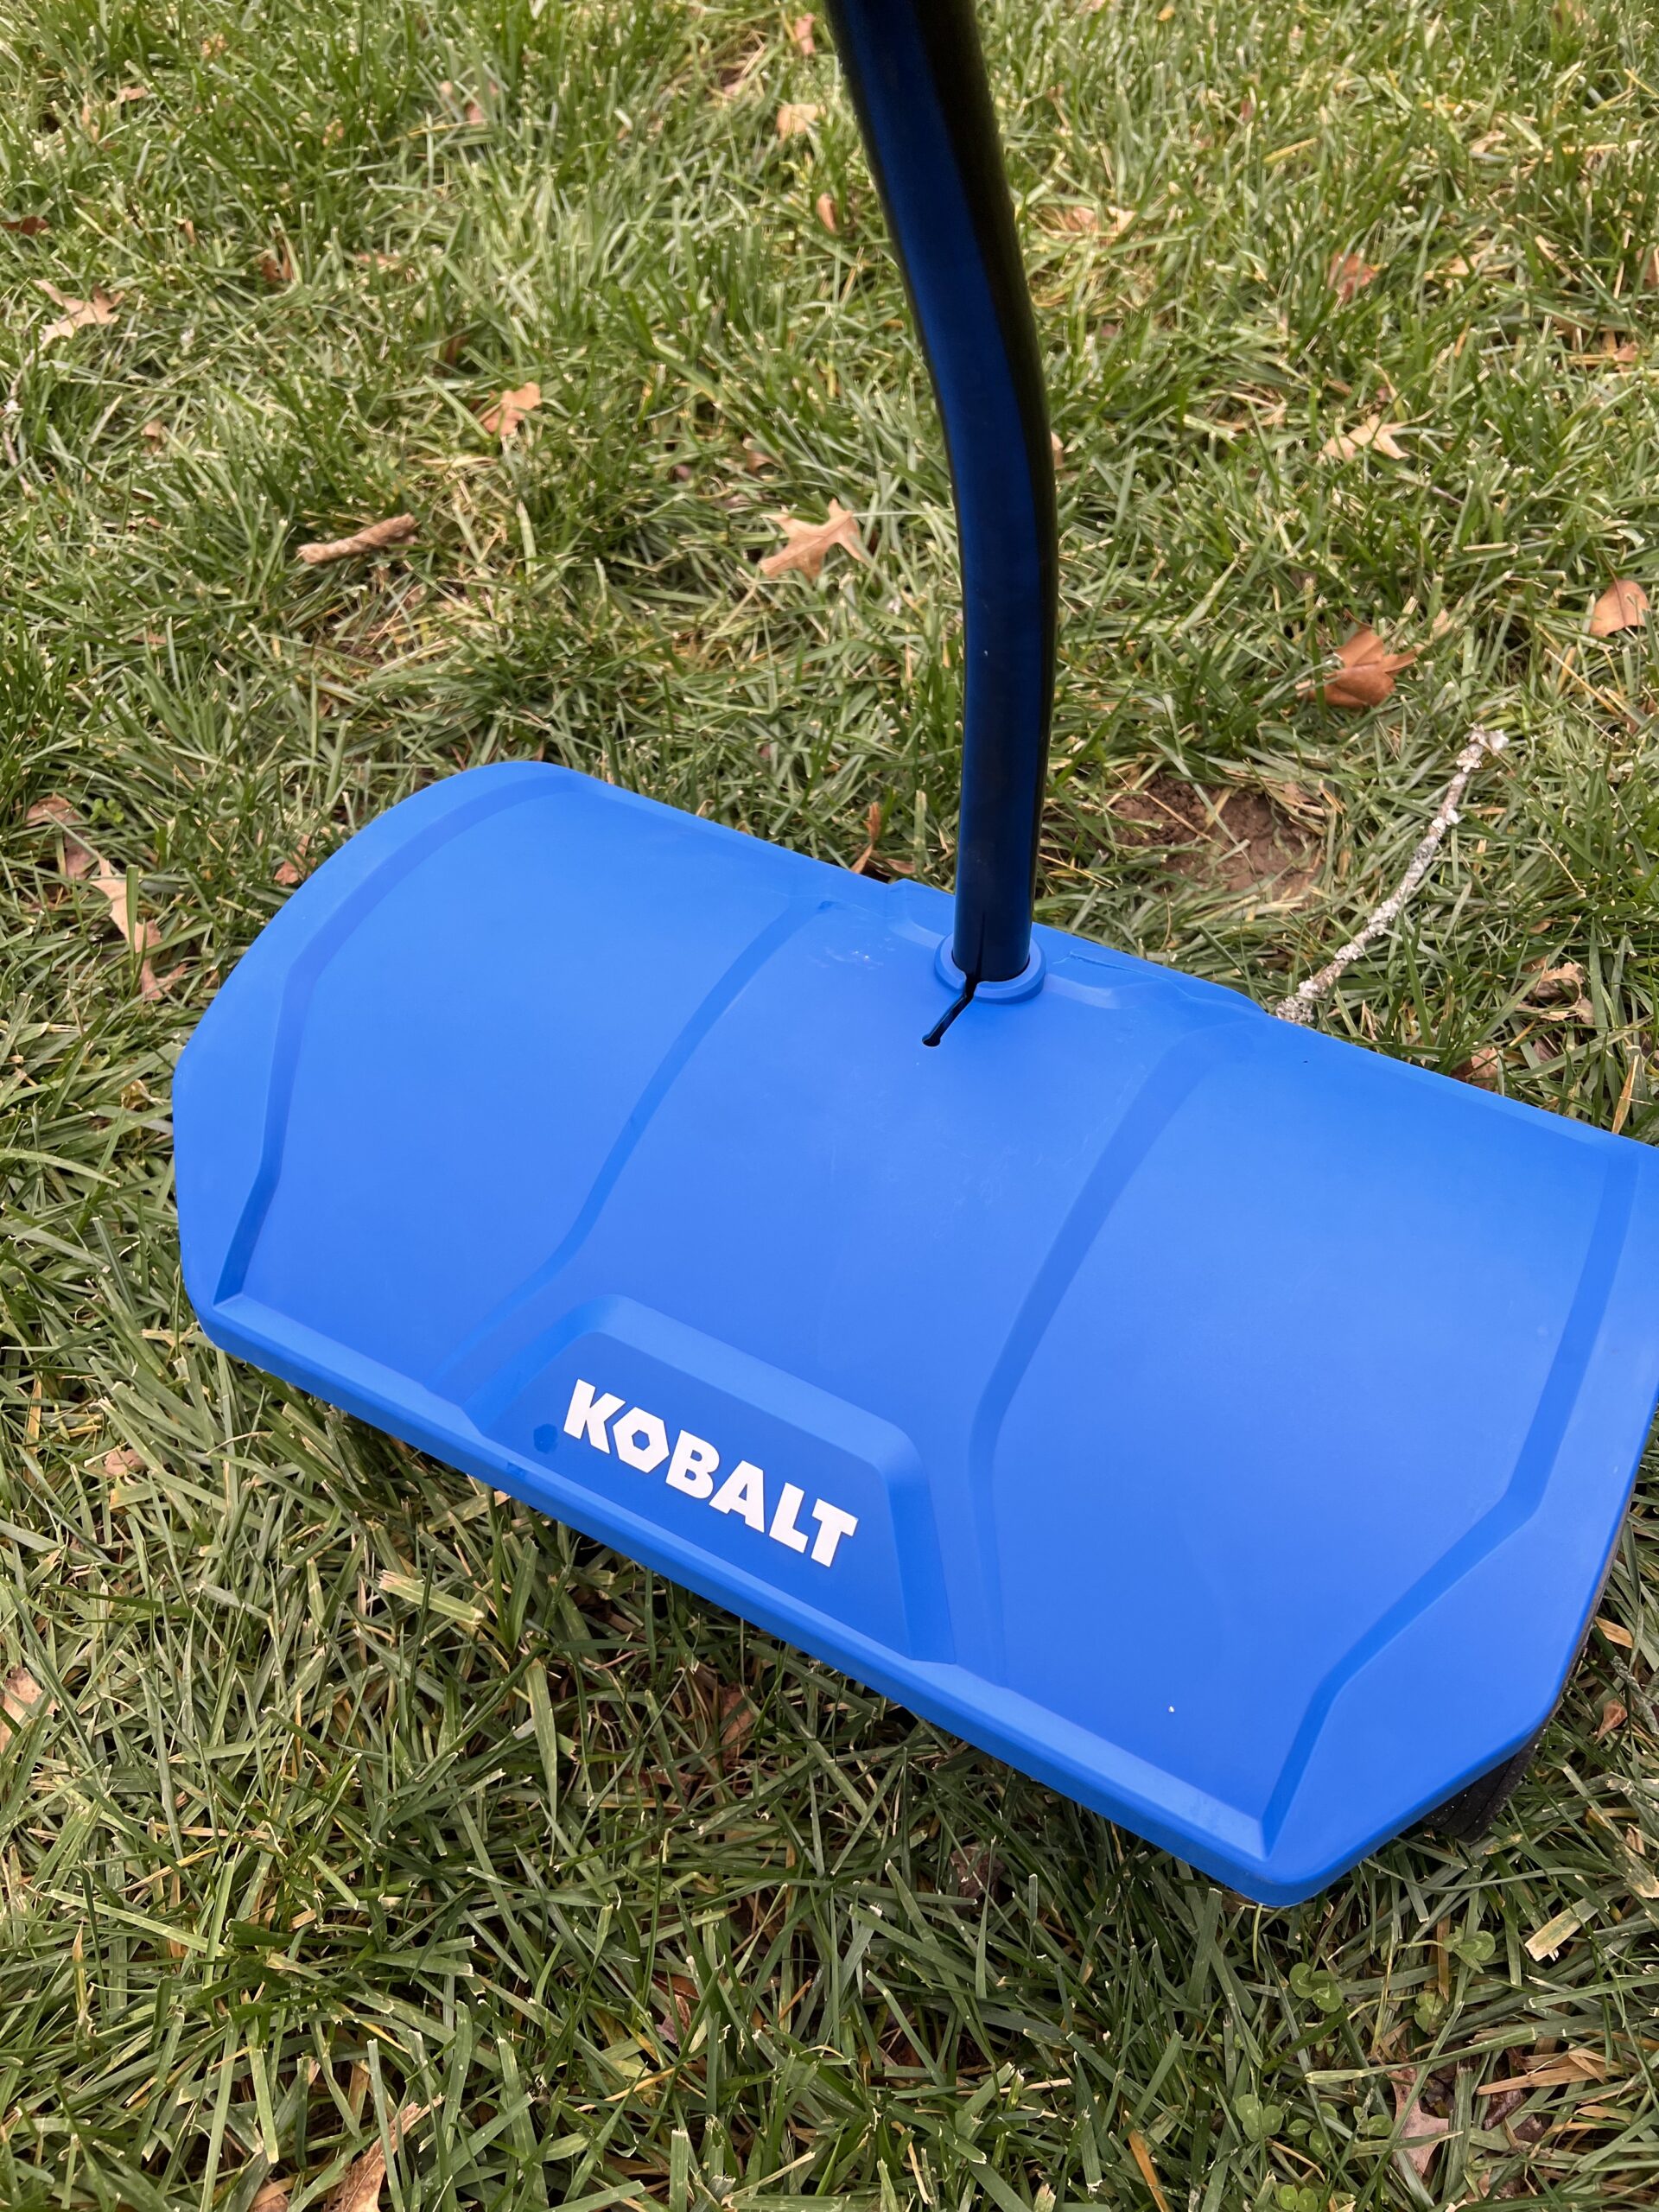
Lastly, I’ll do a quick rake and flatten the area. Nothing else is required.

I’ve heard stories about people putting down newspapers or tarps or other things and I don’t think it’s necessary. 

Remember:

  1. Remove grass and weeds (use weed killer if needed two weeks in advance)
  2. Till up the earth
  3. Rake the debris away
  4. Flatten it out with a rake

Best places to get mulch in 2024

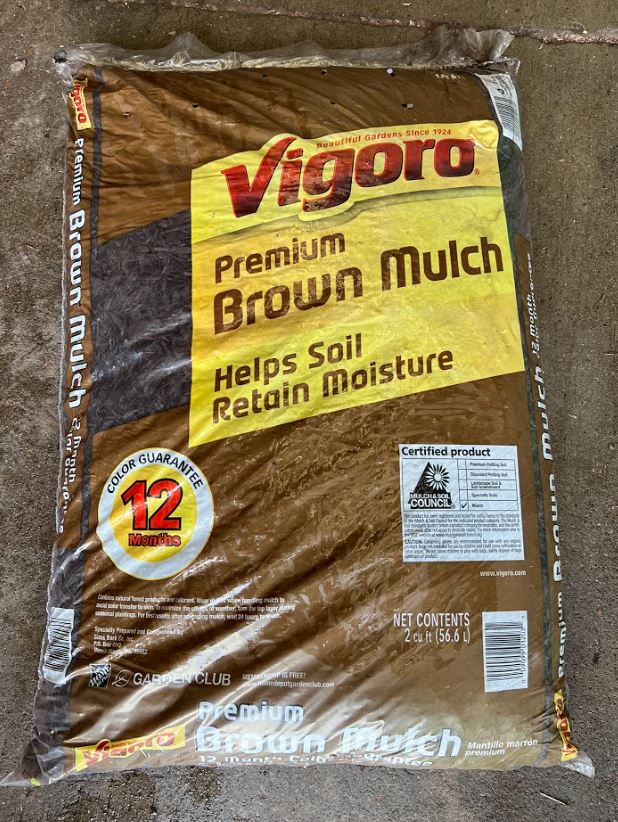
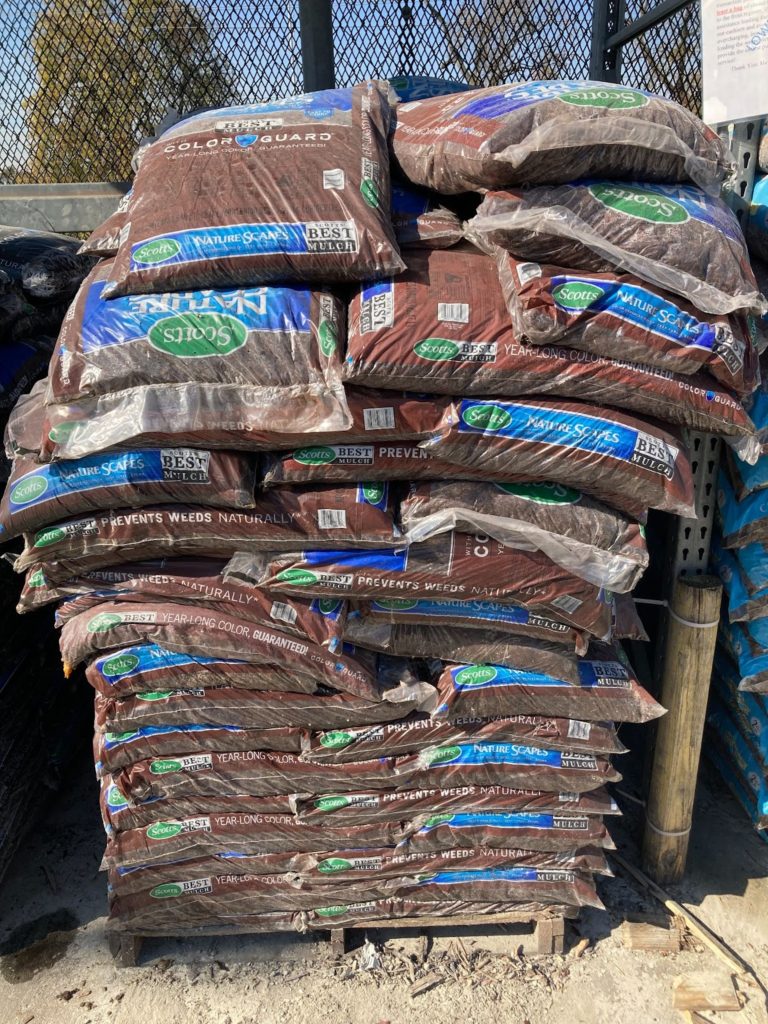
The easiest place to get mulch is to go to Lowe’s or Home Depot and grab bags of mulch. You’ll  likely have to make several trips if you have a smaller car.

Every year, Lowe’s has a 5 for $10 mulch sale and Home Depot has its own 5 for $10 mulch sale that can happen at random, but generally around the same time.

If you have a truck or trailer, you can also go to a nursery or landscaping supply center and pick up bulk mulch, which tends to be a bit cheaper. I’ve done both and found  that bags were an overall easier experience, whereas the bulk mulch seemed “fresher” and higher quality.  

Some nurseries will even deliver the mulch to your home – but if you’re doing this you might as well just spend a little bit more money and have a landscaping company do the whole thing.

How much mulch to buy

There are a few scientific ways to measure the area of your yard that can give you a precise answer, but this is more of an art than a science. Some areas may require a bit more than the standard 2 inch depth, others may require less. Basically, it won’t be perfectly evenly distributed no matter how hard you try.

But that’s okay! We can get as close as possible with a few guesstimates + 1, as I call it. The measurements of mulch bags are in cubic feet, so you want to basically divide by the number of inches to get an estimate. 

It’s confusing, so think of it like this: multiply the dimensions of your area in feet to get square footage. If you are buying 2 cubic ft bags, then divide that by 12 to get the number of bags. If you are using 3 cubic ft bags, then divide by 18. 

I always add an additional on top of that calculation for a margin of error. Worst case scenario, you’ve got an extra bag to cover up spots if an animal digs or rain washes away some of the mulch. 

Laying down bagged mulch: tips and tricks 

Okay – we have cleared the area and flattened it to our liking. We’ve picked up some mulch and we are ready to spread it. Where do we start?

If you’re buying bagged mulch, I recommend putting on some gloves and hauling each bag around to the garden bed and setting it down in the general vicinity of where you want the mulch to go. 

It will look odd to have a bunch of bags laying around, but it gives you a game plan for spacing the mulch bags out appropriately instead of going too heavy at the beginning and having to backtrack. 

Once you have the mulch laid out, go by each bag with a box cutter and cut it right down the middle, long ways. 


After it is cut, simply roll it over and smooth it out by hand. Once you’ve done this to all of your bags, take a light raking to the top and make sure it is all level. Fill in any gaps with the extra mulch bag I told you to buy!

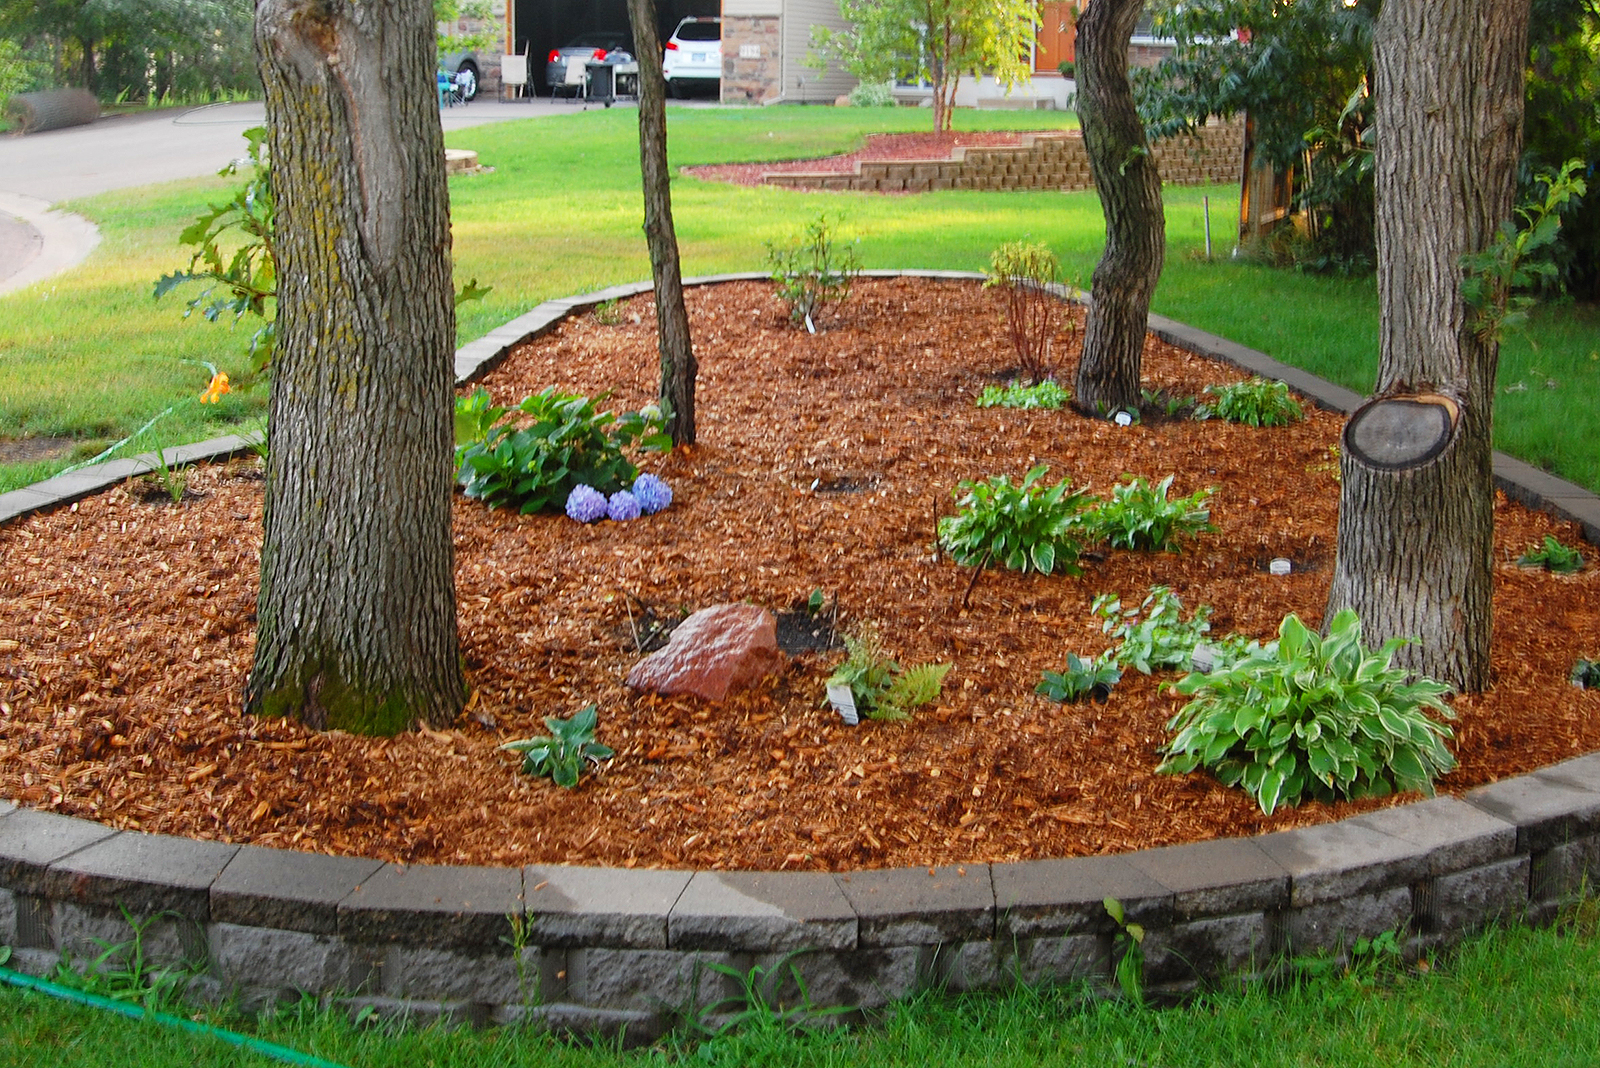
If you are mulching around a tree, you can use the backside of the rake or a pitchfork to leave a little “bowl” shape near the base of the stump. This enables easier water retention for the tree and is a nice little design.

In summary:

  • Lay out the bags evenly in the general vicinity of where the mulch will go
  • Slice open the bags and turn them over
  • Smooth them by hand
  • Give a gentle rake to the top to level out
  • Fill in any gaps

Laying down bulk mulch: tips and tricks 

Laying down bulk mulch is pretty similar to bagged mulch, but you have to do a bit more work. This past year was my first time using bulk mulch and it was quite the workout.

The fastest way to move the mulch!

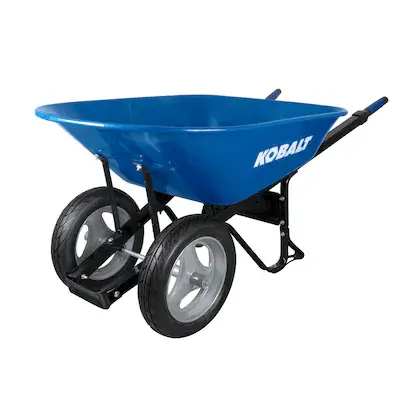
After picking up the mulch in my truck, I then brought it home and started loading up a wheelbarrow. I then took the wheelbarrow and dumped it out in spots I thought would be equidistant for spreading the mulch around.

It took probably 20 trips with the wheelbarrow, but I got it done. My wonderful wife was the spreader, going behind each wheelbarrow-dropped mulch mound and spreading it around by hand. At the end we had a ton of mulch left over (enough to fill a garbage can, which we kept) and then raked the mulch to be completely even throughout. 

Here’s the high-level recipe:

  • Unload the bulk mulch with a pitchfork or shovel  into a wheelbarrow
  • Wheel the mulch to specific spots in the garden and dump it there
  • Make sure to evenly space out each mound that you dump
  • Level it by hand
  • Then level it with a rake

Common questions we get about mulch

Believe it or not, we get a lot of questions about mulch. We started compiling some of the most common and have answered them below:

Do you need to water mulch after putting it down?

Some people suggest watering mulch after putting it down can “settle it”, but I have found that it just speeds up the color deterioration with each watering. I leave mine alone.

How thick do you need to lay down mulch?

Mulch should be around 2 inches thick when laid down.

Do I need to remove old mulch?

You don’t HAVE to remove old mulch, but you’ll find that after about 10 years of laying mulch down in the same spot that you have created a big mound.

It’s a good idea to remove the mulch every 5 years or so to start fresh and level the ground out again.

How much does mulch cost?

It depends. If you get mulch in bulk, you can get it for about $1/cubic ft. If you get mulch in bags, you can get it for about the same price, but only when mulch is on sale at Lowe’s or Home Depot has a mulch sale. The rest of the year it is usually between $1.50 and $2.

Do you have to put something down under mulch?

Some folks will lay down a plastic sheet or tarp underneath the mulch to prevent weed growth further, but I’ve never had much success with these. They have been more trouble than they are worth. 

What do you use to spread mulch?

I use my hand for the initial spread, then finish it off with a light rake at the end.

How much do landscapers charge to put down mulch?

It depends, but on top of the cost of the mulch it will generally be about $150-200. All in you’re looking at $300-500 depending on the size of the job. 

How often should I put down mulch?

Put down mulch yearly if you live in an area with a lot of rain or direct sun, otherwise every other year will work well.

Why we write about mulch

We started The Lawn Review out of frustration. We couldn’t find clarity around what type of products were actually good and reliable. All the fertilizers we tried didn’t work. We ended up with a dying lawn, wasted time, and wasted money.

We take lawn care seriously!

So we started buying and reviewing lawn tools and figuring out which ones were the best. And now we’ve moved onto actually keeping that lawn looking nice all year around. 

We’ve spent thousands of hours building this content for people just like you and me – normal people.

How To Take Care of Your New Sod Lawn (2024 Update)

Caring for a new sod lawn is an extremely nerve-wracking experience. Sod is expensive and looks great, but can easily fail.

If the sod fails to grow and incorporate into the underlying soil, you are left with a huge mess. 

My neighbor recently had to pull up his old sod lawn and it was an absolute nightmare. To add insult to the injury of losing his investment, he had to pull up all the old plastic mesh that was stuck in the dirt. 

Yikes.

Let’s avoid that at all costs. 

Today, we are going to talk through exactly how to take care of your new sod lawn to make sure it thrives for years to come.

Let’s get started:

The Basics: Why Sod Lawns Are Great

If you can successfully pull off a sod lawn transplantation, then they are by far the easiest way to get a nice looking lawn. Sod lawns are great because they immediately give you curb appeal with a luscious, green lawn. 

#goals.

Realistically, starting from scratch with just a plot of dirt and trying to grow thick grass is probably way harder than getting your sod to successfully stick. Starting from scratch involves tilling the dirt, leveling the lawn, watering, laying down fertilizer and seed, watering some more, and lots of prayer. 

When the grass does start to come in, it’s usually sparse and patchy. Then you have to start the process mostly over again. 

On the other hand, sod lawns instantly beautify your yard with thick, green grass. Work is still required to keep it there, but not nearly as much as a new lawn overhaul.

How To Prepare Your Lawn For Sod

Starting at the top, the first thing you want to do is to till up your yard. Yep, intentionally destroy that sucker. Using a tiller at about 2-3 inches will help pull up all the old, dead grass and weeds growing in your yard. It also has the benefit of bringing new soil up to the top, an extreme version of the yearly aeration process.

If you have grass and weeds pulled up from the yard that you just tilled, your next step is going  to be to remove everything but dirt using a rake. So go grab a wide rake and a wheelbarrow and haul off all of that junk.

May come in handy!

Once you have cleared out everything but dirt, you can use the same rake to make the lawn as level as possible. Some people use lawn levelers, but you can really get away with a rake and some elbow grease as long as you’re making the dirt relatively flat and even.

After you’ve got it level, you can lay down some lime and fertilizer. Most generic lime and fertilizers will be just fine to throw down without causing too much damage, but if you want to really skyrocket your chance of success then you can take a soil test. Soil tests will tell you the exact state of your soil which you can use to apply the perfect ratio of fertilizer.

If you’ve laid down the fertilizer, getting the soil nice and most with a sprinkler will help prime it to accept the roots from the sod. Make sure to do a nice sprinkle right before laying down the sod.

To summarize:

  1. Use a tiller to dig up weeds and grass from your yard.
  2. Remove everything except for the dirt using a rake.
  3. Level the lawn using the same rake or a lawn leveler.
  4. Lay down some lime and fertilizer.
  5. Keep the soil moist.
  6. Get ready to go.

How To Take Care of New Sod

It’s a great day!  Your lawn looks picture perfect and the sod is completely down and ready to thrive, right? Right?

Not quite. While the sod looks perfect, it is going to take some work to keep it that way. It’s almost like getting flowers for your wife. They look great, but without water they are going to wilt quickly. It is way more complex to keep it not only alive and green, but truly healthy to survive year after year. 

Watering Your New Sod Lawn

The first thing to do is to let these puppies drink. Give them water! Most folks recommend that you water twice per day for 20-30 minutes. I would go even a little bit less time, 10-20 minutes, but watering multiple times throughout the day, like 4-5 times.

We recommend watering for 10-20 minutes, 4-5 times per day. The difference is all about getting the roots to dig deep. In order to have roots that get deep, they can’t get rotten or diseased by being overwatered. Overwatering will result in fungus and deprive the roots of vital oxygen that they need in the first few weeks for survival.

Be diligent about this!

Our conventional recommendation for someone overseeding their lawn would be to water for 50 minutes, once a day. But that is advice for well established lawns with complex root systems. The longer, the better with those. 

Also be sure to water every day for the first week, then slowly pull back the number of days you are watering each week. Still maintain the 10-20 minute watering time, but 5 days a week the second week, 4 days a week the third week and then finally 2-3 days a week by the fourth week.

Check out our ultimate sprinkler guide.

Should you fertilize new sod?

Once you’ve watered religiously for a month, you can put down some fertilizer. Most basic fertilizers will get the job done, but we are going to recommend a nice soil ratio of 18-24-12, which is notorious for developing deep roots. You can get this from anywhere, but we recommend Anderson’s fertilizer, which you can get from Amazon for a great price.

If this process looks and sounds familiar, it is very similar to the initial overseeding process done after your yearly aeration process. The principles are really the same. You want deep roots. 

One of these broadcast spreaders will help you lay it down.

Know When To Mow New Sod

Honestly, don’t even think about mowing for the first few weeks. You’ll notice the grass looks good at first but will wilt a little bit. Putting violent spinning blades over the top of this delicate transplant will only make things worse. 

Once the lawn has perked up a bit and you have watered religiously, then you are good to mow. This generally falls at the 3-4 week mark. If you want, mowing and fertilizing can happen back-to-back. 

Use a nice lightweight mower for extra care.

As you should basically always do, crank the height up on your mower all the way to the top – especially for the first few mows. Make sure when you do mow, that the grass is completely dry and there are no mushy areas. If you’ve patched parts of the sod lately, leave those alone with the mower. 

Summarizing this:

  1. Water for 10-20 minutes, 5 times per day, progressively tapering a day off each week.
  2. Fertilize your lawn at around the four week mark with an 18-24-12 fertilizer ratio.
  3. Mow at the 3-4 week mark.
  4. Try to stay off of the grass during this time.

I also recommend not to use an edger during this time. Let the roots totally sink in around the border of the grass, even if it starts to look messy. Once you have full confidence that the roots are deep, then you can start to beautify.

Remember, the health of your lawn is always more important than the appearance of your lawn. Just like with teeth. Don’t let it get to your head.

How Long Will It Take For The Sod To Root?

Typically 2-3 weeks is when you can feel confident that your sod has taken root. During cooler months, you can expect 4-5 weeks for the roots to become established.

If you try to rush the process you can put the whole yard at risk. Roots will begin to start digging after about a week, but are extremely delicate until the 2-3 week mark.

Why Is My New Sod Turning Brown?

New sod turns brown when it lacks water. Proper watering, 4-5 times per day for 10-20 minutes will help recover the sod. 

If you see ALL of the sod turning brown, it is likely a water issue. If you are seeing brown spots, it could be any number of things including dog urine, fungus, or overwatering, although all of these are less likely to occur than all of your sod turning brown from dehydration.

How Long Should You Stay Off New Sod?

Try to keep animals, children, and yourself off of the new sod lawn for at least 3-4 weeks. This is a critical time period to make sure that the roots become  established. 

Why we started this site

We started The Lawn Review out of frustration. We couldn’t find clarity around what type of products were actually good and reliable. All the fertilizers we tried didn’t work. We ended up with a dying lawn, wasted time, and wasted money.

So we started buying and reviewing lawn tools and figuring out which ones were the best. And now we’ve moved onto actually keeping that grass nice and healthy all year around. 

We take this stuff seriously!

We’ve spent thousands of hours building this content for people just like you and me – normal people.

What Is Dethatching? Ultimate How-To Guide (2024)

Dethatching is one of those things I had never heard of before I owned a home. In fact, I didn’t even know what thatch was.

But once my lawn went from green to yellow after a few years of the same old fertilizer and aeration treatment, I started to get confused.

Why was I getting worse results after doing the same thing year after year?

That’s when I found out about dethatching – and more importantly – electric dethatchers.

Why you should let your soil breath

Lawn thatch is basically a bunch of old, dead grass and weeds that takes a while to decompose. The way that I realized I had too much thatch in my lawn was when I took my six month old daughter into the yard. She started clawing at the ground and pulling dead grass out of nowhere. 

Thatch from our yard.

While she is an inexpensive dethatcher, there are child labor laws that prevent me from cutting her loose on the whole lawn (kidding).

Anyways, lawn thatch can essentially waterboard your lawn – blocking sunlight and nutrients from getting to the soil and choking your grass to death. 

In small quantities however, thatch can have insulator-type qualities. Think of it like you think of mulch. Mulch has great protective qualities for keeping weeds at bay. Too much mulch that isn’t replenished starts to decay and become harmful to surrounding plants. 

So…what should you do about it?

How it works

Dethatching is the removal of thatch from the top surface of your soil. When dethatchers remove thatch from the surface of your lawn, it opens up the lawn and allows it to breathe. 

A couple weeks after dethatching and overseeding.

I know you may think this doesn’t make a difference, but you would be surprised to see how much thatch comes out of your lawn.

Ever used one of those things that cleans out your ears? The amount of wax that comes out is crazy and changes you forever.

The same thing is true of dethatchers. Whenever I use one, it makes me feel like I have been holding my breath for years and finally get to breathe.

When to dethatch – Fall or Spring?

Hopefully you won’t have to wait as long as I did to realize what was going on in the yard. It’s actually pretty easy to tell when you need to dethatch your lawn:

My neighbor DEFINITELY dethatched this year.
  1. You can wait and slowly watch your lawn die (not recommended)
  2. Your lawn retains water well after you think it should have evaporated
  3. You notice more weeds and/or mushrooms in your lawn
  4. The lawn is becoming unseasonably yellow
  5. Your lawn looks like it has male pattern baldness

If you’re not sure or are feeling paranoid, feel free to go out and dig a nice little cross section of your lawn. You’ll be able to see how deep the thatch goes. 

If you have a decent layer built up in your yard and you see more than a quarter inch or so on top of the soil, it is time to dethatch.

We wrote a great long post about the best time to aerate and overseed your lawn as well.

The difference between dethatching and aerating

Dethatching and aerating are commonly mixed-up lawn care processes. Both involve removing things from your lawn and you really do them in tandem.

But dethatchers are simply focused on the top layer of soil in your lawn. They are helpful to allow nutrients, sun and water reach the top of the soil, but are really skin-deep. Dethatchers do not get into the soil themselves.

Using a core aerator after dethatching.

On the other hand, aerators pull up chunks of soil that almost look like dog turds. This allows for the soil to open up, become less compact, and essentially mix together. The aeration process pulls plugs from the soil to the top of the lawn.

Don’t freak out! These are soil plugs from aerating.

 Both are done around the same time of the year in this order.

  1. Scalp your lawn and get the grass super short, being sure to bag it.
  2. Dethatch your lawn thoroughly, being sure to get all the thatch off the surface
  3. Use a core aerator on your lawn to pull up plugs
  4. Overseed
  5. Water (2x/week for 50 minutes on each area)
  6. Enjoy!

Types of dethatchers

The O.G. lawn dethatcher is a lawn dethatching rake. Which looks like a normal rake but is more intense. 

Not an ancient torture device, but a manual dethatcher.

This rake can help pull up all of the thatch and works well.

But it is a back destroyer. It’s like shoveling for snow except the snow is all ice and your shovel is made of plastic. 

You can make the process WAY faster, remove more thatch, and not be bed-ridden for the next week by using an electric dethatcher.

Electric dethatchers work by basically looking and operating like a push mower, but underneath there are small tines that dig up the thatch and bring it to the surface of your yard. Electric dethatchers are some of the most satisfying tools on the planet and are addictive.

Most electric dethatchers are corded electric tools, but newer battery-powered dethatchers are coming into the market. These aren’t super common tools right now, but I imagine most folks will have an electric dethatcher in the next few years.

Recommended electric lawn dethatchers

We at The Lawn Review have had the distinct pleasure of using lawn dethatchers ourselves. 

We’ve written extensively about the Sun Joe corded electric dethatcher and used it in our ultimate fall lawn care routine YouTube video

We also reviewed it in a single long-form YouTube video if you want to learn more.

Basically, the Sun Joe dethatcher is an affordable electric dethatcher that works really well. I believe they recently released a battery powered lawn dethatcher, which we haven’t used but are interested in trying.

The Sun Joe electric dethatcher we used.

You can find the corded Sun Joe dethatcher on Amazon as well as the new cordless Sun Joe dethatcher.

Greenworks also has a corded electric dethatcher. We liked this one as well, but didn’t love that it came without a collection bag. It is a great budget-friendly electric dethatcher, so I highly recommend it as well. You can get the Greenworks electric dethatcher on Amazon for a great price.

Kobalt electric dethatcher.

Frequently Asked Questions

We get these all the time from people considering dethatching their lawn. This will be an ongoing list collection, so if you have any questions, feel free to let us know.

What is lawn thatch?

Lawn thatch is a layer of dead and decomposing grass between your soil and grass blades. It is okay in small quantities but can also prevent your lawn from thriving.

What is lawn dethatching?

Lawn dethatching is the process of removing dead grass stuck to your soil in order for your lawn to receive better nutrients.

What’s the difference between dethatching and aerating?

Dethatching is the process of removing dead grass from your soil, whereas aerating pulls soil from the ground on top of your lawn. Both are important parts of your lawn care cycle.

What’s the difference between a dethatcher and a scarifier?

Dethatchers and scarifiers often work together to pull up thatch from your grass. Scarifiers are blades that cut up and loosen thatch while dethatchers physically pull it from the grass.

How often should I dethatch my lawn?

Totally depends on your environment. For folks that get a lot of snow, I recommend dethatching yearly to pull up all the grass that got killed underneath the snow.

For others in drier climates, once every few years might be enough. I know that I like to do it every year as part of my fall lawn care routine with cool season grass.

When is the best time to dethatch my lawn?

For those with cool season grass, early fall is the best time. For warm season grass, early spring.

What is better, aerating or dethatching?

Both are used in combination to prepare your lawn for overseeding.

Why we started this site

We started The Lawn Review out of frustration. We couldn’t find clarity around what type of products were actually good and reliable. All the fertilizers we tried didn’t work. We ended up with a dying lawn, wasted time, and wasted money.

We take this stuff seriously!

So we started buying and reviewing lawn tools and figuring out which ones were the best. And now we’ve moved onto actually keeping that grass nice and healthy all year around. 

We’ve spent thousands of hours building this content for people just like you and me – normal p

11 Types of Invasive Grasses in Your Lawn & How To Remove

Different types of invasive grass can do more damage than others, but all invasive grasses have one thing in common: they are incredibly annoying.

Don’t ruin this!

Whether you’re preparing your lawn for the first time, or just noticed some weird looking grass growing in your yard – we are going to figure out what type of grass is invading your lawn and what to do about it.

All that time you spent doing a soil test, getting the right fertilizer, watering, and preparing for the perfect lawn can get ruined overnight.

So, let’s get started identifying some of the common invasive grass species.

How to identify your grass type

If you haven’t signed up for our email list to get our full-year green grass guide, you’re missing out on amazing content like the infographic below. This is a great starting point for all grass care – knowing what you’re working with. Once you understand this, creating an action plan for getting rid of invasive grass species will be way easier.

From our year-round grass guide

Common Types of Invasive Grass in Lawn (with action plan)

What good is it knowing what type of invasive grass species is pirating your lawn without a proper action plan  to get rid of it? Imagine going to the hospital with a heart attack and they say “Yep, that’s a heart attack. See you later”. NO!

You came here for some solutions! 

Let’s get going.

Oh, and if you have ants in your grass, check out our guide on how to get rid of ants in your grass without killing it.

Nutsedge identification and removal

Nutsedge almost looks like a promising, overgrown natural grass that you would like, but turns into a beast that sticks out like a sore thumb. Because of how big and dense it is, it can totally wreak havoc on your yard if it is allowed to proliferate. 

Clemson University (garbage football school) recommends a few different methods for getting rid of it. One thing recommended to get rid of it is to dig 10 inches below the nutsedge and an 8-10 inch diameter around it. Certainly possible, but you might as well just dig another few feet and make your own grave with how much that would suck to do.

In reality, Clemson gives really good advice on how to handle it if you are very scientific and have the appropriate equipment. Our advice is to keep it simple.

Nutsedge almost looks good, then gets out of control fast.

How we recommend getting rid of nutsedge invasive grass

While Clemson’s mechanical method is a sure fire way to destroy your life, there are other options. The good news is that you can get a simple spray, which is what we recommend. The bad news is that nutsedge is extremely stubborn, so multiple applications and patience will be required.

Something you can grab at any Home Depot or even on Amazon is Ortho’s Nutsedge Killer for Lawns. It works with purple and yellow nutsedge and is extremely easy to use. 

Nutsedge
Clemson’s link for more info.

Crabgrass identification and removal

Crabgrass is an annoying late-spring annual weed that is characterized by a central base with stems branching out in a big circle around it. It can form little colonies or neighborhoods of grass and are extremely tough. If you’ve ever tried to pull a big one of these out of your lawn, you know just how difficult it is to completely get out. The central core tends to be very hearty and deep. 

These also do well in places like sidewalk and driveway cracks, which can be extremely annoying and difficult to remove. 

Super common, super ugly.

How to get rid of crabgrass in your lawn

The best offense is a good defense. During the course of your seasonal lawn care, make sure to apply a pre-emergent herbicide specific to crabgrass in the early spring or even late winter if you can. 

Even something really basic like a Scotts Halts Crabgrass can help minimize any crabgrass from getting roots in the middle or late spring. If it’s too late and you see it in your yard, use something easily accessible like a Roundup Crabgrass Destroyer.

Bermudagrass as an invasive grass

Unwanted invasive bermuda is the bane of my existence. I have fescue and live in a transition zone, so bermuda grass pops up at some point in the heat of the summer every year. 

Bermuda is a warm season grass and thrives in the heat of the summer under full sun. Many southern states have beautiful bermuda grass – especially big turf fields. But many of us find it to be more of a pest than anything. For me, bermuda shows up on the edges of my lawn during the summer, always ruining the perfect edges. 

Bermuda – in MY lawn!

How to get rid of unwanted bermuda grass in your yard

Once you’ve noticed bermuda growing in your yard, grab an easy BioAdvanced Bermudagrass control for lawns. This product is super easy to use and pretty dang effective if you have cool season grass. As a plus, it takes care of crabgrass, foxtail, and a few others. 

Clover as an unwanted grass type

Not talking about Lucky Charms – in fact you aren’t lucky at all if you get this. It is a perennial weed that is super common in America. The most common characteristic of clover is obviously the little leaves that people think are lucky, but also some small little flowers. 

Clover – remember making those crowns?

I have neighbors that don’t mind clover at all, but for those that are picky like you and me, we want to get rid of them ASAP as possible.

How to get rid of clover in your lawn

Clover is easy to fix because it is a tell-tale sign of an under-loved lawn. Your lawn needs better nutrients if you have clover. If you don’t know what your lawn needs, then take a soil test – don’t just guess and ruin your yard.

Step one is to do a soil test and fertilize your yard, let the good grass grow. Clover also has really shallow roots and is easy to pull out by hand. Lastly, spot treat the rest of your yard with something like a Bonide Clover Killer – this can help make sure it is gone for good.

Wild Onions are an invasive grass

If your lawn makes you cry, it may be because of the onions getting chopped by your mower. This cool season weed grows and forms little bulbs beneath the ground. They aren’t exactly onions but start to look and smell just like them. 

image credit: Clemson

You will see wild onions in your lawn most frequently in the autumn, when it starts to cool down a bit. Pulling these up is kind of a fruitless (or vegetable-less effort) because the bulbs will stick in the ground and just keep sprouting.

How to get rid of wild onion in the lawn

Luckily, wild onions aren’t all that hard to kill. There are great options like Ortho WeedClear – a simple product that covers a bunch of different weeds. A simple spray and pray will work here.

Quackgrass is a stubborn invasive grass

I had never known what quackgrass was until I had a friend ask me to write about it for this article. Quackgrass is a true pest. It is a cool season invasive grass that actually releases chemicals that hurt other plants. They grow super fast and are really aggressive.

Broad leaves make it super easy to spot. Photo cred: Purdue.

Maintaining a super healthy lawn is the best way to prevent quackgrass from coming – don’t give it any easy landing spots. 

How to get rid of quackgrass in your lawn

Quackgrass sucks. And sadly, there aren’t specific quackgrass killing sprays or solutions. The best thing on the market is good old fashioned RoundUp as soon as possible. Then again and again and again until it gets killed to death.

Green Foxtail invasive grass

Green foxtail is a summer annual that sprouts out really big and tall – almost up to a foot in length. It has these spiky hairs at the very tip which make it extremely easy to identify. You generally won’t see this in your lawn unless you really let it go. Maybe a spot that you miss when you mow – behind the shed or up against the house. 

Green foxtail’s distinctive bushy head.

You can cut them down, but they will continue to shoot out the long bristled endings.

How to get rid of green foxtail in your lawn

The best offense is a good defense of course, with applying a nice pre-emergent and nurturing your lawn throughout the year. But if you’re reading this, it is probably too late.

A nice broad spectrum weed control product will work, like good old fashioned RoundUp as mentioned earlier. Simple solution for a simple problem!

Dandelions – common weeds

Who doesn’t know what dandelions are? Probably one of the most famous weeds in the world (besides weed, of course) that everyone is familiar with. Not only the famous yellow characteristic flower, but also the dried out version that people make a wish with.

Photo cred: Clemson.

The all-star of the lawn weeds game doesn’t mean that you are happy to see them. They spread super easily and can actually be pretty ugly when they spread. 

How to get rid of dandelion in your lawn

Fortunately since dandelion is so common, it has a billion easy killer solutions. One of the most popular solutions is OrthoWeedClear – the same stuff you can use for clover (two birds, one stone).

Creeping Charlie removal guide

Creeping Charlie is a hard-to-tackle weed that is almost too pretty to kill. It has nice green, round leaves with purple flowers. It is closely related to mint, so actually has a decent smell as well. It won’t grow too tall and does best in shady areas and underneath trees. 

Photo cred: Wisconsin University

How to get rid of Creeping Charlie in your lawn

Creeping Charlie can be knocked out with something called Triclopyr Ester, which also works with clover and unwanted bermuda. 

Triclopyr is not the most popular lawn product in the world, but will definitely get rid of Creeping Charlie. There are some side effects, however. This product is not great for warm season grasses like Zoysia and Bermuda. 

Bluegrass – not the good kind

Bluegrass, when unwanted, is a confusing grass species that almost resembles fescue in its early stages. In fact, I had a friend send me a picture of some bluegrass and ask if his fescue was getting too long.

Kentucky Bluegrass.

Unfortunately, when Bluegrass starts to really grow out, it gets bunched up and grows these little fuzzy heads that stick out like a sore thumb. The fuzzy heads can really start to make your lawn look discolored and then it becomes extremely apparent that you have a problem.

How to get rid of bluegrass in your lawn

The best way to get rid of bluegrass is with a simple spray of RoundUp – the easiest and most common herbicide on the market. The trick with RoundUp is to make sure to apply it when its nice and dry outside without a threat of rain. Otherwise, it will wash right off.

The Bottom Line on invasive grass types

One common thread you will see in each of these weed control methods is to play defense. The best way to prevent weeds and invasive grass in your lawn is to apply a pre-emergent, continue to water your lawn, mow regularly, and make sure your grass is as healthy as can be. Proper aerating and overseeding at the right time of the year is important as well. Crowd out the bad with the good. 

Kind of a good life motto as well.

Why we started the Lawn Review

We started The Lawn Review out of frustration. We couldn’t find clarity around what type of products were actually good and reliable. All the fertilizers we tried didn’t work. We ended up with a dying lawn, wasted time, and wasted money.

We take this stuff seriously!

So we started buying and reviewing lawn tools and figuring out which ones were the best. And now we’ve moved onto actually keeping that grass nice and healthy all year around. 

We’ve spent thousands of hours building this content for people just like you and me – normal people.

Ultimate Guide to Getting Lawn Stripes (2024 Update)

Lawn stripes: more elusive than Bigfoot. I want them. You want them. Everybody who takes pride in their lawn wants them. I’m going to show you how Lawn Striping your yard is not only possible, but likely easier than you think.

This fella got creative with his lawn stripes – I love it.

I know the Bible says to never envy your neighbor’s house, but they didn’t have grass in that region of the world at that point, so I doubt that applied here (Lord, forgive me for these awful jokes). Those gorgeous contrasting shades of light and dark green that throws me into an envious rage each time I pass ole Jeff’s house at the corner of my street. Clean and professional.

What if I were to tell you it’s not as hard as it looks? I can’t promise your front yard will look like Fenway park in the middle of June, but I can provide you some easy tips to help accentuate those lines and make your lawn the envy of the neighborhood.

Let’s get going:

What causes lawn Stripes?

There are 2 main drivers behind the appearance of lawn stripes – light and direction the grass is laying. When your grass is laying towards you, you see the dark pattern, and the light pattern comes when the grass is laying in the opposite direction of you. It’s actually pretty simple if you think about it. You mow one direction, and the grass lays down in the direction that you are moving the mower. Go back the other way, and you’ve got your contrast.

Achieving the basic lawn stripe pattern is easy. All you have to is mow in opposite directions. Below I’ve provided some simple steps that can help bring those lawn stripes to the next level.

Dreamy!

First thing’s first – Types of Grass

The type of grass that brings out the best contrast between stripes in your lawn is a hotly debated topic. The experts at NASA have concluded that cool-season grass accentuates the lawn stripes the best. What the heck is a cool-season grass? Your fescues, bluegrass, and ryes to name a few. Warm-season grasses like Bermuda and Zoysia have stronger and stiffer blades that stand up more quickly, causing that initial striping that you see after mowing to fade away quickly. One obvious rule of thumb: the flimsier the blade of grass, the more profound the lawn stripes.

This isn’t to say that you can’t get stripes out of warm-season grasses like Bermuda or Zoysia, its just a little bit tougher and short-lived.

Brother-in-law has mastered the slanted checkerboard with Tall Fescue!

Sharpen lawn mower blades for best lawn stripes

A common problem we see in lawns is the light haze that can occur a couple days after mowing, causing those stripes to fade more quickly. This is caused by the tear on the grass from the previous mow, and the edge of the blades of grass looking jagged, rather than cleanly sliced. Best way to avoid this common peril is to sharper your mower blades at least 3 times a year. Good rule of thumb for when to sharpen each mowing season? Memorial Day, Fourth of July, and Labor Day.

Keep those blades sharp as samurai swords!

Water Helps the grass grow back stronger

One additional hack to help bring out the stripes in your lawn – water directly after you mow. The droplets weight down the grass blades and help emphasize the difference between light and dark in your lawn. The water dies, and the blades stay in their position. Might sound pretty trivial, but it has made a huge difference in my lawn. It’s an easy task that you need to do anyways, so why not knock out 2 birds with one stone?

Ditch the Bagger on your lawn mower

The biggest misconception I hear about when it comes to lawn stripes – bag the excess clippings to increase the appearance of lawn stripes. This has very little to no affect on the appearance of your lawn and deprives it of valuable nutrients that come from the mulching process. The excess clippings break down and create a thatch layer rich in potassium, nitrogen, and phosphorus to name a few.  Natural fertilizer!!

The only time it makes sense to use a bagger is if you’ve let your grass grow too high. I know, it happens to the best of us. If you start off without the bagger and are seeing big lumps of grass clippings laying on the surface, then it might be best to use the bag for that one time. But constant bagging, week after week, deprives your lawn of rich nutrients and natural fertilizer that your lawn needs. And its free!!

To get lawn stripes, you need a lawn striping kit

A striping kit is basically a roller that latches onto the back of your mower, that helps push those blades of grass down even further. This is what the major ballparks and sports arena’s use that basically make your lawn look as if it’s been painted in 2 shades of green.

Below, I’ve highlighted some of the best striping kits on the market for the most popular mowers out there. Most of these kits are after-market, and are not produced by the mower manufacturer. Why is that? Because they’re scared to get into the game.

Toro lawn mower striping kit

One of our favorite mower manufacturers, and one of the most popular brands in the market, is Toro. If you’re a fan of TLR, you’ve probably seen our Toro Recycler 22” or Toro TimeMaster 30” reviews. Toro is one of few mower manufacturers who actually sell a string kit that can be easily installed onto your mower. Below I’m listing out some links that can help bring your lawn striping skills to the next level on your Toro walk-behinds.

Check this striping kit out designed for a Toro 21-22” walk-behind

Or this one, for installation on a Toro 3” walk-behind

Big League Lawns:

Unfortunately, most of our favorite mower manufacturers don’t yet offer any lawn striping kits or rollers for their mower products. But do not fret, secondary manufacturers have picked up the slack and provided some great aftermarket alternatives that get the job done. Our favorite? The CheckMate from Big League Lawns. They make striping kits that easily attach to the most popular mowers on the market. Each one of the CheckMate lawn striping kit’s costs around $110 plus shipping, which in my opinion, is well worth it.

Check out any of the striping kits below for your lawn mower of choice:

Checkmate Striping Kit on a Ryobi 40V

How to make your own lawn striping kit

Want to impress your wife? Build it yourself!

I haven’t given this a go yet, but I understand the there are some awesome step-by-step guides out there if you’re looking to go the DIY route to achieve those beautiful lawn stripes. If you’re anything like me, you’d like to try out a home-made version before splurging on a >$100 striping kit.

Check out this guide if you’re interested in making your own striping kit!

Final Thoughts on Lawn Striping

If you’re looking to take your lawn to the next level – lawn striping is the how you can do that. Whether you build your own, or plan to buy from one of the manufacturers I laid out above, it can make a huge difference in the appearance of your lawn and the contrast between stripes.

Start with the easy stuff like sharpening your blades or watering after each mow. If you’re wanting those beautiful candy-cane stripes like you see on the diamond – a striping kit might be your best bet. Take charge of your lawn and get creative with your lawn stripes!

Why we review lawn tools

The reason we started this website in the first place was because we had so much trouble trying to find reasonable, understandable, honest reviews for lawn equipment. And it’s not cheap! After hours and hours of research, trying products and returning them, and messing up our yards – we started this site.

We take testing to extreme measures.

As people who had to learn the hard way – we are here for you.

My Experience Using Milorganite Fertilizer (+ Secret Weapon)

Milorganite Fertilizer is one of the most popular fertilizers available on the market. Having good soil is absolutely ESSENTIAL for having a beautiful lawn.

Bottom line on Milorganite Fertilizer: Milorganite is a tried and true fertilizer that works just about anywhere on just about anything. You can grab it for a great price from your local hardware store or on Amazon.

How do you get good soil you ask? One of the best ways is to fertilize! Let’s check out one of the best products:

Milorganite has an amazing reputation for quality

Milorganite is an OG of the fertilizer world. This stuff has been around almost 100 years and there’s a reason! It works.

Essentially Milorganite is a bunch of dead microscopic bug things that ate a bunch of crap out to the water in Lake Michigan. The company takes these little bug things and kills them, then dries them out and packages them in pellet form. (Super dumbed down version but that’s basically it.)

We took this picture right before we picked it up.

These dead bugs are PACKED with nutrients that are like Wheaties for your lawn, flowers, shrubs, trees, vegetables, etc. Like the Frank’s Red Hot commercial says, “I put this S** on everything!” Just don’t eat it. Well actually you kind of can eat it because you can use it in your vegetable garden. But don’t eat the actual pellets, silly. 

It’s also great for use during the summer fertilizing season.

Is Milorganite fertilizer safe?

Milorganite is safe to use. Not only has Milorganite been around longer than the dinosaurs, it’s also subject to strict environmental control regulations. It complies with all the state, local and federal regulations. There is essentially nothing fake in this product, no synthetics, salt or other mined resources. It’s basically just dead microbes. Because it has nothing added to it (LIKE SALT) it won’t burn up your yard or harm newly planted landscaping.

Photo cred: Utah State

Milorganite is also pet friendly! I can’t tell you how many times my wife has worried about our dog, Bella, eating up the fertilizer I apply to the yard. (And honestly she does). I can sleep easy at night knowing this stuff won’t poison our family pup. It might make your dogs stomach hurt or ruin a carpet if ingested but it shouldn’t kill them.

How does Milorganite work?

Milorganite is a slow releasing fertilizer, so in addition to not burning up due to salt additives, it also won’t damage plants because it doesn’t decompose into your lawn all at once. It continues feeding for 2 to 3 months after application.

This slow release system also is good for mother nature. Unlike some fertilizers, the slow release does a pretty good job at preventing it from being released into the groundwater. Like I said earlier, the key to a healthy lawn is healthy dirt! 

How to apply Milorganite Fertilizer in your lawn

To apply Milorganite Fertilizer on your lawn, I highly recommend using the Scotts® Turf Builder® Edgeguard® DLX Broadcast Spreader. Depending on your lawn size, dump a bag of this stuff into the hopper of your spreader and adjust the disbursement setting on the edge of the hopper to whatever the bag recommends. It’s a big orange knob. You can’t miss it.

Looks like this!

Then pull the handle on the broadcast spreader and walk around your yard just like if you were mowing. Maybe a little more spread out than you would if you were mowing but in a similar pattern. Just make sure you’re getting some overlap of pellets on every pass.

Similar process as Scotts turf builder

A 32 lb bag should cover a 2,500 sq ft lawn. My yard is about 10,000 sq ft so I need about 4 bags per application. 

You really should fertilize four times a year if you want that deep rich green lawn. Think a meadow in Ireland or something. This stuff will make your lawn look GOOD. You really can’t use too much unless you go crazy with it. Remember it’s slow releasing so I tend to use a little bit more than they recommend. I apply on the holiday schedule, Easter, Memorial Day, Labor Day and Halloween. But it depends on where you live. Check out the calendars below to help you out.

Application instructions for Milorganite fertilizer for cool-season grass.
Milorganite Fertilizer instructions for warm-season grass.

Milorganite Fertilizer Review: Recommendation

Before I’d tell you to go buy a new mower, I’d tell you to buy this stuff. It truly is the foundation you’ll build your lawn kingdom on. You simply cannot have a lush, beautiful lawn that makes your neighbors do a double take without healthy soil. Trust me. You’ve got to be religious about fertilizing. Four times a year. Every year. FOREVER.

The certainties in life should be death, taxes and fertilization. A bag of it will run you about $30 on Amazon or at Home Depot. So for you Dave Ramsey budgeters, plan on spending about $240 a year on it. So yes, I would absolutely recommend this stuff to anyone wanting a show stopper lawn. 

Where to buy Milorganite Fertilizer

You can grab Milorganite Fertilizer from just about anywhere – but we found it for a great price on Amazon.

Our secret weapon: Lawn IV

While it is still a secret, we are working to develop the ultimate sidekick to Milorganite. More to come Spring of 2024!

Why we review lawn tools

The reason we started this website in the first place was because we had so much trouble trying to find reasonable, understandable, honest reviews for lawn equipment. And it’s not cheap! After hours and hours of research, trying products and returning them, and messing up our yards – we started this site. 

We go to extreme measures.

As people who had to learn the hard way, we want you to know exactly what you are signing up for before you purchase a piece of equipment. That’s why we are committed to providing honest, easy-to-understand reviews that mean something.

Exit mobile version