I’ve Used The Ryobi 40V Expand-It Weed Eater For 7 Years

Ryobi 40V battery

The Ryobi 40V weed eater was the first weed eater I ever owned, so it makes this product super easy to review.

In fact, I bought the Expand-It version with the blower and edger attachments. Ryobi has a series of 40V lawn equipment, most notably the tools I just mentioned here. Recently, Ryobi has gotten into the lawn mower game as well. 

The Ryobi 40V weed eater is a great trimmer but there are a few things you should know before buying. For starters, don’t get the blower attachment. Secondly, buy a different weed eater string (like this one). Otherwise – the edger attachment is great and the whole tool has lasted me well over 5 years.

You can grab it with the battery on Amazon for a great price or at Home Depot (where it may actually be cheaper).

Today we are going to review:

Why would I buy a Ryobi electric weed eater?

There are a few reasons to check out an electric weed eater when picking out your next lawn and garden tool kit. As compared to gas-powered weed eaters, electric weed eaters tend to be easier to use and maintain. At the end of a long winter season, you may have to refuel your gas powered weed eater and crank it a few times before you can get it to start. With the Ryobi 40V weed eater and other electric weed eaters, you simply place the battery and you are ready to go. 

Another benefit to electric trimmers and attachment capable systems is the lack of maintenance. You will not have to do anything to maintain an electric trimmer other than change out the line. No oil change, no filter change, and no messy gasoline spills. 

If you are a Ryobi loyalist and have one of their mowers, then you can actually use this same 40 volt battery in both the mower and the trimmer. More on that later. 

Ryobi 40V weed eater parts

The diagram below shows all of the parts involved in the Ryobi 40V weed eater. As you can see, this product detaches just below the handle to allow for other attachments. 

To detach the attachments, simply untwist the knob and press the silver button to pull out the attachment. Likewise, to reattach another attachment, simply align the silver button with the hole and slide in. Twist the knob to tighten in place and you are ready to go.

As you can see, the bottom has a “Reel Easy” (ha) bump feed string head with a “speed” winder. When you get low on string, the head has a button that will push out a little bit more if tapped.

The “Reel Easy” head of the Ryobi 40V trimmer.

Ryobi 40V weed eater tool only

If you already have a Ryobi 40V battery, you can purchase this product “tool-only”. A tool only product comes without the battery and is generally a lower price. This is great for those that have multiple Ryobi products, like the Ryobi mower.

Ryobi 40V weed eater diagram from Ryobi’s website.

Reviewing the Ryobi battery-powered weed eater

Let’s take a look at all of the things you should consider before buying a new weed eater.

Power output on the Ryobi 40V weed eater

The Ryobi 40V Expand It system has a modest amount of power. Honestly, I did not feel like the weed eater packed nearly the punch that its gas powered counterparts do.

Further, the electric weed eaters have to really “wind up” and get momentum before they reach their full speed. Because this tool isn’t specifically designed for weed eaters, it has to be very adaptable in how it produces power.

There is a little rod that twists around inside the attachment which drives the speed of the head. Torque is applied all the way down the rod and you can tell a lot of energy gets lost in the process. 

If you are looking for a weed eater that can take on a big job, the Ryobi 40V weed eater simply is not your tool. For small yards and some light brushwork, this weed eater will do just fine. 

A step up in power from this weed eater is the slightly more expensive EGO Power+ Multi-head tool with the string trimmer attachment is amazing.

Durability and usability

The Ryobi weed eater is one that has lasted surprisingly long. I have had mine for over three years and only replaced the line one time. It has consistently operated at full capacity and I have never had issues with breaking, slowing down, or otherwise. One thing I don’t like about the handle of this particular weed eater is that it always feels like it is in the wrong spot. 

With the Ryobi 40V weed whacker having multiple attachment heads, it means you can really slide the attachment into the tool facing any direction. While this might seem convenient, it’s really hard to tell which angle you should keep it at for the best trim job. When I use the weed eater, I feel like I am holding the trimmer at a weird angle and twisting my wrists or arms to make it go where I want it to go – not very comfortable.

Make sure not to get this one.

UPDATE: I took the guard off of this weed eater and it performs way better and is so much easier to use. Take it off and throw it out!

Comfort and feel

Another downside of this weed eater is the balance. Consider that this battery is also used on their lawn mower and a ton of other products in their 40V lineup of tools, meaning it is quite heavy. The tool feels great, light, and balanced before I add the battery. Once the battery is added, you have to exert a lot of upward pressure on the back of the weed eater, making straight lines and other maneuvering very difficult. 

I know it sounds silly, but when you start to feel that burn in your shoulder and neck area from holding a weird position, you will regret not buying a better balanced product. I have not seen an available shoulder sling or other device that can help keep it aligned, either. 

The heavy battery that accompanies the Ryobi 40V weed eater.

Maintenance and string replacement of the Ryobi electric weed eater

As mentioned previously, maintenance is not required at all on this product. You will have to replace the strings, however. Replacing the strings on this weed eater was one of the more infuriating moments of my life. I really struggled to figure it out on my own and had to make the below video on YouTube to get it right. 

Finally got it!

Replacing strings on these is super frustrating because you have to very delicately weave it through while trying to maintain the bundled line from falling out and making a big slinky.

Battery life

The Ryobi 40V battery is also used for the mower, so you better hope that it lasts for a long time if you only use the weed eater. It does. The weed eater lasts a really long time in my experience.

When I have used this attachment, I usually start with the trimmer attachment, then switch to the edging attachment, then finish off with the blower. To my knowledge, I have only gone through the battery fully one time. The first day of the spring season, I edged my lawn for the first time of the year and dug up a lot of dirt. When finishing off with the mower, the battery died. 

For most small jobs and especially for the weed eater, you will not have any issues with getting your job completed.

The official review of the Expand-It system

FeatureRyobi 40V weed eaterGas powered weed eater
Difficulty to useLess easy to maneuverEasier to maneuver
DurabilityVery durableVery durable
MaintenanceEasiest to maintainLess easy to maintain
ValueMedium valueHigh value
For lots <10,000 sq. ftHighly recommendedLess recommended
For lots <1 acreRecommendedHighly recommended
For lots >1 acreNot recommendedHighly recommended

To summarize our review, the Ryobi 40V weed eater is a good weed eater if you have a relatively small yard and/or small job. This weed eater is simply not very comfortable to use, but makes up for the lack of comfort with sheer convenience. The ability to just attach the battery and start on the job makes this super easy for those with not much land to cover.

The fully assembled Ryobi 40V weed eater.

I recommend this weed eater due to the ability to leverage this battery with other Ryobi tools, its convenience and simplicity, and using the various attachments to have an all-in-one approach to taking care of your yard.

If you have a big yard or typically spend a lot of time trimming, I would check out one of the gas powered weed eaters like the ECHO SRM-225, a staple in the lawn community. 

Why we review lawn tools

The reason we started this website in the first place was because we had so much trouble trying to find reasonable, understandable, honest reviews for lawn equipment. And it’s not cheap! After hours and hours of research, trying products and returning them, and messing up our yards – we started this site. 

We have great ways of testing.

As people who had to learn the hard way, we want you to know exactly what you are signing up for before you purchase a piece of equipment. That’s why we are committed to providing honest, easy-to-understand reviews that mean something.

Greenworks Electric Dethatcher Review (+ How-To Guide)

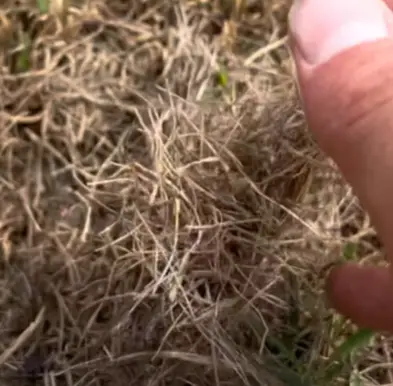
My Greenworks Dethatcher is a lawn tool that I became obsessed with the second I started using it. Dethatchers work by pulling up old, dead grass that is embedded in the soil of your lawn. This provides the most satisfying experience ever when you use it.

This dead grass, or “thatch”, prohibits your living grass from getting nutrients and can cause your grass to appear thin. Dethatchers have historically been tough-looking heavy rakes that you could pull across your lawn by hand. 

Let’s get started!

When and why to use a dethatcher on your yard

Dethatching your yard is one of the most satisfying lawn tasks. If you are one of those people who likes pimple popping videos or loves to peel off the plastic of a new appliance, then dethatching will be your jam.

My Greenworks Dethatcher.

It basically pulls up all this dead grass that is stuck to your lawn and pushes it to the top of your yard. You can almost hear your yard start breathing again. 

The time of year to dethatch your yard is just prior to the aerating and overseeding process. For us, this time of year is in October, but can vary depending on where you live. Dethatching right before aerating and seeding gives the best possible chance for your seeds to make contact with soil. 

THIS is thatch.

First, you pull up the dead grass with the dethatcher. Once you have pulled all of this up and gotten rid of it, then you can aerate. You will want to aerate your lawn immediately after dethatching, then overseed the lawn. This will put seed straight on the open soil and give it the best success to grow into a thick, luscious lawn. 

The Greenworks Dethatcher features

The Greenworks dethatcher comes in at a slightly lower price point than the Sun Joe Dethatcher. It is also one of the most popular dethatchers available on the market. Let’s review what makes this so popular.

Folding down my dethatcher after use.

Psst – check out our comparison of the Sun Joe vs Greenworks Dethatcher.

My experience using this dethatcher

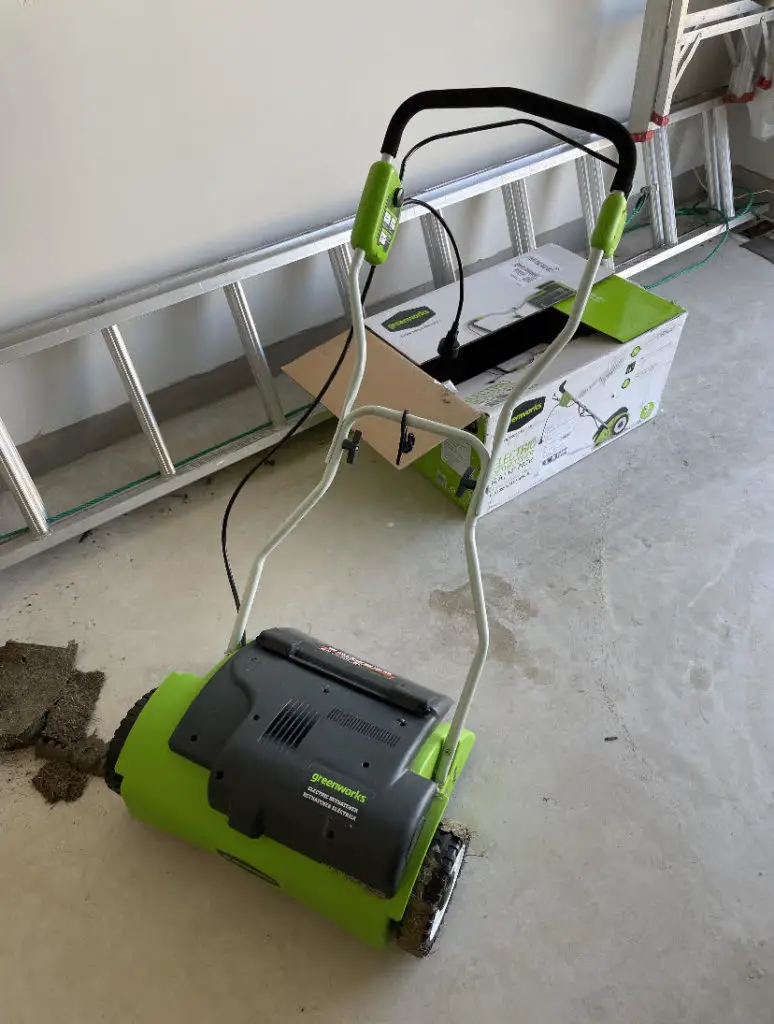
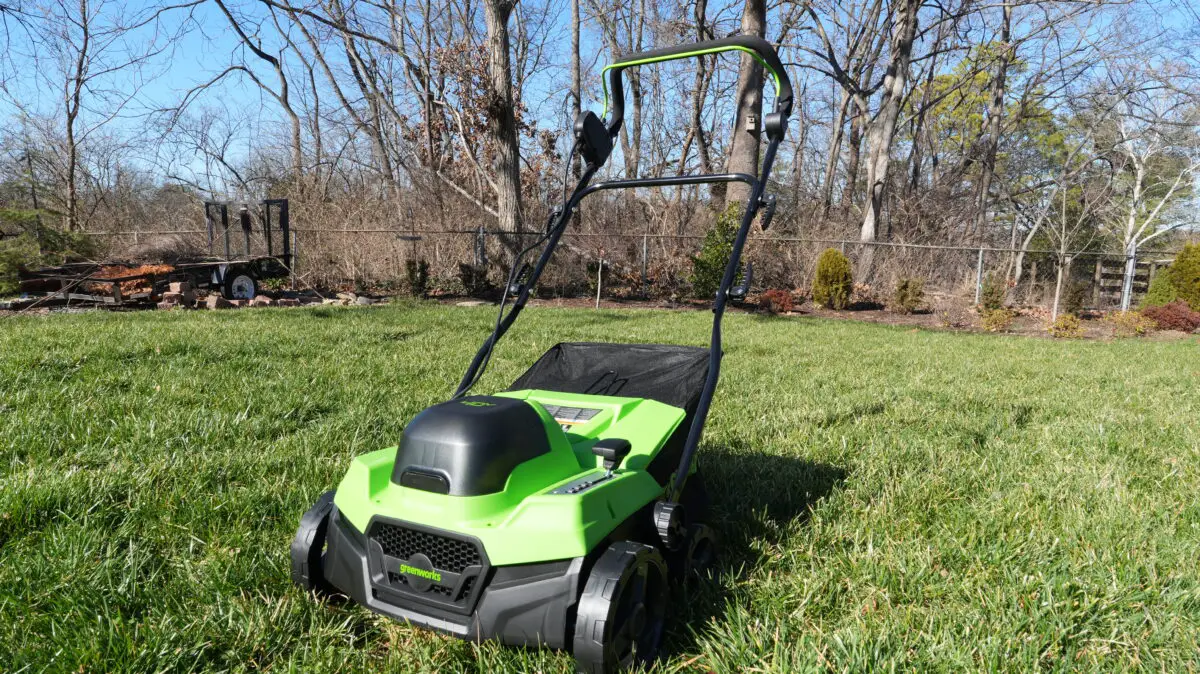
I used my Greenworks dethatcher for the first time this year on my relatively newly sodded lawn in Austin, TX. Despite only having a year or two of life, I got an insane amount of thatch off the ground. Here’s how it worked.

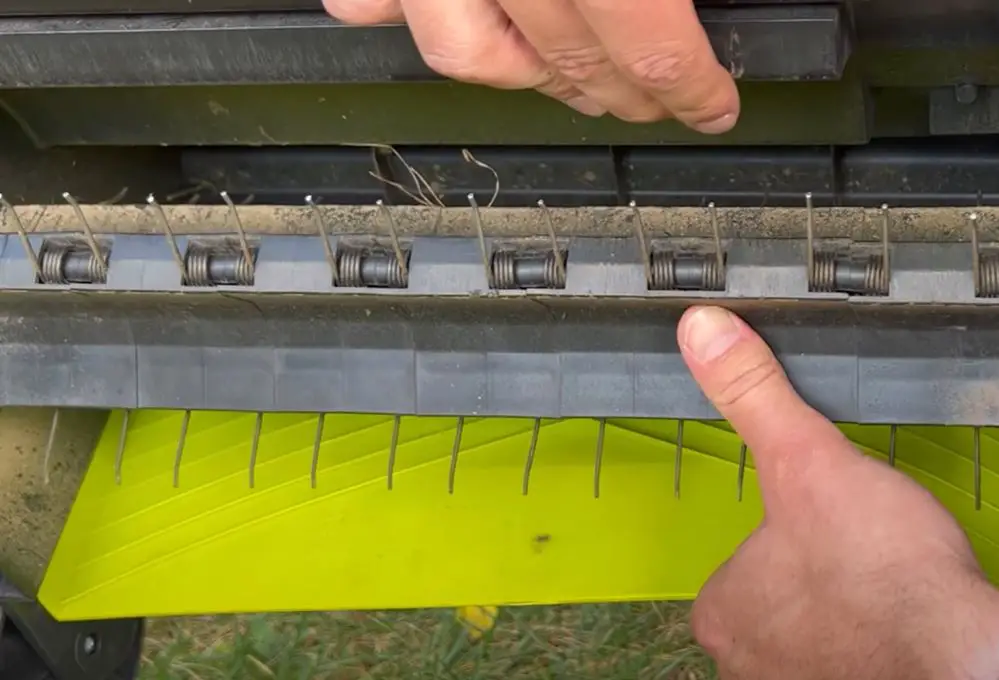
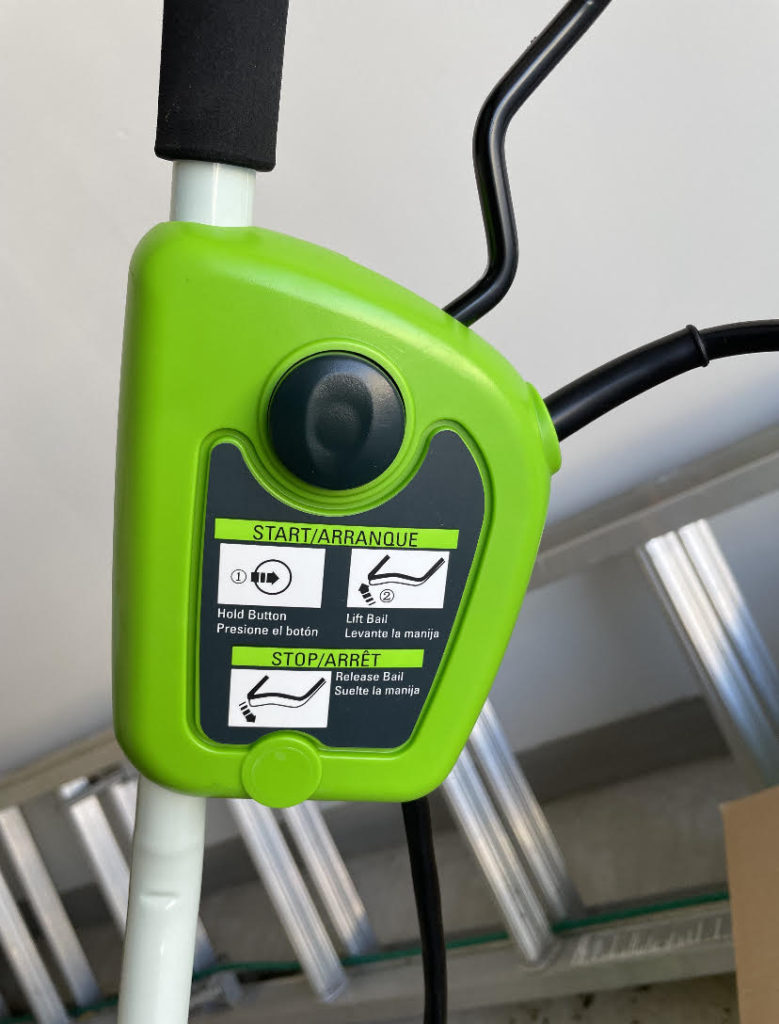
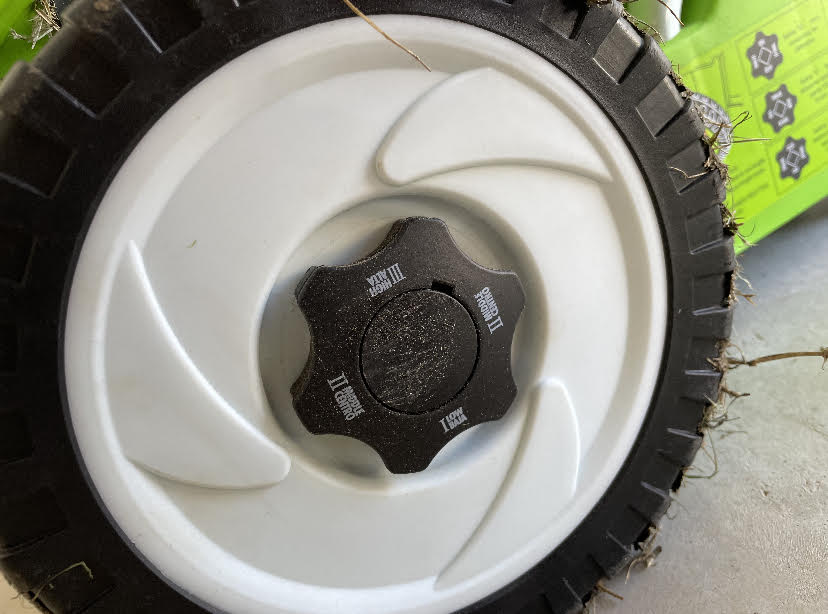
The Greenworks Dethatcher comes with an easy push to start functionality. This push to start feature allows for guaranteed starts after being stored through a cold winter. It boasts a 14 inch width for the tines (the little spikes that pull up thatch), which gives it an immediate advantage over some of its competitors. 

The handles fold in and allow for easy storage. As do other dethatcher in its class, it does not use any batteries and requires no charging. Rather, the Greenworks dethatcher requires an extension cord. As I mentioned in my last dethatcher review, a fifty foot extension cord is recommended. Longer extension cords can become quite heavy and cumbersome to move throughout your yard. 

The start and stop features on my Greenworks dethatcher.

Comfort is important to me, and as a tall person I highly value the longer handles that come with the Greenworks dethatcher. These are much more comfortable and help me stay out in the yard longer. 

This is surprisingly powerful

Not sure what kind of power you can expect with an electric dethatcher. This is not a gas guzzler and is not meant to really provide any power. But it does have 10A of power running through it. It does not have a self propelled feature persay, but does inch forward with the help of the thines moving forward trying to pull up grass. 

When I was using this dethatcher and testing out the power, I noticed that it wasn’t an issue – the issue was moving slowly, which is basically just what I have to do when I use a dethatcher.

You can check out the cordless version of the Greenworks dethatcher.

This dethatcher is simple and durable

While most people scoff at plastic and electric lawn tools, I think this one really does have great durability. I have not put too much use into mine, but have heard others talk about the longevity of the tines. The tines are the little pieces of metal that actually pick up and displace the dead grass on the bottom of the dethatcher. You would expect some wear and tear, but they appear to last quite a while.

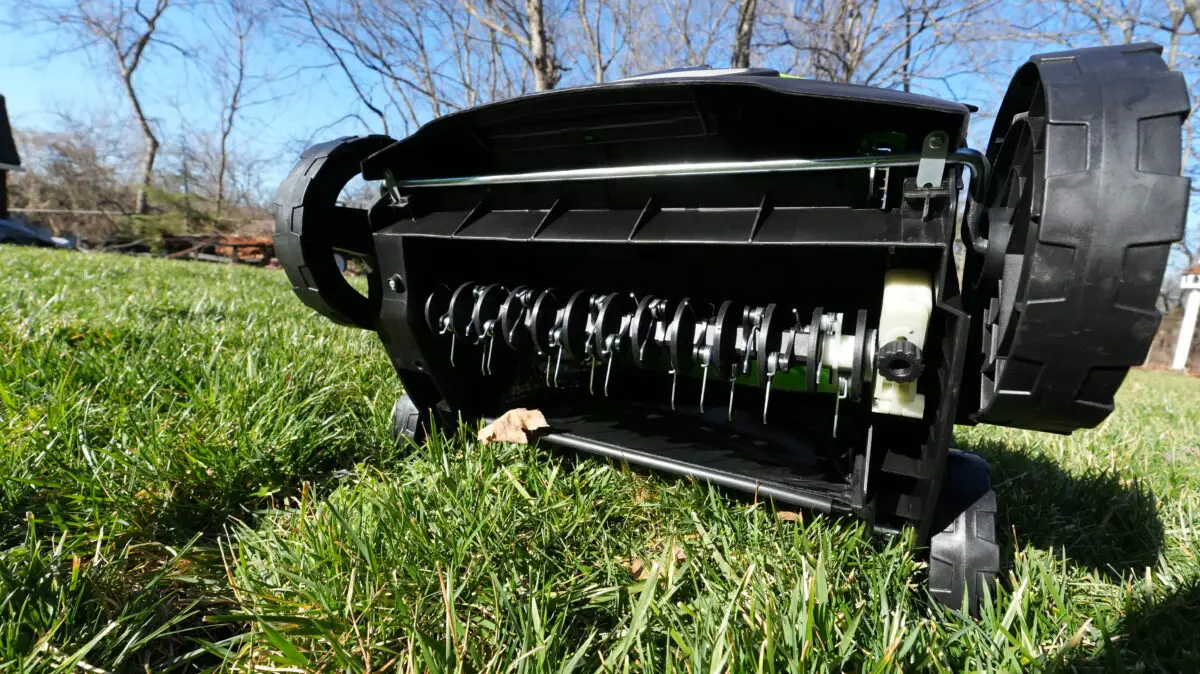
This is really a simple machine that does not require any maintenance. When broken down to its functional components (kind of like active ingredients in supplements), it is just an electric power circle of little spikes. Not much can go wrong.

This one was really easy for me to break down and fold in half in my garage, basically just like how it came out of the box.

My yard now looks way better after using this

My Greenworks dethatcher will pull up the dead grass from the top of my yard without fail. As long as it is moderately dry outside, it will not have a problem getting to the thatch and giving your grass some room to breathe. 

Clean-up, however, is a different issue. Compared to several other electric dethatchers, the Greenworks dethatcher does not come with a bag. Do not fret! The bags that come with the dethatchers are almost comically small. 

Height settings on my Greenworks dethatcher.

I was surprised with the amount of grass that came up from this tool. You will likely fill your bag after about 5 to 8 feet of pushing. With that in mind, most people use all dethatchers without bags. 

To clean up, simply grab your mower, put it on a high setting, slap the bag on, and do a quick run over the yard to suck up all the thatch. You can always use a blower, a heavy duty rake, or whatever you would like to clean up the yard. 

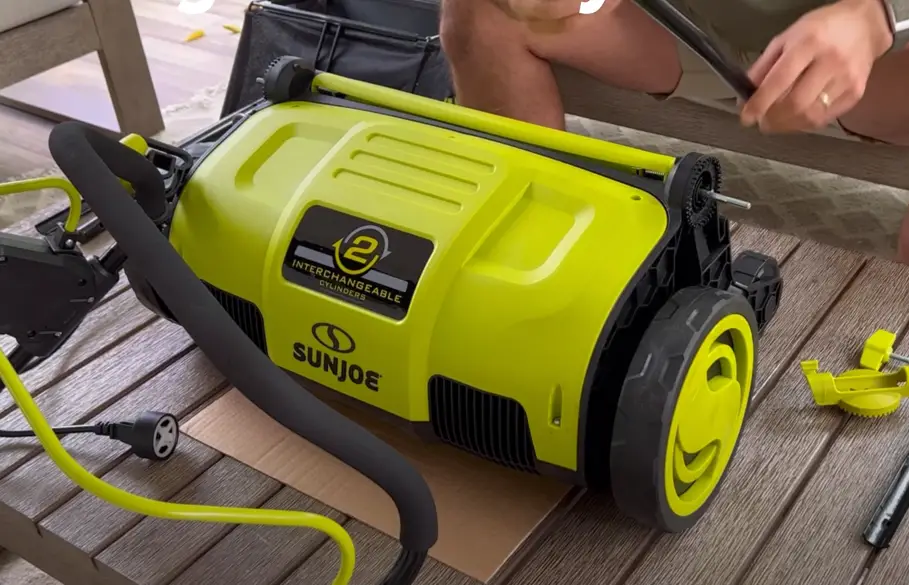
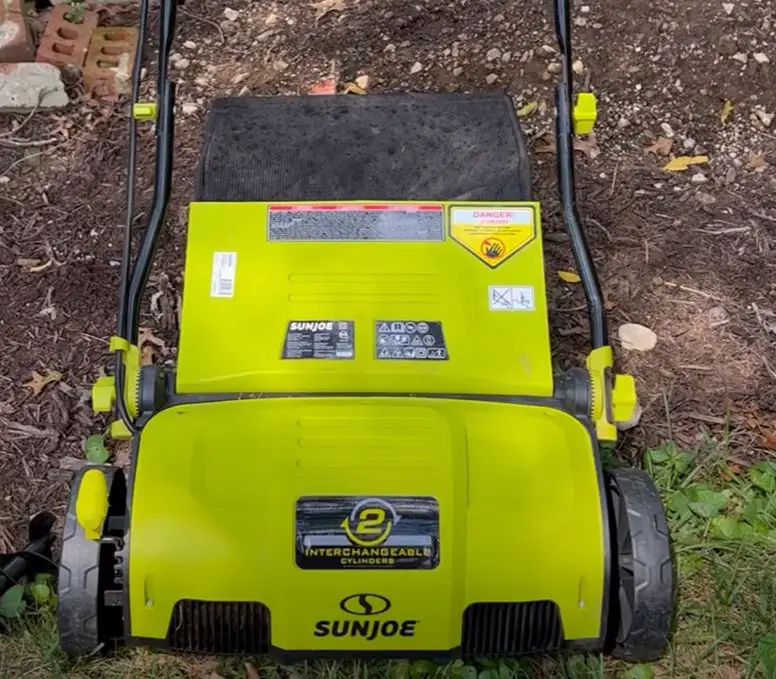
Comparison: Greenworks dethatcher vs Sun Joe dethatcher

If you are looking at an electronic dethatcher online, you are likely picking between these two. Both are the top sellers on Amazon and combined have over 20,000 reviews. Both look very similar and both have almost 5 stars on Amazon. 

Luckily, I have owned both and even tested them side by side to see which one did a better job of pulling up thatch.

Functionality and power

To compare the two, let’s start with functionality. They function identically. Both are powered by an extension cord, move at the same speed, and electronically pull up thatch. The advantage goes to Greenworks here because they have a slightly bigger tine deck. 14 inches in the Greenworks vs 13 inches in the Sun Joe dethatcher. You will get more out of each pass using the Greenworks.

Add-ons

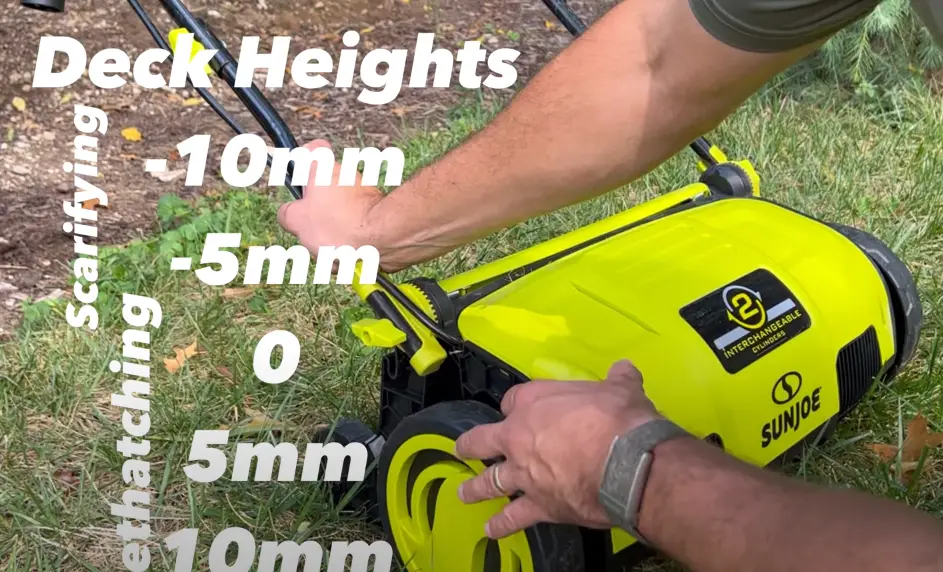
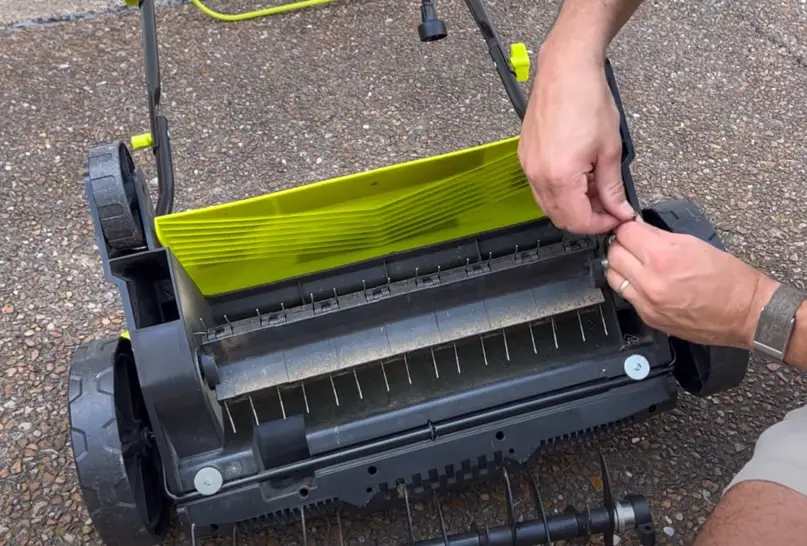
Something else to consider when comparing these products is the availability of add-on features. Greenworks offers zero add ons to their product, whereas Sun Joe offers a scarifier and a bag. As mentioned previously, the bag is meaningless and most people trash it. The scarifier applies blades to the soil to help cut through and tough thatch and provide a modest amount of aeration. The advantage in this category goes to Sun Joe. 

Tines at the bottom of my Sun Joe dethatcher.

Cost and value

As of right now, the Sun Joe dethatcher costs around $150 and the Greenworks dethatcher comes in right around $130. Both are going to last a long time and both are of very similar quality. If it were me (and it is me), I am going with the Greenworks. 

Overall comparison: Greenworks dethatcher vs Sun Joe dethatcher

Y’all this is a relatively easy one for me. I will save $20 and go with the Greenworks dethatcher if I had to do it over again. It operates the same, has great durability, is slightly wider, and a good bit cheaper. 

Check out our web story detailing the competition between these two.

You can grab the Greenworks dethatcher on Amazon (on sale right now for 35% off) for an awesome price. You can also get the Greenworks 27022 dethatcher straight from the Greenworks website.

Why I Love The Dewalt 20V MAX Hedge Trimmer

The Dewalt Hedge Trimmer 20V DCHT820B is a cordless trimmer used for folks trying to clean up their overgrown bushes around their yard. Cordless trimmers are handy for those that like to cover a longer distance without being weighed down or restricted by a cord.

Cordless hedge trimmers are popular even for the most novice of yard groomers. This Dewalt Hedge Trimmer is one of the few trimmers I have experienced that I truly have a strong opinion on.

Here’s a quick breakdown of my experience with the Dewalt hedge trimmer. Keep scrolling if you want to read more! Follow this link to watch my video review on Youtube as well.

  • Dewalt crushed it by providing a nice rubber molded grip that makes it really easy to handle
  • The brushless motor means this was built for durability
  • This Dewalt hedge trimmer is part of the 20V MAX series with dozens of other tools
  • I used it on my backyard and loved it.

Buckle up and let me review the Dewalt hedge trimmer. Click below to jump ahead:

Dewalt has really stepped up their game and even made a sleek cordless lawn mower and some really sweet leaf blowers as well. They have a history of great gas products, too, like their huge Dewalt 3400 PSI pressure washer.

How I tested this

I borrowed this hedge trimmer from my brother-in-law for a Youtube video I recorded. It was a great time of year to put it to the test on some bushes in my backyard.

When I was using this hedge trimmer, I was testing it for a few things. Obviously power, but also handling and comfort, battery run-time and charge time, and overall value (price compared to performance).

I’ve tested a bunch of these now and this one was a big surprise.

Using this hedge trimmer is easy and comfortable

Dewalt is known for having a high quality, residential suite of products. Most folks in the construction or commercial landscaping industry are not using Dewalt, but it is one of the most popular brands for folks like you and me walking around Home Depot. 

The Dewalt 20V hedge trimmer is super light!

The hedge trimmer is highly usable for residential consumers. As is any other cordless trimmer, the Dewalt is easy to pick up and take wherever you need around your yard.

Further, another aspect of this is the compatibility of the battery. The hedge trimmer comes with a 20V battery that is usable with all of its 20V products. In fact, the Dewalt lawn mower uses the same battery – talk about convenience!

Yep, that means if you own a Dewalt power drill or other battery powered device from them, you can just keep one battery charged and open up space in your garage.

Try to purchase the tool-only version

Tool only means that the hedge trimmer comes without a battery. This is super convenient for Dewalt loyalists who want to leverage their existing suite of 20V tools from Dewalt. Simply pop the battery on to the back and fire up the trimmer, just like any other Dewalt tool you own. 

Comfortable grips make a difference

A positive to having a 20V battery is that this will be a relatively light weight hedge trimmer. Additionally, a lack of a cord to lug around will make this tool feel like a feather.

Great easy to use handle.

Also, I may be too accustomed to my twenty-year old corded hedge trimmer, but I sensed that this trimmer had much less vibration. Particularly when you first pull this out of the box, the lightweight feel, lack of vibration, and sharp blades make the first few cuts feel really nice.

This hedge trimmer has some serious power

This hedge trimmer boasts a 5.0Ah Lithium Ion battery. While this sounds impressive, you are only going to get so much power out of a battery-powered hedge trimmer. 

The first time I ever used a hedge trimmer I pictured it being like using one of those big lumberjack chainsaws. I was disappointed to say the least when I started using one and could not cut through a ¾” inch thick branch. 

Like a hot knife through hot butter.

I am not alone in thinking that this tool does not have the power that you would want or expect. Other reviews that I have read online have pointed out that the hedge trimmer can take a few passes over the same spot to truly get a good cut. 

Conversely, the good news here from a low power hedge trimmer is that for most people using this tool, it will not really impact you that much. Most people are used to hedge trimmers taking a few passes because most people (me) wait too long to cut their bushes and end up having to take a million passes to get it trimmed. 

For those that obsess over their circular-shaped bushes, this will leave some power to be desired. 

Depth matters for cutting thick branches

Something that cracks me up about all of the measurements and data points provided by Dewalt is the trimmer depth. Basically, Dewalt measures the length of the blades and says that length is how thick of a bush it can cut. In your dreams.

Amazing trimmer depth.

Finally, if you think a hedge trimmer can cut through a three quarters of an inch branch, you have gullible written on your forehead. While this product can cut to a depth of three quarters of an inch, it will only get you through a very leafy, brushy hedge. 

Cost and value

The Dewalt 20V Hedge Trimmer is selling for anywhere between $200 and $250 from what I can tell. The tool only Dewalt 20V Hedge trimmer sells for about $130 to $150. 

Perfect molded grip


Comparable brands like Black and Decker, Greenworks, and Craftsman have virtually identical trimmers for about the same or LESS cost.

In my opinion, the true value of this product is not anything inherent to the product itself. Most battery powered cordless hedge trimmers are going to perform the same. Those who purchase a cordless trimmer for tasks around their relatively small to medium sized yards will be totally fine purchasing any of these.

Who should buy this?

The value of purchasing a Dewalt 20V hedge trimmer comes most to those who already own a suite of Dewalt 20V battery powered items. The tool-only version of this hedge trimmer is significantly cheaper. If you have a 20V battery for this already, you can save a good amount of money, garage space, and electricity by sticking with this brand. 

Who should NOT buy this hedge trimmer?

If you have a suite of products from Ryobi, Craftsman, or any of the other brands that have compatible batteries, I do not recommend purchasing this product. Try to find a hedge trimmer with compatible batteries and similar features. 

The final review: Dewalt DCHT820B Cordless Hedge Trimmer

You can grab the Dewalt DCHT820B on Amazon right now for a great price. If you already have the battery, you can save even more money by using this link to get a tool-only version from Amazon.

If you don’t like Amazon, its also available at Home Depot, where you can buy online or pick it up in store.

FeatureRating
Difficulty to useLess difficult than corded
DurabilityAverage
MaintenanceEasiest to maintain
ValueHigh value for Dewalt 20V loyalists, medium to low for others
For lots <10,000 sq. ftHighly recommended
For lots <1 acreNot recommended unless keeping spare batteries around
For lots >1 acreNot recommended

Why we started The Lawn Review

The reason we started this website in the first place was because we had so much trouble trying to find reasonable, understandable, honest reviews for lawn equipment. And it’s not cheap! After hours and hours of research, trying products and returning them, and messing up our yards – we started this site. 

Best way to test tools – on your face.

As people who had to learn the hard way, we want you to know exactly what you are signing up for before you purchase a piece of equipment. That’s why we are committed to providing honest, easy-to-understand reviews that mean something.

Corded vs Cordless hedge trimmers

Hedge trimmers come in corded and cordless fashions. Corded trimmers have been the default and most popular trimmers on the market for a long time. Trimmers that require you to keep them plugged in have a few negatives, however.

Corded hedge trimmers

I have always used a corded hedge trimmer and the most frustrating part to me is that it comes unplugged pretty easily. I find myself stepping on it, getting it caught on a branch, or tangling my arm around it. Another negative to the long cord is the limited reach provided by the cord. Even for bushes close to my house, I can reach the end of the cord pretty quickly if I am getting on a ladder to cut a tall hedge.

My classic Craftsman corded hedge trimmer doesn’t fail.

Lastly, and this one is probably irrational, but I tend to feel like I am going to get the cord caught in the trimmer and cut it off. This has never happened but it stresses me out when I am working in the yard. 

Cordless hedge trimmers

Cordless hedge trimmers are definitely more functional for spending time out in the yard. My concerns about cutting off the wire, getting tangled in wire, and becoming unplugged all go out the window. You will also have a longer range for cutting than you would with a traditional corded hedge trimmer.

Not to mention, if a sibling or friends wants to borrow the Dewalt Hedge trimmer 20V, you don’t have to worry about lugging around a heavy extension cord. 

This one made our list of some of our favorite cordless hedge trimmers!

Sun Joe Electric Dethatcher Review (+ Full Video)

The Sun Joe dethatcher AKA Sun Joe AJ801E, is a tool that has recently blown me away. I had never used a dethatcher before – and boy was I missing out. Not only on the results but on the complete satisfaction this tool provides.

Ever gotten really close to the soil and wondered what all that dead grass was doing? After it rains it is all of the super soggy, dirty, twisty grass that sits at the base of the grass and clogs it up. I can tell you what it is doing – it is called thatch and it is clogging up the soil and suffocating your lawn just like it was mine.

When I started dethatching my lawn at least once per year, especially before I aerate and overseed, has yielded amazing results. Getting rid of those dead strands of grass gives my yard room to breathe, take in nutrients, and grow more luscious throughout the season. 

Let’s get started – click to jump ahead

How I tested the Sun Joe dethatcher

In short, I bought it and recorded a long video of myself using it in the yard. So if you want to see it in action, check it out on Youtube.

But I have about a half acre of tall fescue and I took this puppy through my entire yard – twice. It dug up so much dang thatch that I had to put it in my trailer. When I was evaluating it, I was mostly looking at its power, convenience, durability, and value (price to performance ratio).

It was pretty sweet.

Sun Joe dethatcher features and benefits

At first glance, the Sun Joe dethatcher appears to be a big plastic box with a metal bar. In fact, it looks weak and wimpy. It feels kind of unsturdy and cheaply made.

Do not be fooled. This thing is a workhorse! You will notice once you get it going that it has some serious power to pull up the dead grass. Yep, that same dead grass that broke my back with the rake is coming up super easily by a plastic box. No reason to feel embarrassed.

Plug and play

The downside of this dethatcher is that it needs to be plugged in to operate – it is not battery powered. A nice, long extension cord will help get the job done. I recommend a fifty foot extension cord. One hundred foot extension cords tend to get really heavy and difficult to maneuver. 

The dethatcher from the front with bag attached.

Clean-up after dethatching – bag or no bag?

The Sun Joe dethatcher leaves quite the mess behind. I was be surprised to see the amount of thatch that comes up from beneath my grass. That being said, Sun Joe provides a bag that can be mounted to the dethatcher. I suggest using this to clean as you go. Otherwise, go over the loose thatch with your mower and collect it in that bag. Another option is to grab the rake, but obviously would be a last resort. 

Height adjustment.

Sun Joe Dethatcher Durability

At first glance, this chunk of neon green plastic that is only about 13-15 inches wide does not look like it would be super durable. Frankly, that is exactly what I thought when I first looked at the Sun Joe Dethatcher (or really any Sun Joe product).

The truth is, the little throngs at the bottom poking out are called tines. The tines on this machine are, in fact, super durable. These tines will work to dig up all of the thatch and leave my lawn looking great. Truly, the plastic casing and wheels are deceptive, as they simply serve as a cover for an otherwise low-output (meaning not getting super hot or vibrating) tool. I have no concerns with the durability of this equipment and have had zero issues with tines. The tines can also be replaced if needed, giving the Sun Joe dethatcher a high durability ranking.

Setting expectations

While the Sun Joe dethatcher is a powerful tool that will save my back, it isn’t for everyone. If you have a massive yard, you are better off getting a commercial size dethatcher that can be hooked on to the back of a riding mower.

Assembling the Dethatcher right out of the box.

To level-set expectations, the Sun Joe dethatcher has a width of almost 13 inches ranging up to 15 inches with the largest model. This is not going to be “a few passes in the yard and you are good to go”. It will require you to move relatively slowly and make many passes to cover the entirety of your yard. But boy, will you be surprised by the amount of thatch you pull up. 

It is ideal to use the dethatcher on your yard right before you aerate and seed. This gives your yard a fresh slate to work off of for the most aeration and overseeding. All of those gaps that you notice between the blades will become filled in (if only this could happen to my hair).

The scarifier attachment on the Sun Joe Dethatcher

This machine also comes with a scarifier attachment. Honestly, I had never used or even heard of a scarifier before I used the dethatcher. It basically looks like someone removed the blades out of my blender and put them in this machine. 

The tines inside.

Basically, the scarifier cuts little grooves in your yard to somewhat aerate and cut through small roots and other tricky pieces that might give the dethatcher a hard time. In my experience, I would just use the dethatcher then switch over to a normal aerator to get the job done prior to seeding. 

Renting vs buying the Sun Joe Dethatcher

This is a very easy question for me to answer. Simply put, once I used the dethatcher on my lawn one time, I was addicted. It is incredibly satisfying to pull up a bunch of old grass that has been plaguing my lawn. 

The Greenworks dethatcher is the main competition – we own it, too.

Renting a Sun Joe dethatcher simply is not worth it. This is something I will want to do to my lawn every couple of months. The dethatcher is relatively inexpensive compared to other lawn items, ranging from $150 to $200 depending on where and when you buy. It is on sale on Amazon right now, which is where I got mine.

The Cordless Sun Joe Dethatcher: A new version

For an additional $100 or so, you can purchase a cordless dethatcher. I do not generally recommend getting the cordless version and I will explain why.

The range of the batteries on these will not get me much further than the limit of an extension cord. Meaning, I will not get much of a benefit besides not having to worry about pulling around or tripping over an extension cord. I also hate having clutter in my garage and already have enough battery chargers for my other tools. This comes with two batteries that will simply add more clutter, chargers, and things that I will fall and break my neck on in the garage. 

The official review: Sun Joe Dethatcher

FeatureSun Joe AJ801E
Difficulty to useMuch easier to use than a rake
DurabilityMedium durability
MaintenanceNo maintenance required
ValueHigh value to own vs. rent
For lots <10,000 sq. ftHighly recommended
For lots <1 acreRecommended up to 0.5 acres
For lots >1 acreNot recommended
Our breakdown.

The Sun Joe dethatcher will absolutely change your yard. While this can be a tedious process, it beats out the alternative of breaking your back with a rake. We here at The Lawn Review highly encourage purchasing this product and giving it a try. Once you do your first pass in your lawn, you will be addicted!

Check out our comparison web story we made stacking this one up against the Greenworks dethatcher.

You can grab the Sun Joe dethatcher AJ801E on Amazon for sale right now.

Why would I buy a Sun Joe dethatcher?

I am not really sure who Sun Joe is, but he makes electric yard tools like dethatchers, pressure washers, electric air compressors, and more. Traditionally, dethatching is done with a fine rake across the entirety of your yard. Other than the damage this does to your weekend and lower back, it can put a lot of stress on your living grass. 

The Sun Joe dethatcher AJ801E provides an electronic way for you to simply scoot across your lawn and pull up all of the dead grass. This saves you time and back pain and is much more effective. 

Sun Joe also has a line of winter products, aptly named Snow Joe.

When to use a dethatcher

Dethatchers are great for people who do their own lawn care. Where I see dethatchers being most useful is at the beginning of the spring when the snow has melted. Snow plows and general use around your yard can cause dirt, debris, and rotten roots.

Another great time to use the dethatcher is right before aerating and seeding, typically around October (depending on where you live). This gives the seed fresh ground upon which to grow and takes away competing sources of nutrients like sunlight, nitrogen, and water. 

Why we started The Lawn Review

The reason we started this website in the first place was because we had so much trouble trying to find reasonable, understandable, honest reviews for lawn equipment. And it’s not cheap! After hours and hours of research, trying products and returning them, and messing up our yards – we started this site. 

We have unusual testing methods.

As people who had to learn the hard way, we want you to know exactly what you are signing up for before you purchase a piece of equipment. That’s why we are committed to providing honest, easy-to-understand reviews that mean something.

Exit mobile version