7 Easy Tips to Hang Outdoor Christmas Lights (+ 1 Secret)

Christmas light installation guide

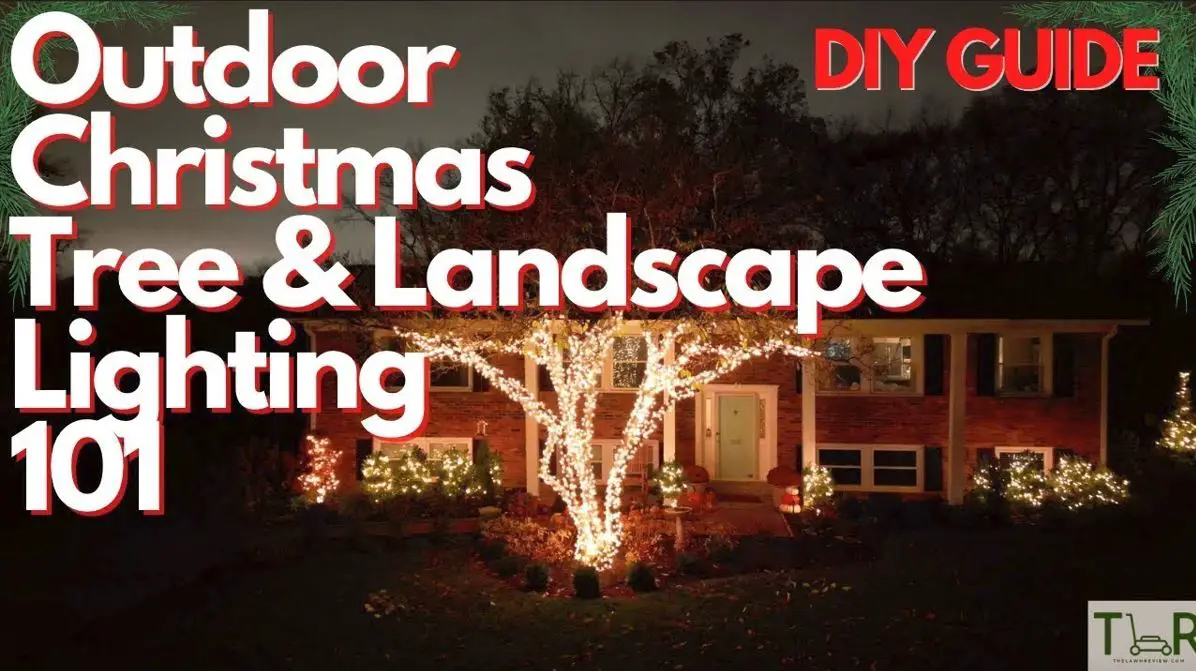
With Christmas just around the corner, I thought it would be the perfect time to share some of my top tips and tricks for creating a nice-looking outdoor Christmas landscape lighting display. My favorite part: I’ll tell you how to make it easy install AND put away – year after year.

As a serial learner of lessons the hard way, I thought I would save you some time and show you exactly how the pros do it. Here’s a quick summary of the tips. You can click each one to jump down to it.

  1. Plan out what you want the lights to look like on paper
  2. Get high quality lights that you don’t have to throw away each year
  3. Get really good, long extension cords
  4. Test all the lights before putting them up (this was learned the hard way)
  5. Add multiple layers to provide depth
  6. Make sure there isn’t a tripping hazard
  7. Use a timer

I made a Youtube video highlighting exactly what tips I use to set up my Christmas lights.

My Ultimate Outdoor Christmas Light Secrets: Exposed

You know how your mom has that old recipe book with different meatloaf and weird Jell-O casseroles? This is basically the same thing but with old secrets from my experience. Some say that these secrets were originally found with the Declaration of Independence.

Tip #1: Map out the lights

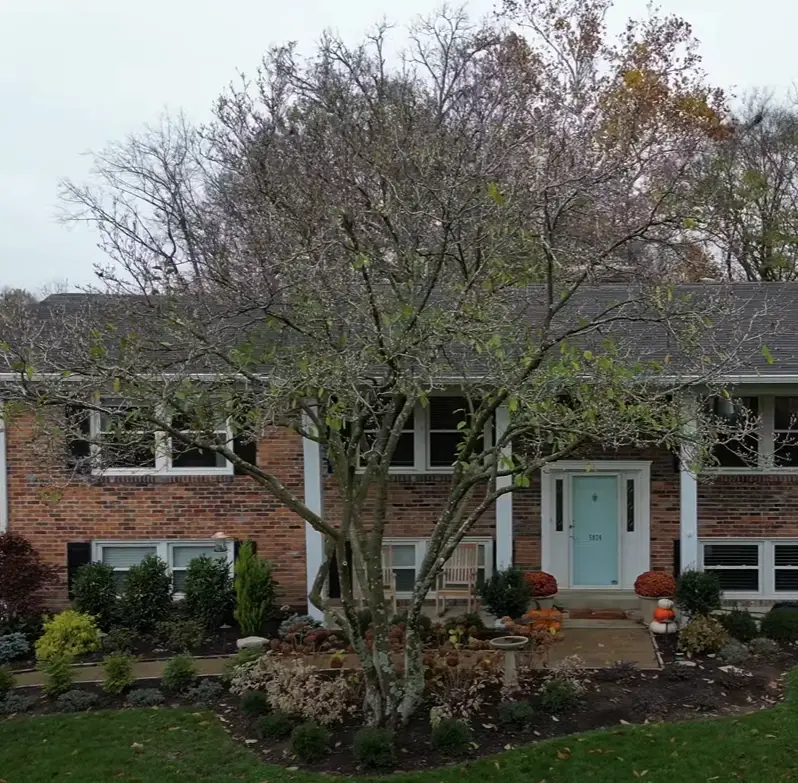
The key to a successful outdoor lighting display is careful planning. Start by taking a stroll around your property and envisioning where you want to place lights. Consider highlighting architectural features like roof lines, trees, and porch columns. Planning ahead will help you determine the quantity and types of lights you need, preventing last-minute trips to the store and ensuring you have everything on hand when you start decorating.

The before!

Tip #2: Get the nice lights

When it comes to outdoor lighting, quality matters. I know it seems like buying more expensive lights is a huge waste of money, but it makes a huge difference in the installation experience.

Invest in durable, weather-resistant lights that can withstand the winter elements. LED lights are an excellent choice for their energy efficiency and long lifespan. They might cost a bit more upfront, but they’ll save you money in the long run and reduce the likelihood of mid-season replacements. Plus, they come in a variety of colors and styles, allowing you to get creative with your display.

Tip #3: Always keep in mind extension cord placement for Christmas lights

Dealing with a web of extension cords can be a headache. To minimize frustration, plan your layout with extension cords in mind. This is arguably the most important component of setting up the lights – matching the male plugs to the female outlets.

This is a sweet plug for outdoor Christmas lights.

Use outdoor-rated extension cords and strategically place them to ensure a clean and organized setup. Consider using cord management tools like stakes or clips to keep everything in place and prevent tripping hazards. A well-thought-out extension cord strategy will save you time and make your display look polished.

Tip #4: Plug the Christmas lights in before hanging them up

There’s nothing worse than spending hours meticulously placing lights, only to discover a section isn’t working. Before you start hanging lights, test each strand to ensure they are functioning correctly.

Super secret – wrap them in a ball like this and they don’t tangle.

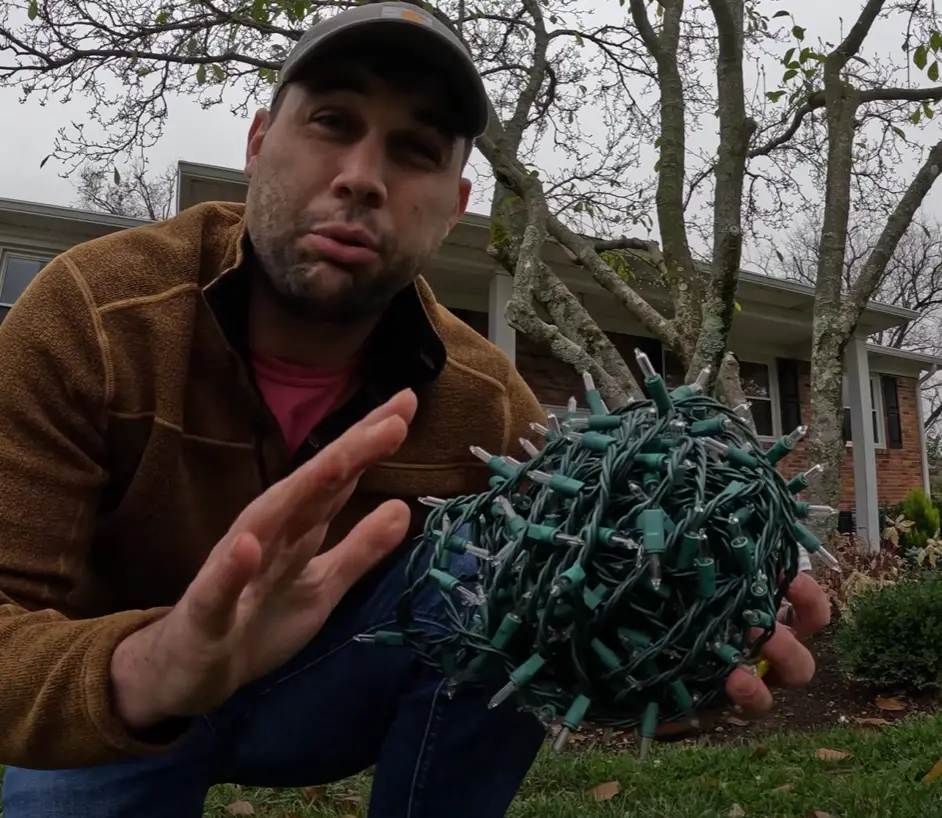
This will save you the headache of troubleshooting later on and help you identify any faulty bulbs that need replacing. It’s a small step that can make a big difference in the overall success of your outdoor lighting project.

Nothing worse than getting the lights up, gathering everyone around, and having a strand be completely dead.

Tip #5: Use multiple layers of Christmas lights

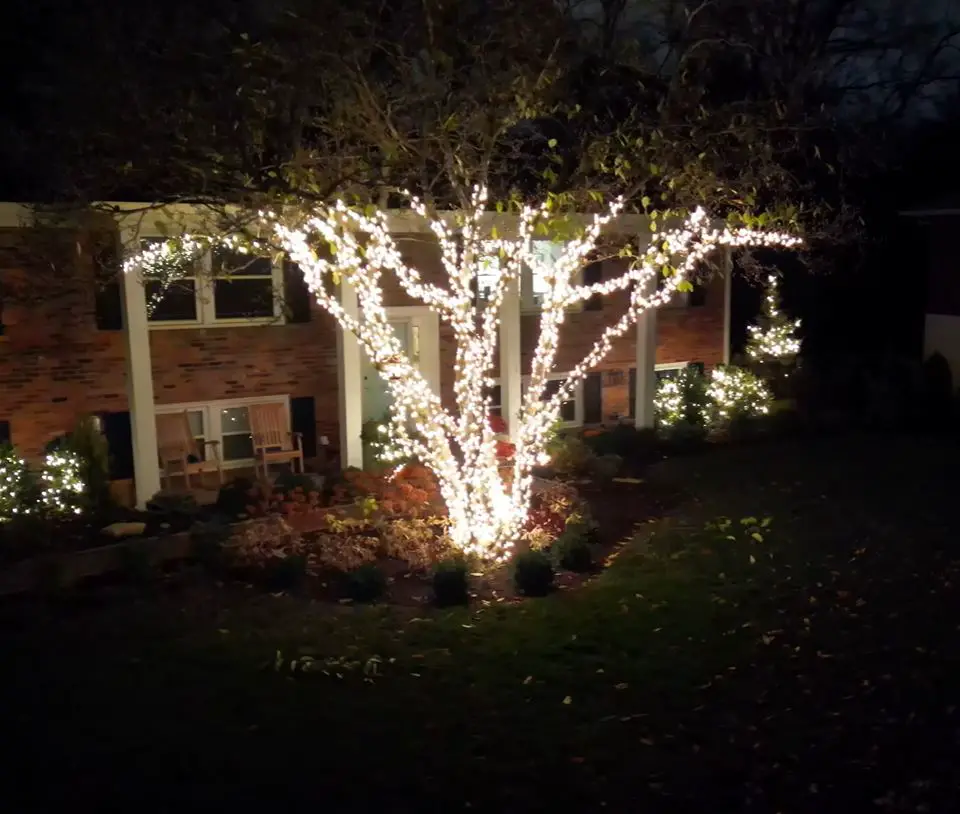
To create a visually stunning display that will make your neighbor jealous, think about adding depth through layered lighting. Use a combination of different light types, such as string lights, pathway lights, and spotlights. This will add dimension to your outdoor space and make it more visually appealing. Experiment with different angles and distances to find the perfect balance. Layered lighting not only enhances the overall aesthetics but also adds a touch of swag to your Christmas display.

Tip #6: Please be safe

While the goal is to create a dazzling display, safety should always be a top priority. Secure lights properly to avoid them falling or becoming a tripping hazard. Be cautious when using ladders, especially on uneven ground.

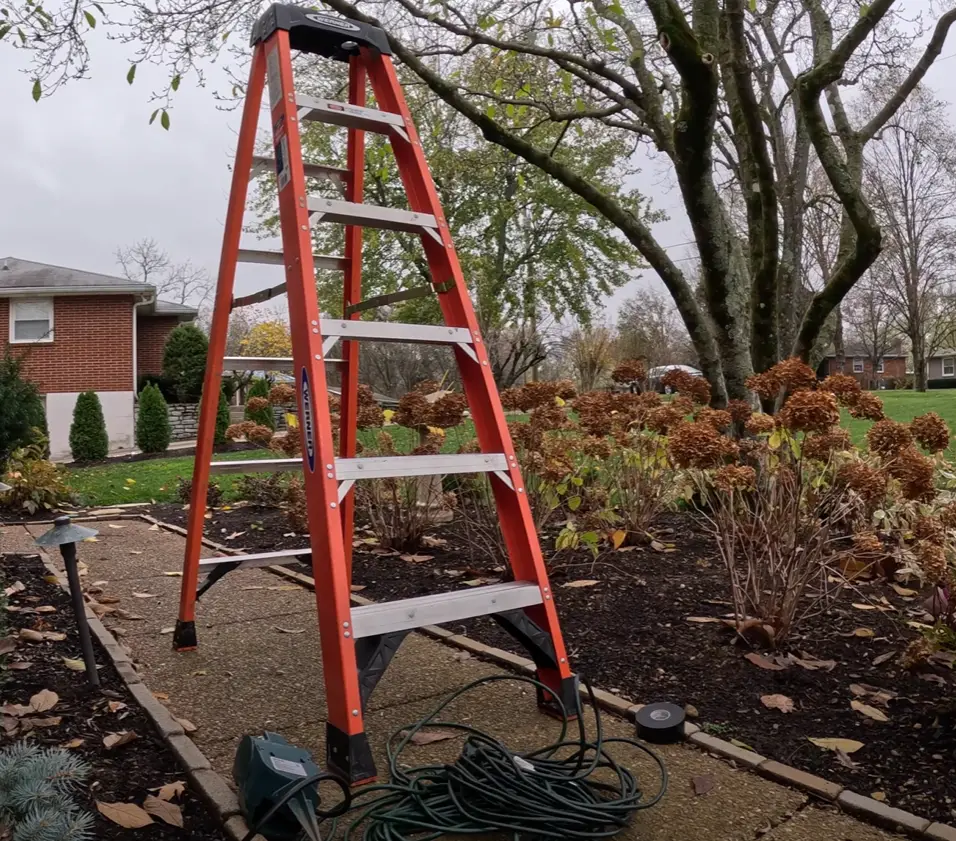
If you’re unsure about the safety of a particular setup, don’t hesitate to ask your jealous neighbor for help. Ensuring a safe decorating environment will allow you to enjoy your Christmas lights without any worry.

Tip #7: Use a timer for your Christmas lights

Save yourself the trouble of manually turning lights on and off every day by using timers. Timers are a game-changer, automating the process and ensuring your display shines bright during the designated hours. Set them to come on just as the sun sets and turn off when you head to bed. Not only does this make your life easier, but it also contributes to energy conservation by avoiding unnecessary use during daylight hours.

Best of luck hanging up Christmas lights!

Wrapping up, I hope these tips help you create a hassle-free and stunning outdoor lighting display this Christmas season. Remember, the key is to plan ahead, invest in quality, and prioritize safety. Stay tuned for more helpful tips, and don’t forget to subscribe for a chance to win exciting giveaways every month. Until next time, happy decorating!

Here’s my secret: You can use Christmas lights on your bushes and cover with a sheet to protect bushes from frost.

How I Have Never Had A Single Plant Die: $16 Does It

I’ve never lost a plant to disease, fungus, insect, or mites! In this guide, I’ll share with you the secrets of maintaining thriving outdoor plants. You’ll learn exactly what I do, when I do it, and how I do it to keep my backyard green and flourishing. You can read the below or check out my Youtube video that walks through the whole process.

Let’s dive into the key points covered in this guide and unveil the secrets to successful outdoor plant care.

Choosing the Right Products

The first step in ensuring the health of your outdoor plants is choosing the right products. Bioadvanced offers a range of solutions, and one that’s particularly effective is the Bioadvanced 3-in-1 product that you can grab on Amazon. 

This versatile formula is designed to protect your plants against insects, diseases, and mites. It’s a valuable tool in my gardening arsenal and what I would consider my “secret weapon”. Bioadvanced offers other specialized products like the Tree & Shrub Protect & Feed, Complete Insect Killer, Rose and Flower Care, and Fruit Citrus & Vegetable Insect Control. I use the rose version on my knock out roses.

Each of these products serves a specific purpose, so select the one that fits your plants and what you’re trying to accomplish.

Note: this is not a sponsored post in any way. I talk a lot about Bioadvanced but have never had communication with them and certainly never been paid to use or talk about their products.

Bioadvanced 3-in-1: Your Garden’s Best Friend

Bioadvanced 3-in-1 is truly a garden’s best friend. It’s a game-changer when it comes to warding off potential threats. This all-in-one solution simplifies my outdoor plant maintenance routine, making it incredibly easy to protectmy garden from pests, diseases, and mites (where the 3 in 3-in-1 comes from). 

Bioadvanced offers a well-rounded approach to plant care, ensuring that your garden remains vibrant and pest-free. It’s an excellent choice for those who value the simplicity of a one-size-fits-all solution. If you know me, you know I’m rocking the three-in-one shampoo, conditioner and body wash just like every other guy out there. Bioadvanced does the same thing for your plants.

Pro tip: I use this Ryobi backpack sprayer for my application.

Quick aside: Using Bioadvanced Rose and Flower Care

When it comes to taking care of my flowering plants, Bioadvanced’s Rose and Flower Care is my go-to solution. This product is specially formulated to provide the essential nutrients and protection these delicate plants need. 

With regular use, I get stunning blooms and healthy foliage throughout the season. It’s as simple as applying the product according to the instructions, and your roses and flowers will absolutely pop all season long. No more getting demolished by bugs!

How I apply these products to my plants

To ensure the effectiveness of these products, it’s crucial to follow the recommended application instructions. Timing is essential. Applying the solution at the right time can make all the difference. 

For example, in spring, as new growth starts to emerge, it’s an ideal time to protect your plants with Bioadvanced 3-in-1. Frequent monitoring and applying treatments as needed is also key. Regular inspections will help you identify potential issues early, ensuring your plants are never caught off guard by pests or diseases.

Prioritize Prevention Over Cure

One of the most crucial lessons I’ve learned in my gardening journey is that an ounce of prevention is worth more than a pound of cure (something my mom always said). Translation: it’s easier and more effective to prevent problems from occurring in the first place rather than trying to treat them once they’ve taken hold. 

This is where products like Bioadvanced’s 3-in-1 shine – they serve as a proactive shield against potential threats. Your outdoor plants will thank you for the extra care and attention.

Proper Outdoor Plant Maintenance

Alongside using the right products, maintaining your outdoor plants involves various other aspects. Regular watering, appropriate sunlight, and the right soil conditions are equally important. Additionally, pruning and deadheading help your plants channel their energy more effectively and keep them looking tidy and attractive. Be sure to research the specific needs of your plants to create a suitable maintenance routine.

Careful Observation and Adaptation

Gardening isn’t just about following a set of rules; it’s about observing your plants and adapting your care routine accordingly. Pay close attention to the behavior of your plants. If you notice any changes or signs of distress, act promptly. It’s crucial to address issues early to prevent them from spreading to other parts of your garden. By being attentive, you can ensure that your outdoor plants remain in top-notch condition.

Share Your Thoughts With Us!

I’ve shared my tried-and-true methods for keeping outdoor plants healthy, vibrant, and thriving. Now, it’s your turn! I’d love to hear about your experiences and any additional tips you have for plant care. Gardening is a community, and we all benefit from sharing our knowledge and expertise.

Let’s continue to nurture our green spaces and create beautiful, thriving gardens. Find us on Youtube!

Final thoughts on Bioadvanced

Maintaining outdoor plants doesn’t have to be that hard – it isn’t like having a pet or a child. With the right products, timely care, and careful observation, you can ensure that your garden remains disease-free and teeming with life. By grabbing some Bioadvanced products, following their instructions, and adapting your care routine to the needs of your plants, you’ll be well on your way to becoming a successful plant mom or dad.

Orbit Sprinkler Review and DIY Installation Guide: 2024

Orbit’s In-Ground Sprinkler System was a super easy choice for me to buy. I love doing my lawn myself and getting this thing for super cheap on Amazon was enough motivation for me to finally set one of these up.

Whenever I used to pass by someone in my neighborhood with an in-ground sprinkler system, my immediate thought was always “can’t hide money!”. In-ground sprinkler systems and big money go hand-in-hand. But let me tell you what – it doesn’t have to be that way. You can get a great system and set it up yourself for something I call “middle class fancy”. 

Let me explain more – or you can watch our full YouTube video guide here, where we tested the entire process.

Here are the quick steps for setting up your Orbit In-Ground Sprinkler System:

  1. Buy the system (duh)
  2. Test your hose faucet pressure
  3. Design your set-up
  4. Assemble the sprinkler heads
  5. Adjust the sprinkler heads to the right range
  6. Lay out the assembled system above ground
  7. Give it a test run
  8. Dig the sprinkler pathway
  9. Place system in and fill in the dirt.

Setting up the Orbit In-ground Sprinkler System

Let me walk you through exactly how I set up my Orbit in-ground sprinkler system from start to finish.

Step 1: Buy the system (skip if you’ve already done this)

Sounds obvious, but trying to do any pre-work here will majorly mess you up. Going out and digging up a pathway will only bite you in the butt if you haven’t bought the system yet. I got mine from Amazon and it was absurd how cheap the whole kit was. 

Step 2: Test your hose faucet water pressure

Fortunately, Orbit sends you a nice little pressure gauge that you can hook to your hose faucet that tells you how much water pressure your hose puts out. Simply screw this on, measure the pressure, and keep note of the measurement.

Just a warning here – if your pressure is below 35 PSI, this thing may be super wimpy and not worth it. If your PSI is above 80, then you may want a pressure reducer as it might be too strong for this system.

Step 3: Design your sprinkler set up

Orbit has a guide that correlates how much pressure your faucet puts out with how far apart you need to set up your sprinklers. Since mine was on the high end, I am putting each one of my sprinkler heads 24 feet apart. 

This takes some careful mapping and spacing in your yard. Orbit recommends a U shape in your yard for you to get optimal spacing and watering. I mapped mine out with some yard stakes to make sure it was all even Steven before doing any kind of digging. 


Quick tip: While mapping this out, let the blue hose that comes with the system lay out in your yard and relax and “melt”. This will help kill any tension once you start laying it down.

Step 4: Assemble all the sprinkler heads

The sprinkler head set up is pretty straightforward and provided in the attached instructions. You simply clip on the blue caps to the base hose adaptor connector and screw those on. I bought some plastic stakes and zip tied the sprinkler heads to those. I’ll explain more later.

Step 5: Adjust sprinkler heads

Once you’ve got your sprinkler heads attached to your stake and in the spot you want them in your lawn, remove the inner sprinkler component (with the green cap). Pull down the spring and set the parameters of the sprinkler. To do this, you get a flathead screwdriver and tighten it until you have a good range. 

This takes some trial and error to figure out exactly how this needs to be set up for your yard, but basically functions like a complex parameter range on any other sprinkler (even the oscillating sprinklers).

Step 6: Lay out the hose above ground

It’s really important to make sure you set up the full system before doing any digging. This means actually getting the hose out, cutting it, and connecting it to the sprinkler system. Orbit sends a nice tube cutter that lets you easily cut down the hose to the size you need. Some important tips here that I learned the hard way is to push the blue hose in as far as possible to make sure you don’t get leakage.

Step 7: Give the Orbit Sprinkler System a test run

Before you dig, make sure the system works! Connect it to your hose and let it run. Make sure there aren’t any leaks and that each spring-loaded sprinkler head actually does its job. This is a critical time to make any last minute adjustments to the sprinkler range.

Pro tip: Make sure you get that head-to-head coverage on your sprinkler. This is recommended by Orbit to ensure you don’t miss any spots and can fully get your yard soaked.

Step 8: Digging the Sprinkler System in

There’s a hard way to do this and a harder way to do this. The hard way is to rent a trencher and dig a nice trench to fill your hose in with. The harder way is to use a flat shovel and do it the old fashioned way. I chose to rent a trencher. 

This process took quite a while, but was definitely better than doing it with a shovel. It also gave me super clean, evenly distributed trenches to drop the hose down into. 

Pro tip: Dig 8-10 inches and put the pipe in for the best results.

Step 9: Refill the dirt

Once you’ve laid the pipe (no jokes, please), then simply test it out and then fill it back with dirt. This is another laborious process to get the dirt back into the hole, compact, and level. 

Orbit In-Ground Sprinkler System Review: My Experience

After getting it all set-up, I’ve actually loved having this sprinkler system in my yard. I’ve got it set up with a timer to run super early in the morning. After I got it installed, I haven’t had to touch any of the sprinkler heads (although it has only been a few weeks).

Mowing for the first time wasn’t too much of a hassle and the grass is starting to come back in on the areas I dug up. I’ll report back after more time has passed, but so far I am extremely pleased with how the set up is going.

This $200+ dollar system is a small item that makes you feel like you are rich. A really cheap way to get a great looking yard without having to go out there with a sprinkler and do it manually. 

Common questions and troubleshooting Orbit In-Ground Sprinklers

Here are some common questions I get (and had myself) when I first got my In-Ground Orbit System.

How do you adjust orbit in ground sprinklers?

You can adjust the range of the orbit sprinklers by opening the sprinkler head, pulling down the spring, and using a flathead screwdriver to adjust the range on the top of the sprinkler head.

How do I make my sprinklers shoot farther?

To get your in-ground sprinklers to shoot farther, you need to increase the overall water pressure in your hose faucet. Anything below 30 PSI will make for a very weak sprinkler.

Why is my Orbit sprinkler head not rotating?

If the Orbit sprinkler head is not rotating, there is likely dirt or debris stuck in the head. Open it up, clear it out, and ensure the appropriate rotation range settings are in place.

Why we review lawn tools

The reason we started this website in the first place was because we had so much trouble trying to find reasonable, understandable, honest reviews for lawn equipment. And it’s not cheap! After hours and hours of research, trying products and returning them, and messing up our yards – we started this site. 

As people who had to learn the hard way, we want you to know exactly what you are signing up for before you purchase a piece of equipment. That’s why we are committed to providing honest, easy-to-understand reviews that mean something.

How to Sharpen Your Lawn Mower Blades: 2024 Guide

Sharpening your lawn mower blade is one of those underrated tasks that you do every few years to revive your yard. I noticed pretty recently that my lawn had some split ends. If you know what I’m talking about, then it makes a lot of sense. 

Sharpening your lawn mower blade is the ultimate “tinkering in the garage” activity. The kind of thing you do when there are no sports on TV and you’ve really got nothing better to do. But for those of us that are perfectionists with our lawns, sharpening your mower blades is a huge necessity.

Let’s get started! Here are the basic steps to sharpening your mower blade:

How to sharpen your lawn mower blade

We actually made this blog post originally as a Youtube short – a less than one minute video that covers all the high points. Here is what we recommend:

Step 1: Prepare the materials

You’re going to need a few tools to get this done the right way. The most important tool in this is the angle grinder. We use (and recommend) the Ryobi angle grinder, which we grabbed off of Amazon for a great price. With the angle grinder, you will want to be sure to have eye protection – so grab some safety glasses and gloves as well. 

Next up you’ll want some way of holding the blade in place. We used a bench clamp to really tighten the  blade in place, but you can also keep it on the ground with weights if you’re really looking to MacGyver it. 

You may also need a socket wrench (we did) to remove the bolt that is holding the mower blade to the mower. 

Because stuff is going to be flying everywhere, make sure you have some rags handy for a clean up and quick blade polish. You may also want a face mask to keep out any fragments from getting in your mouth or lungs. 

Bench clamps rock.

Step 2: Remove the mower blade

The next step in this process is to remove the blade(s) from the mower. If you have a gas-powered lawn mower, start by removing the spark plug. This is a safety measure to avoid  the blades somehow getting activated while you’re down there taking them off. I liken this safety measure to turning your car off when you get gas. (This is a Honda HRN mower).

Next, lay the mower on its side. 

Lay it down gently.

Then use a socket wrench to remove the bolts holding the blades to the mower.

Pop those bolts off to remove.

While you’re down there, give your decking a nice power wash to get off all the old grass and prevent rusting. 

Step 3: Use the angle grinder to sharpen the blade

Once you’ve removed the blades from the mower, it’s time to sharpen these puppies. First, make sure to really clamp the blades down so they don’t move during the angle grinding process. We used a bench clamp to keep it held in place. If you don’t have one, try to find some way to keep it extremely secured down during the grinding process.

Next up, grab your angle grinder. We used the Ryobi angle grinder mentioned earlier with a 60 grit sandpaper disk. 

Grab the angle grinder and get to work.

Once you’ve got the grinder set up, get it spinning and follow along the natural edge of the mower blade. You can move back and forth to get it completely polished and sharpened along the edge. There isn’t a super exact science to doing this other than closely following the edge, making sure to sharpen the entirety of the blade from the tip all the way to the center. 

Step 4: Balance and reattach the sharpened mower blade

One last step that is often overlooked is making sure the blades are balanced. It’s as easy as setting it on a hanging nail to make sure you don’t have a lopsided blade. Balanced blades are important for keeping an even cut. 

If they aren’t balanced, then you can likely shave down the side that’s heavier with the grinder until you find it becoming more even. If that doesn’t work – it may be time for a new blade.

Perfectly balanced. As all things should be.

Overview of steps to sharpen lawn mower blades

  1. Get your tools together:
    • Eye protection
    • A few rags
    • An angle grinder 
    • Safety gloves
    • Bench clamps
    • KN95 face masks to protect yourself from dust
  2. Lay your lawn mower on its side 
  3. Remove the spark plug and mower blades
  4. Use an angle grinder with a sandpaper wheel to sharpen the slanted side of the blade
    • Make sure to grind at a natural angle to avoid damaging the metal
  5. Balance the blades
  6. Put the blades back on the lawn mower the same way you took them off
Reattach that sucker.

Once you finish sharpening the blades, you’ll notice that your grass looks much cleaner after mowing. Nevertheless, one of the most important parts of sharpening a blade is the grinder you use (and how you use it). A subpar grinder can leave you with a lawn that looks even worse than before. Therefore, I recommend choosing a high-quality angle grinder to sharpen your lawn mower blades and achieve the best result. 

Frequently Asked Questions

Want to learn more about what it takes to sharpen lawn mower blades? Here are my answers to the most frequently asked questions. 

How often should you sharpen lawn mower blades?

As a general rule of thumb, you should sharpen a mower blade after 25 hours of use. If it takes an hour to mow your lawn and you mow it once per week, you need to sharpen the blades after 25 weeks.

How do I know when to replace my lawn mower blades?

Telltale signs that you need to replace your lawn mower blades include patchy spots in the grass or visible damage to the blade (dents, chips, etc.).

Can you sharpen lawn mower blades without removing them?

Yes, you can technically sharpen mower blades without removing them from the mower. However, keeping them on the mower while you sharpen them isn’t the best approach. Using an electric grinder, you could easily sharpen the blade at the wrong angle and ruin it OR the blades could start spinning and cut your hands off. However, using a tool to file the blades manually isn’t as risky.

How do you sharpen a lawn mower blade by hand?

You can sharpen a lawn mower blade by hand with a file. I personally like the Kapoua Needle File Set with six metal pieces. Alternatively, you could get an electric grinder and finish sharpening the blade in a fraction of the time. 

The Bottom Line: Sharpening mower blades

Sharpening lawn mower blades is fairly simple. To recap, you’ll want to remove the spark plug before getting to work. After removing the spark plug, put the lawn mower on its side and remove the blade (either one or two blades, depending on the mower). Place the blades on nails to keep them balanced and sharpen them using an angle grinder or file. Once you’re finished sharpening the blades, put them back on the lawn mower the same way you removed them.

You should sharpen the blades after 25 hours of use or when you notice patchy grass after mowing. 

Why we review lawn tools

The reason we started this website in the first place was because we had so much trouble trying to find reasonable, understandable, honest reviews for lawn equipment. And it’s not cheap! After hours and hours of research, trying products and returning them, and messing up our yards – we started this site. 

How we spend our time now.

As people who had to learn the hard way, we want you to know exactly what you are signing up for before you purchase a piece of equipment. That’s why we are committed to providing honest, easy-to-understand reviews that mean something.

Why you should sharpen your mower blade

You start to see brown tips on your grass where the blade just doesn’t perform like it used to. After mowing you look through your yard and it doesn’t look crisp. You miss some spots. Mowing your lawn took longer than it used to.

Lawn is looking like Guy Fieri with the frosted tips!

These are the signs of a dull blade.

A dull lawn mower blade gives your yard a ragged appearance. If you don’t sharpen your lawn mower blade, you’ll end up with shredded or clumpy grass that looks unkempt. 

Thankfully, sharpening a lawn mower blade only takes a few minutes and doesn’t require a professional. The best time to sharpen the blade is at the beginning of mowing season, around early March. This preps it for the new season without it sitting through the winter season and getting dull. However, you can also sharpen the blades throughout summer and spring if you notice them becoming dull and have the time.

The best time to sharpen your mower blades is right before the cutting season – sometime in early spring as part of your preparation schedule.

Best Time To Aerate and Overseed Lawn: 2024 Update

Learning how and when to aerate and overseed your lawn is critical to a beautiful lawn that makes your neighbors jealous. Remember: you reap what you sow. And the window for sowing the perfect lawn isn’t open year-round.

Today we are going to walk through the difference between aerating and overseeding, when is the best time aerate and overseed, and give you some insight on how we get this done each year.

Jump ahead:

Let’s get started!

Aerating vs Overseeding

Aeration consists of perforating soil with small holes, allowing nutrients and water to seep inside and reach the roots of the grass. This technique promotes healthy and nourished grass, leaving your lawn green and lush. If you don’t aerate your lawn, the soil can become compact, which can deprive the grass of the key nutrients it needs to flourish. Grass that isn’t aerated is particularly susceptible to the elements (extreme heat and drought, for example). 

You can use a big time aerator like this one we rented from Home Depot.

You can decipher whether your lawn needs aeration by examining the soil. If the soil is hard or has a spongy texture, it’s time to aerate. Thin grass losing color is another telltale sign that you need to aerate your lawn.

Overseeding generally accompanies aeration. You add grass seeds across the entire yard when you overseed your lawn. The goal of overseeding is to regrow grass in areas where it is damaged or thinning. Now you may wonder, “do I have to aerate my lawn before I overseed it?”

The answer is yes; it’s best to aerate your lawn before overseeding because aeration helps the soil absorb nutrients and gives it fresh, overturned soil to thrive in. Aerating after overseeding can be massively disrupt to new seedlings.

Overseeding using a broadcast spreader.

The Best time to Aerate and Overseed

If you have cool season or transitional grass, the best time to aerate and overseed your lawn is the early fall. During the early fall, the temperature is cooler while the soil is still warm. This combination allows your lawn to recover quickly and see the most benefit from the aeration and overseeding. Cool season grass truly thrives during the fall months and gives your seeds the best chance of survival.

A general guide to grass zones.

If you have warm season grass, early-to-mid spring is the best time to aerate and overseed your lawn. Warm season grasses thrive in the summer so you want to give them time to germinate. This allows a root system to begin to form and for the grass to start living it up when the warmer temperatures arrive.

Don’t know your grass type? Reference this!

If you are noticing your grass starting to have brown tips, check out our guide on how to sharpen your mower blades.

Do-It-Yourself Lawn Aeration

While lawn aeration is typically a job left to the professionals, it doesn’t have to be. In fact, you can take lawn aeration into your own hands (literally). But before you hit the ground running, you should understand the cost of DIY aeration techniques and the effort required.

Our process is typically:

  1. Scalp your lawn – cutting it very short allows for the best preparation for overseeding and will allow more soil to be dug up through the aeration process. Make sure to bag the clippings to not choke your yard.
  2. Use a dethatcher to dig up all the dead grass off of the surface of your yard. Dethatchers and aerators are different, but compliment each other very well.
  3. Rent a gas-powered aerator from Home Depot. It helps to go in with a few neighbors to rent one and split the cost. There are also lawn tractor pull-behind aerators that work really well, too.
  4. Use the aerator to go over every square inch of your yard, pulling up old

One of the most popular DIY dethatcher products is the Sun Joe Dethatcher. This electric aerator and dethatcher is extremely satisfying and works wonders despite looking kind of dinky.

The Kobalt dethatcher attachment.

If you’re looking for a great workout and to be made fun of by your neighbors, you can also aerate your lawn with DenForste Lawn Aerator shoes, also available on Amazon. I’ll preface by saying you’re in store for a serious workout if you use these shoes. I definitely don’t recommend using them for a larger yard and suggest aerating when the temperature drops in the evening. On a positive note, the shoes have a solid aluminum base and spikes that won’t bend. And while the idea of aerator shoes sounds far-fetched, Amazon reviewers seem to dig these shoes.

Want to learn more about the difference between an aerator, dethatcher, and scarifier? Check out my guide that explains the difference between the three and how to use them. 

Do-It-Yourself Overseeding

Do-it-yourself overseeding is a lot easier than aeration. But remember, depending on the soil quality, you may need to dethatch or aerate your lawn first.

Once your lawn is ready-to-go, I recommend getting your hands on a Scotts Turf Builder Broadcast spreader. This handy device makes it mind-blowingly easy to overseed your yard and holds up to 15,000 square feet of product.

You can also use a handheld spreader if you have a smaller yard or only need to overseed a few concentrated areas of grass.

We recommend using Anderson’s seed for your lawn based on personal experience. Scotts has some good cheap stuff, but we’ve found it typically is contaminated with random grasses or weeds (and it says so on the bag)

Frequently Asked Questions about Aerating and Overseeding

Everyone has some natural curiosity about aeration and overseeding. If you’re eager to know more about the ins and outs of this all-important lawn care technique, take a look at some of the most frequently asked questions below.

How Much Does It Cost to Aerate Your Lawn?

You can expect to shell out anywhere from $150 to $230 to aerate your lawn, depending on where you live and the size of your property. If you’d like a more precise cost estimate, multiply every thousand square feet of lawn by $17. For example, if your yard measures 5,000 square feet, you will pay around $85 to aerate your lawn (5 x 17). 

How Much Does It Cost to Overseed Your Lawn?

The cost of overseeding is about double the cost of aeration alone. In other words, a lawn care company that charges $150 to aerate a yard will charge $300 to aerate and overseed it. If you’re lucky, they may also throw in some fertilizer. 

Can You Aerate and Overseed Your Lawn by Yourself?

Yes, you can aerate your lawn by yourself using an at-home aerator or aerator shoes. However, these methods are much more labor intensive and may not be as effective as hiring a professional to do the job.

How Often Should You Aerate Your Lawn?

Most lawn care professionals recommend aerating your yard annually. However, some people can get away with doing it once every two or three years if they have sandy soil and healthy grass.

Lawn Aeration and Overseeding: A Final Glance

Aeration and overseeding help your lawn absorb healthy nutrients and regrow in areas that are thinning or damaged. Aeration costs between $150 to $230, while aeration and overseeding together double the price of aeration alone. The general rule of thumb is to aerate and overseed your lawn once per year. The best time to aerate and overseed your yard is the early fall because the temperature is starting to cool, but the soil is still warm. 

Rest assured, lawn aeration and overseeding may seem slightly inconvenient, especially if you attempt to do it on your own. Nevertheless, the pros of aeration and overseeding far outweigh the cost involved. You’ll have vibrant and evenly-distributed grass that boosts your home’s curb appeal and makes the lawn much easier on the eyes.

Why we started The Lawn Review

We started The Lawn Review out of frustration. We couldn’t find clarity around what type of products were actually good and reliable. All the fertilizers we tried didn’t work. We ended up with a dying lawn, wasted time, and wasted money.

So we started buying and reviewing lawn tools and figuring out which ones were the best. And now we’ve moved onto actually keeping that grass nice and healthy all year around. 

How we spend our time now.

We’ve spent thousands of hours building this content for people just like you and me – normal people.

Exit mobile version