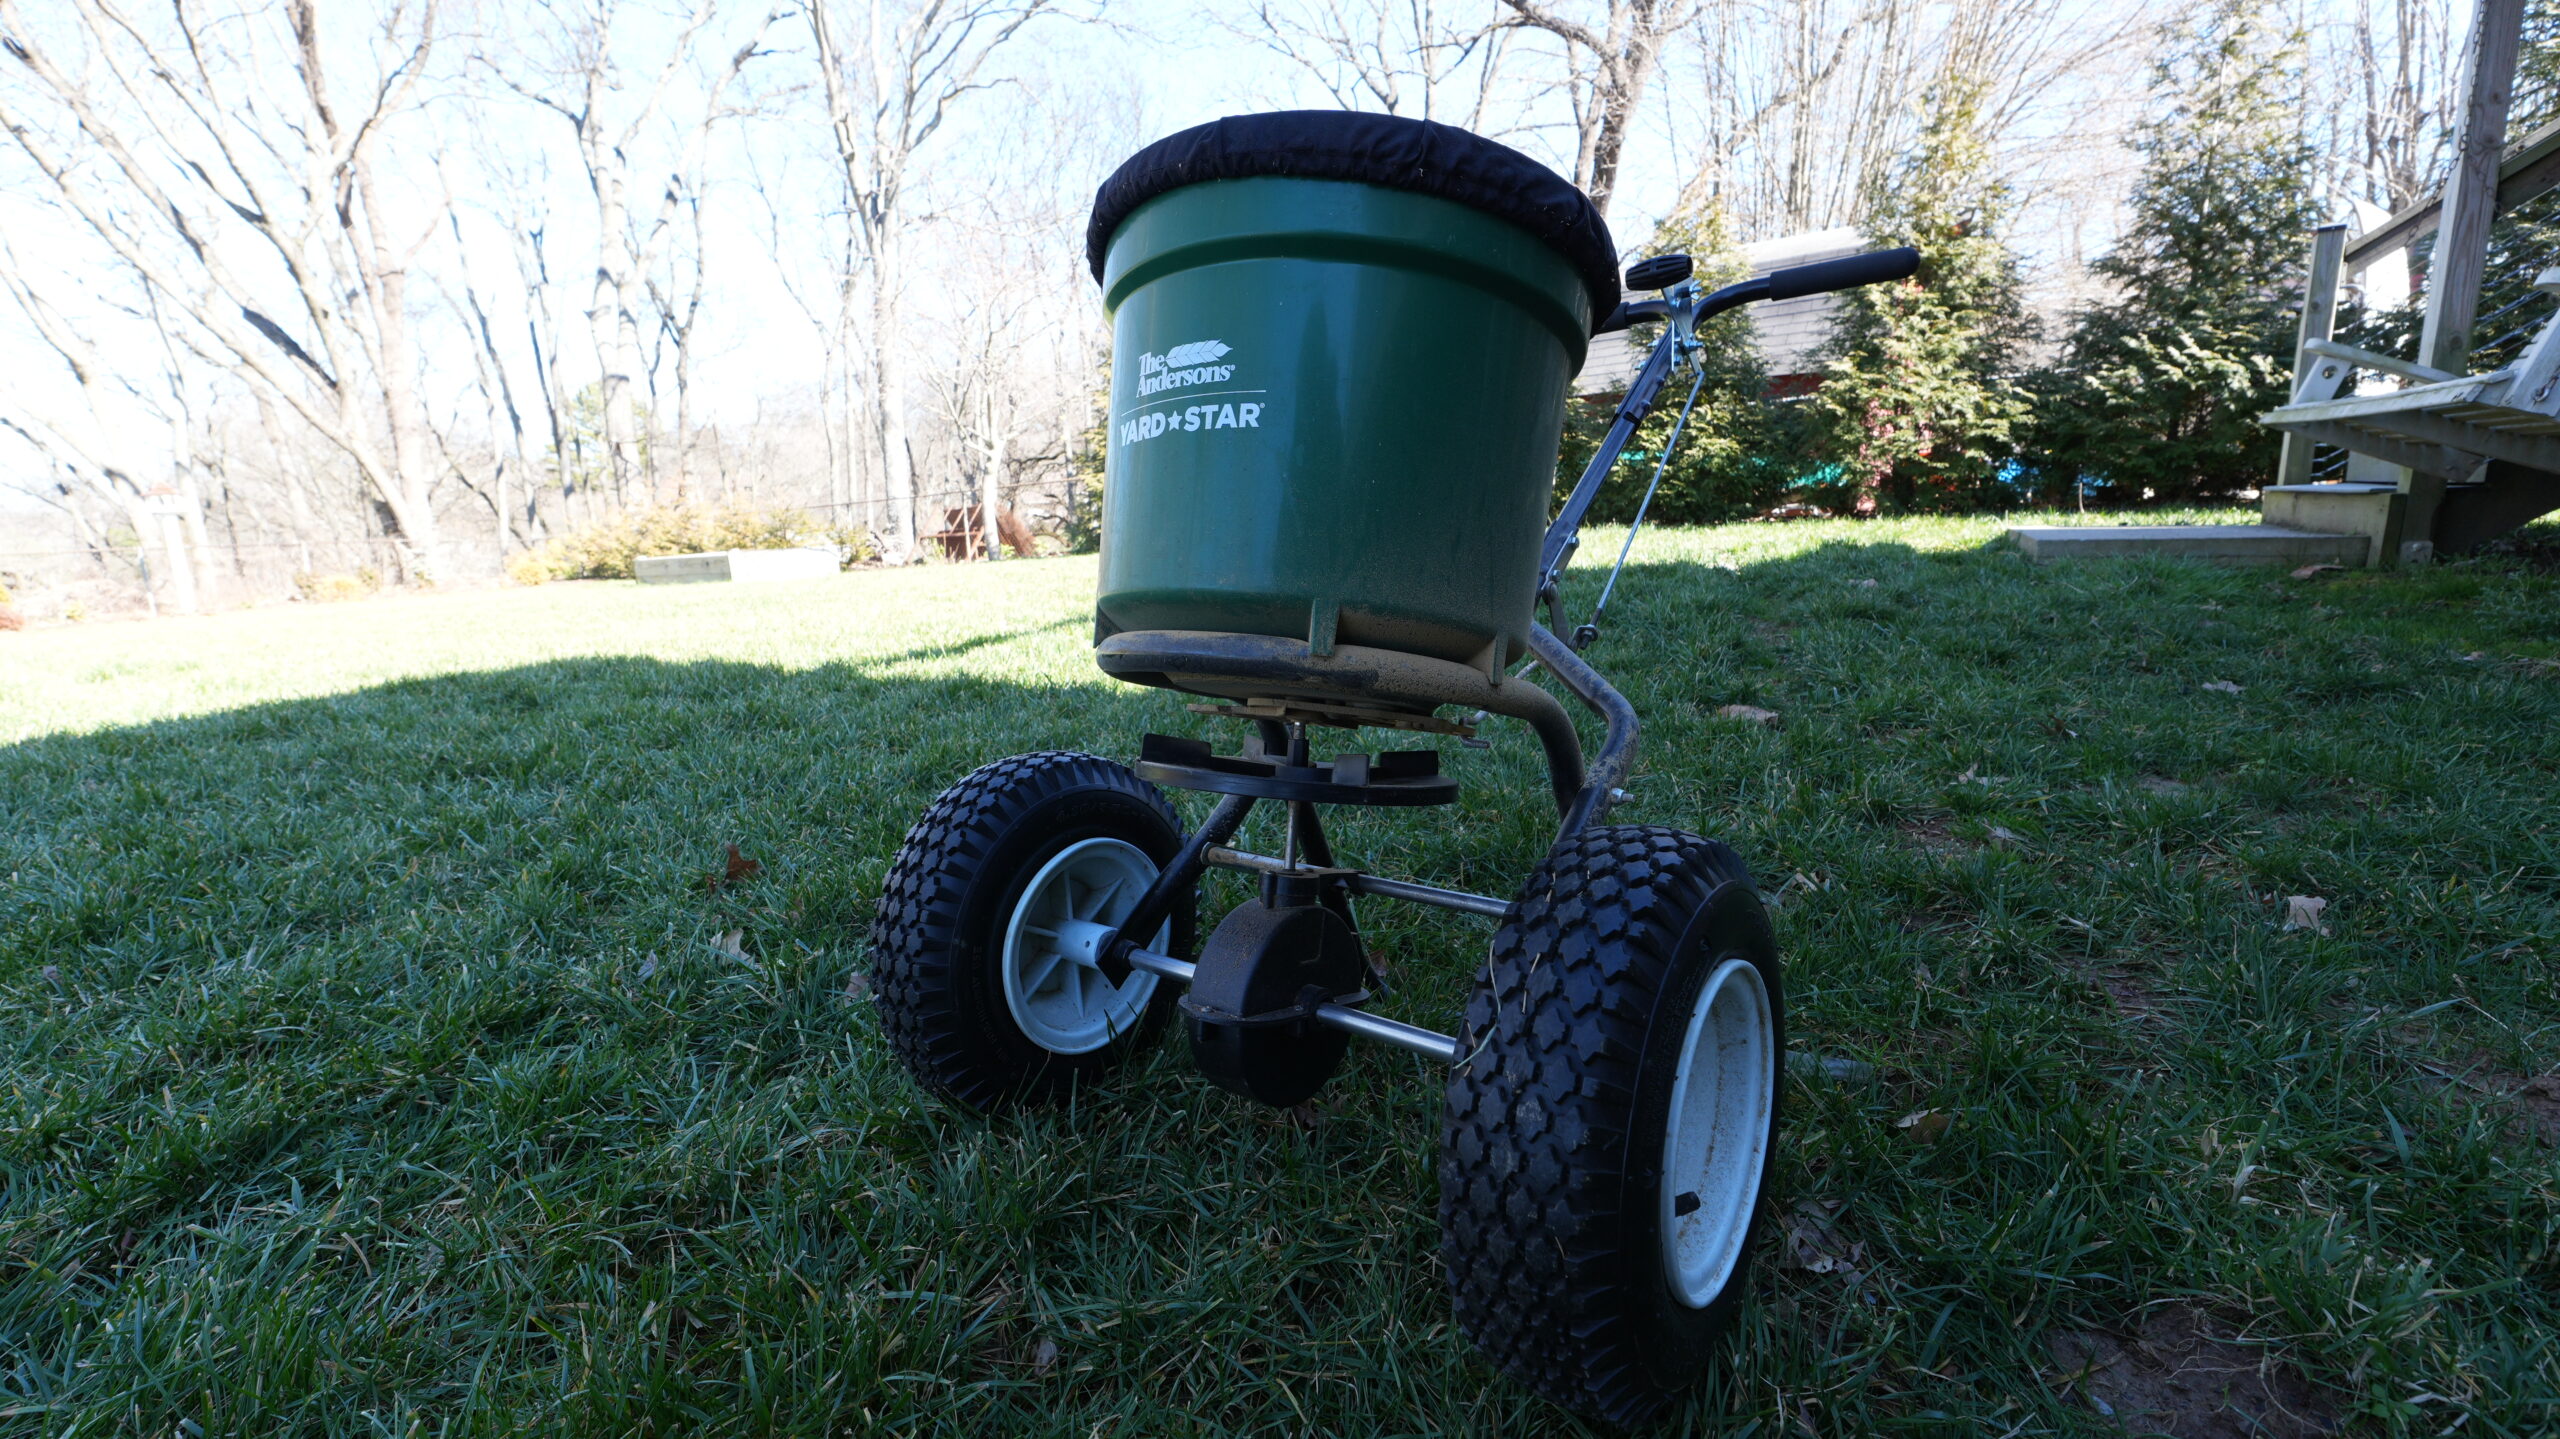
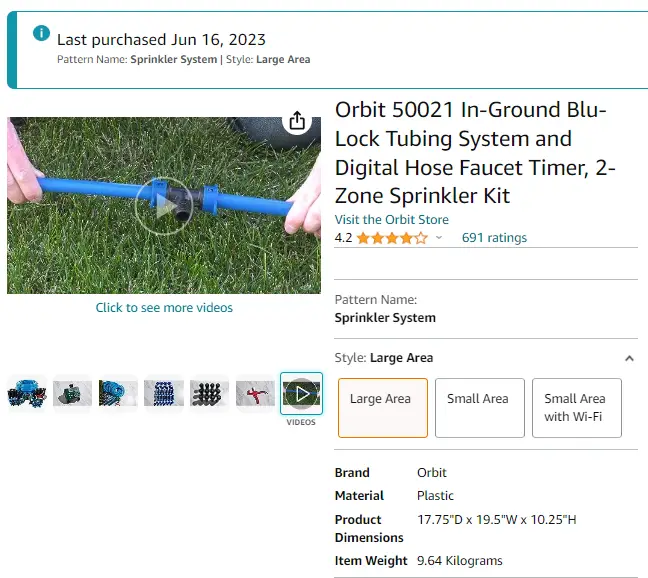
Orbit’s In-Ground Sprinkler System was a super easy choice for me to buy. I love doing my lawn myself and getting this thing for super cheap on Amazon was enough motivation for me to finally set one of these up.
Whenever I used to pass by someone in my neighborhood with an in-ground sprinkler system, my immediate thought was always “can’t hide money!”. In-ground sprinkler systems and big money go hand-in-hand. But let me tell you what – it doesn’t have to be that way. You can get a great system and set it up yourself for something I call “middle class fancy”.
Let me explain more – or you can watch our full YouTube video guide here, where we tested the entire process.
Here are the quick steps for setting up your Orbit In-Ground Sprinkler System:
- Buy the system (duh)
- Test your hose faucet pressure
- Design your set-up
- Assemble the sprinkler heads
- Adjust the sprinkler heads to the right range
- Lay out the assembled system above ground
- Give it a test run
- Dig the sprinkler pathway
- Place system in and fill in the dirt.
Setting up the Orbit In-ground Sprinkler System
Let me walk you through exactly how I set up my Orbit in-ground sprinkler system from start to finish.
Step 1: Buy the system (skip if you’ve already done this)
Sounds obvious, but trying to do any pre-work here will majorly mess you up. Going out and digging up a pathway will only bite you in the butt if you haven’t bought the system yet. I got mine from Amazon and it was absurd how cheap the whole kit was.
Step 2: Test your hose faucet water pressure
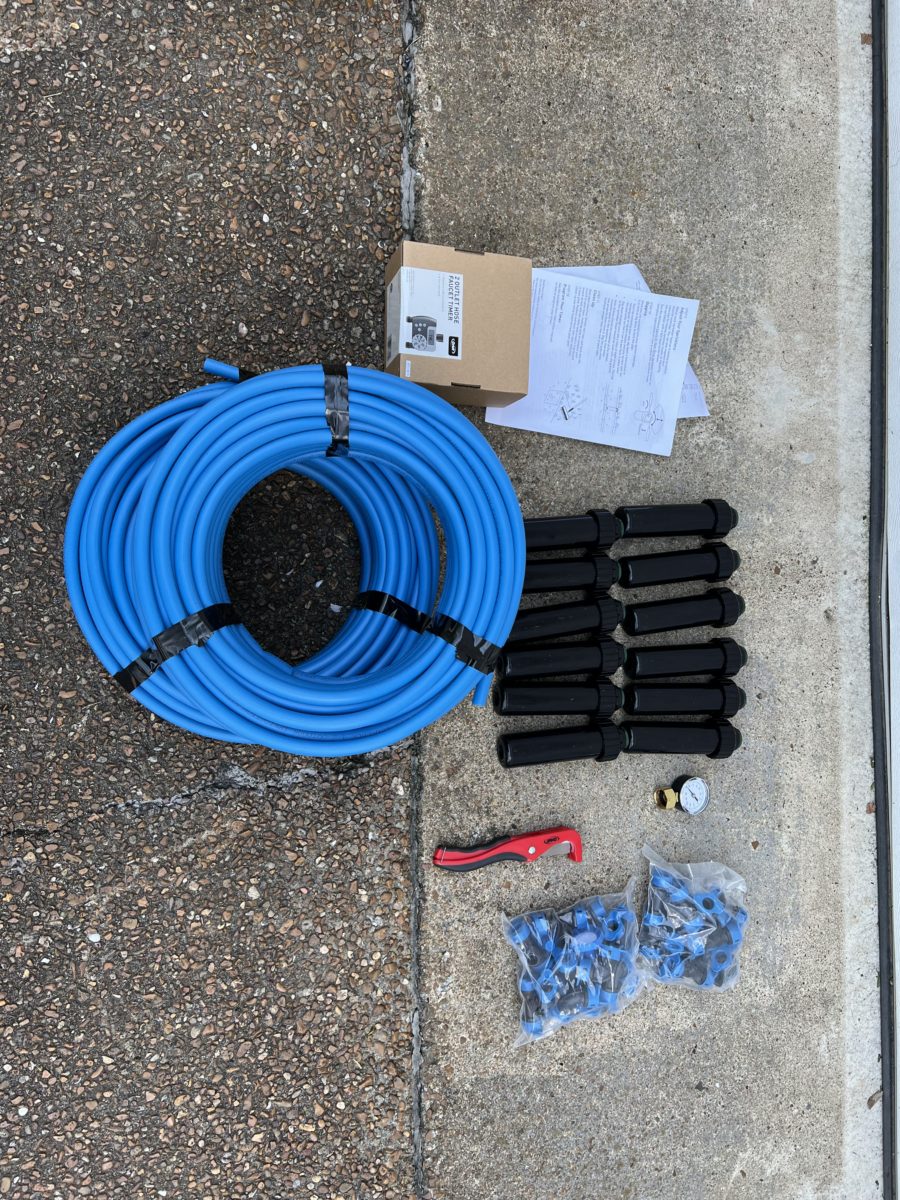
Fortunately, Orbit sends you a nice little pressure gauge that you can hook to your hose faucet that tells you how much water pressure your hose puts out. Simply screw this on, measure the pressure, and keep note of the measurement.
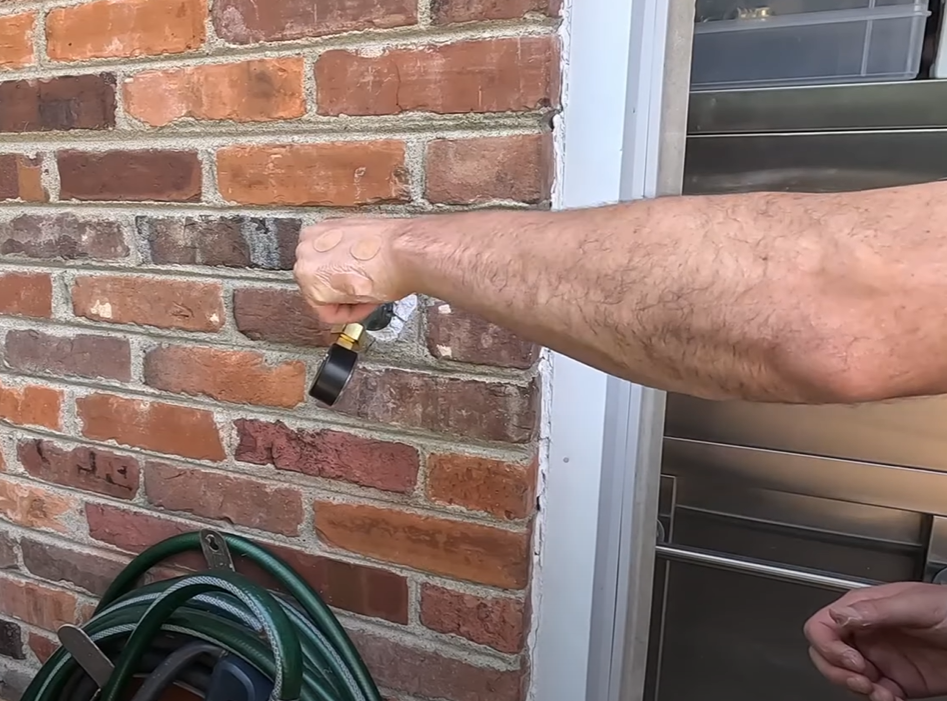
Just a warning here – if your pressure is below 35 PSI, this thing may be super wimpy and not worth it. If your PSI is above 80, then you may want a pressure reducer as it might be too strong for this system.
Step 3: Design your sprinkler set up
Orbit has a guide that correlates how much pressure your faucet puts out with how far apart you need to set up your sprinklers. Since mine was on the high end, I am putting each one of my sprinkler heads 24 feet apart.
This takes some careful mapping and spacing in your yard. Orbit recommends a U shape in your yard for you to get optimal spacing and watering. I mapped mine out with some yard stakes to make sure it was all even Steven before doing any kind of digging.
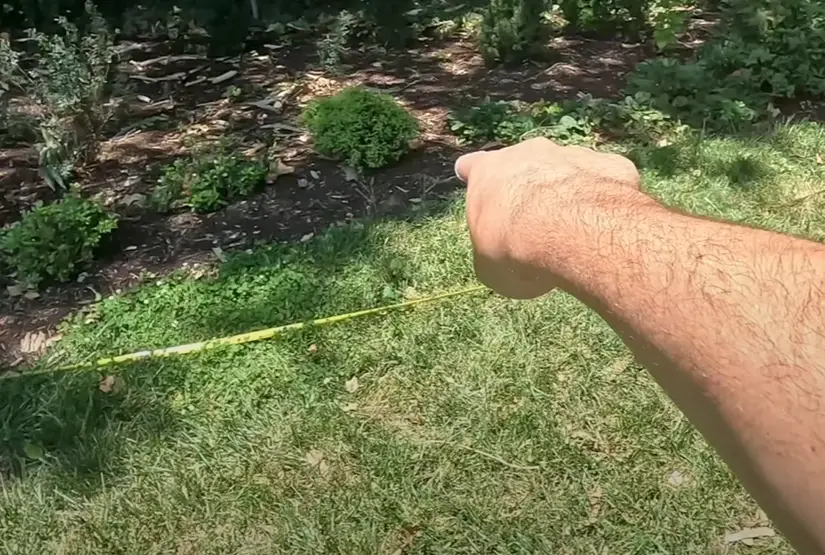
Quick tip: While mapping this out, let the blue hose that comes with the system lay out in your yard and relax and “melt”. This will help kill any tension once you start laying it down.
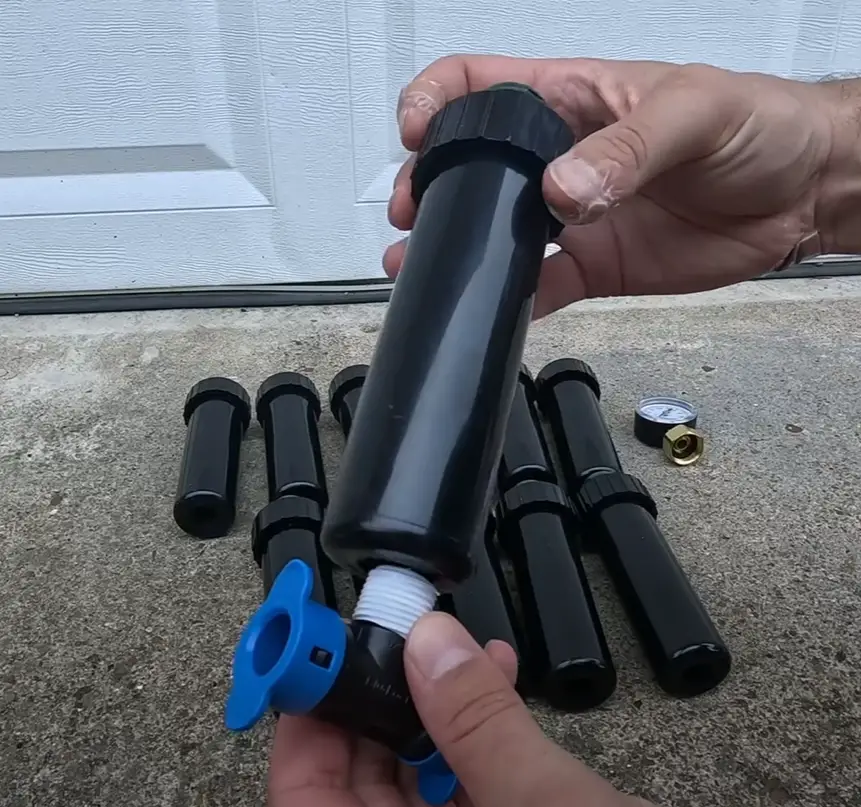
Step 4: Assemble all the sprinkler heads
The sprinkler head set up is pretty straightforward and provided in the attached instructions. You simply clip on the blue caps to the base hose adaptor connector and screw those on. I bought some plastic stakes and zip tied the sprinkler heads to those. I’ll explain more later.
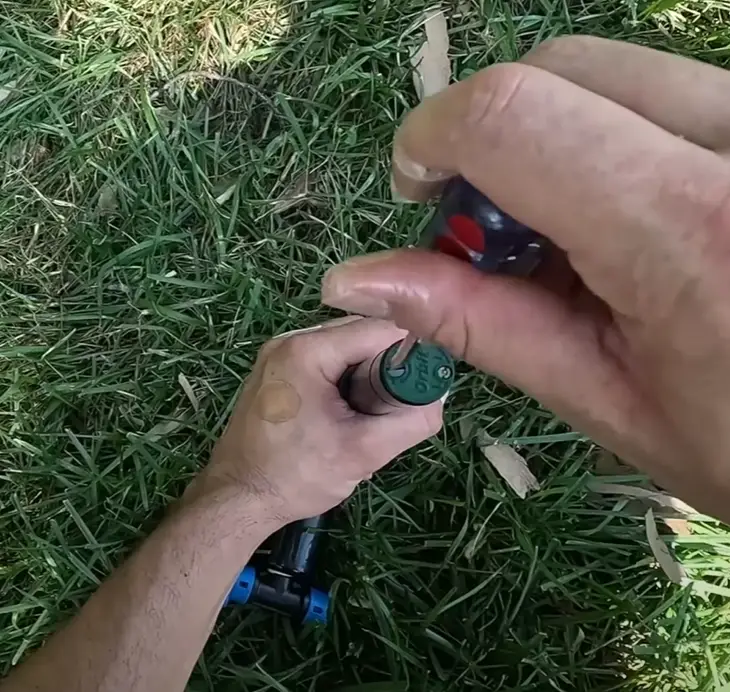
Step 5: Adjust sprinkler heads
Once you’ve got your sprinkler heads attached to your stake and in the spot you want them in your lawn, remove the inner sprinkler component (with the green cap). Pull down the spring and set the parameters of the sprinkler. To do this, you get a flathead screwdriver and tighten it until you have a good range.
This takes some trial and error to figure out exactly how this needs to be set up for your yard, but basically functions like a complex parameter range on any other sprinkler (even the oscillating sprinklers).
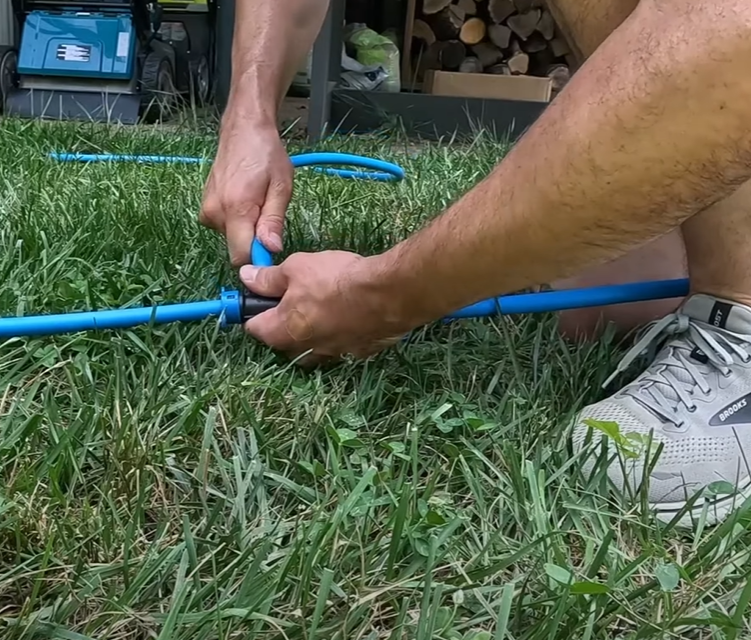
Step 6: Lay out the hose above ground
It’s really important to make sure you set up the full system before doing any digging. This means actually getting the hose out, cutting it, and connecting it to the sprinkler system. Orbit sends a nice tube cutter that lets you easily cut down the hose to the size you need. Some important tips here that I learned the hard way is to push the blue hose in as far as possible to make sure you don’t get leakage.
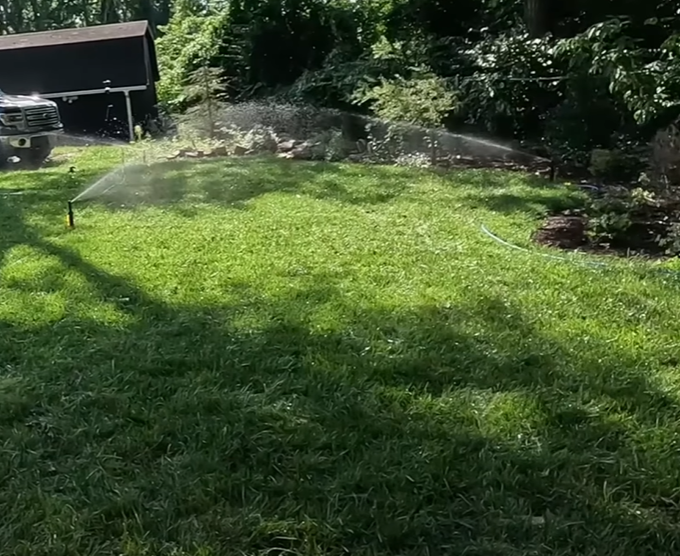
Step 7: Give the Orbit Sprinkler System a test run
Before you dig, make sure the system works! Connect it to your hose and let it run. Make sure there aren’t any leaks and that each spring-loaded sprinkler head actually does its job. This is a critical time to make any last minute adjustments to the sprinkler range.
Pro tip: Make sure you get that head-to-head coverage on your sprinkler. This is recommended by Orbit to ensure you don’t miss any spots and can fully get your yard soaked.
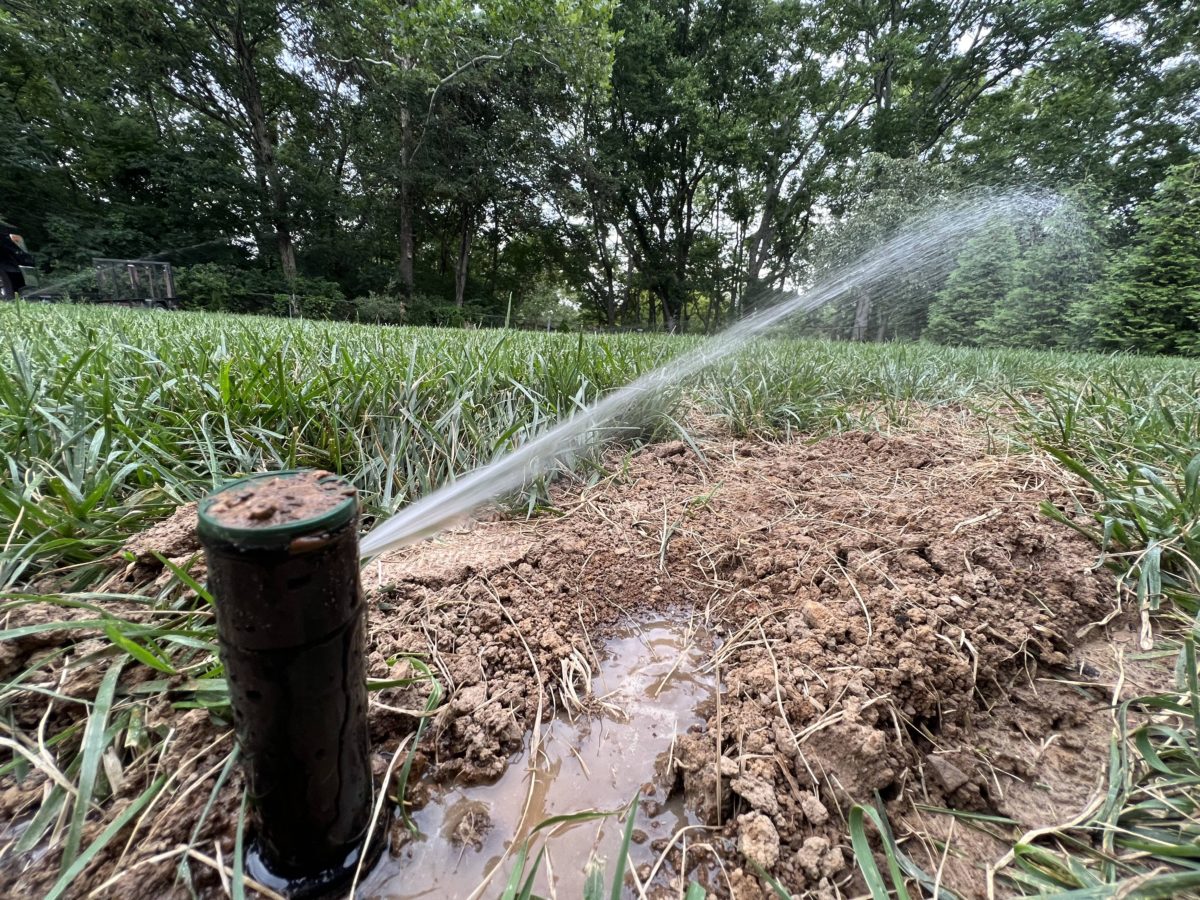
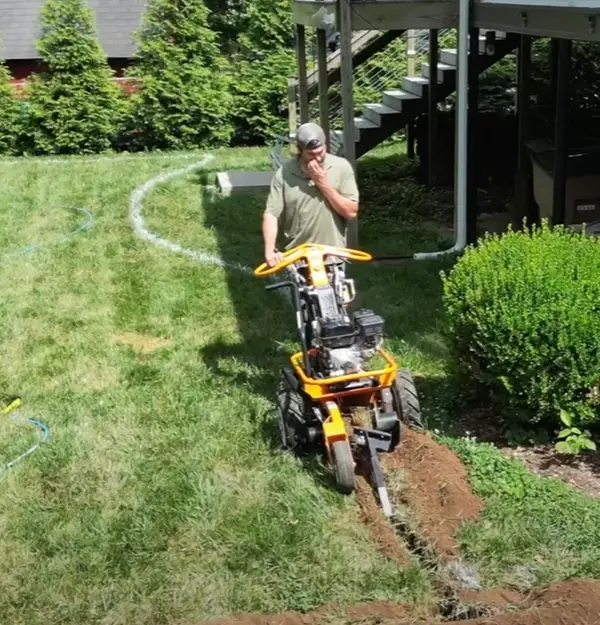
Step 8: Digging the Sprinkler System in
There’s a hard way to do this and a harder way to do this. The hard way is to rent a trencher and dig a nice trench to fill your hose in with. The harder way is to use a flat shovel and do it the old fashioned way. I chose to rent a trencher.
This process took quite a while, but was definitely better than doing it with a shovel. It also gave me super clean, evenly distributed trenches to drop the hose down into.
Pro tip: Dig 8-10 inches and put the pipe in for the best results.
Step 9: Refill the dirt
Once you’ve laid the pipe (no jokes, please), then simply test it out and then fill it back with dirt. This is another laborious process to get the dirt back into the hole, compact, and level.

Orbit In-Ground Sprinkler System Review: My Experience
After getting it all set-up, I’ve actually loved having this sprinkler system in my yard. I’ve got it set up with a timer to run super early in the morning. After I got it installed, I haven’t had to touch any of the sprinkler heads (although it has only been a few weeks).

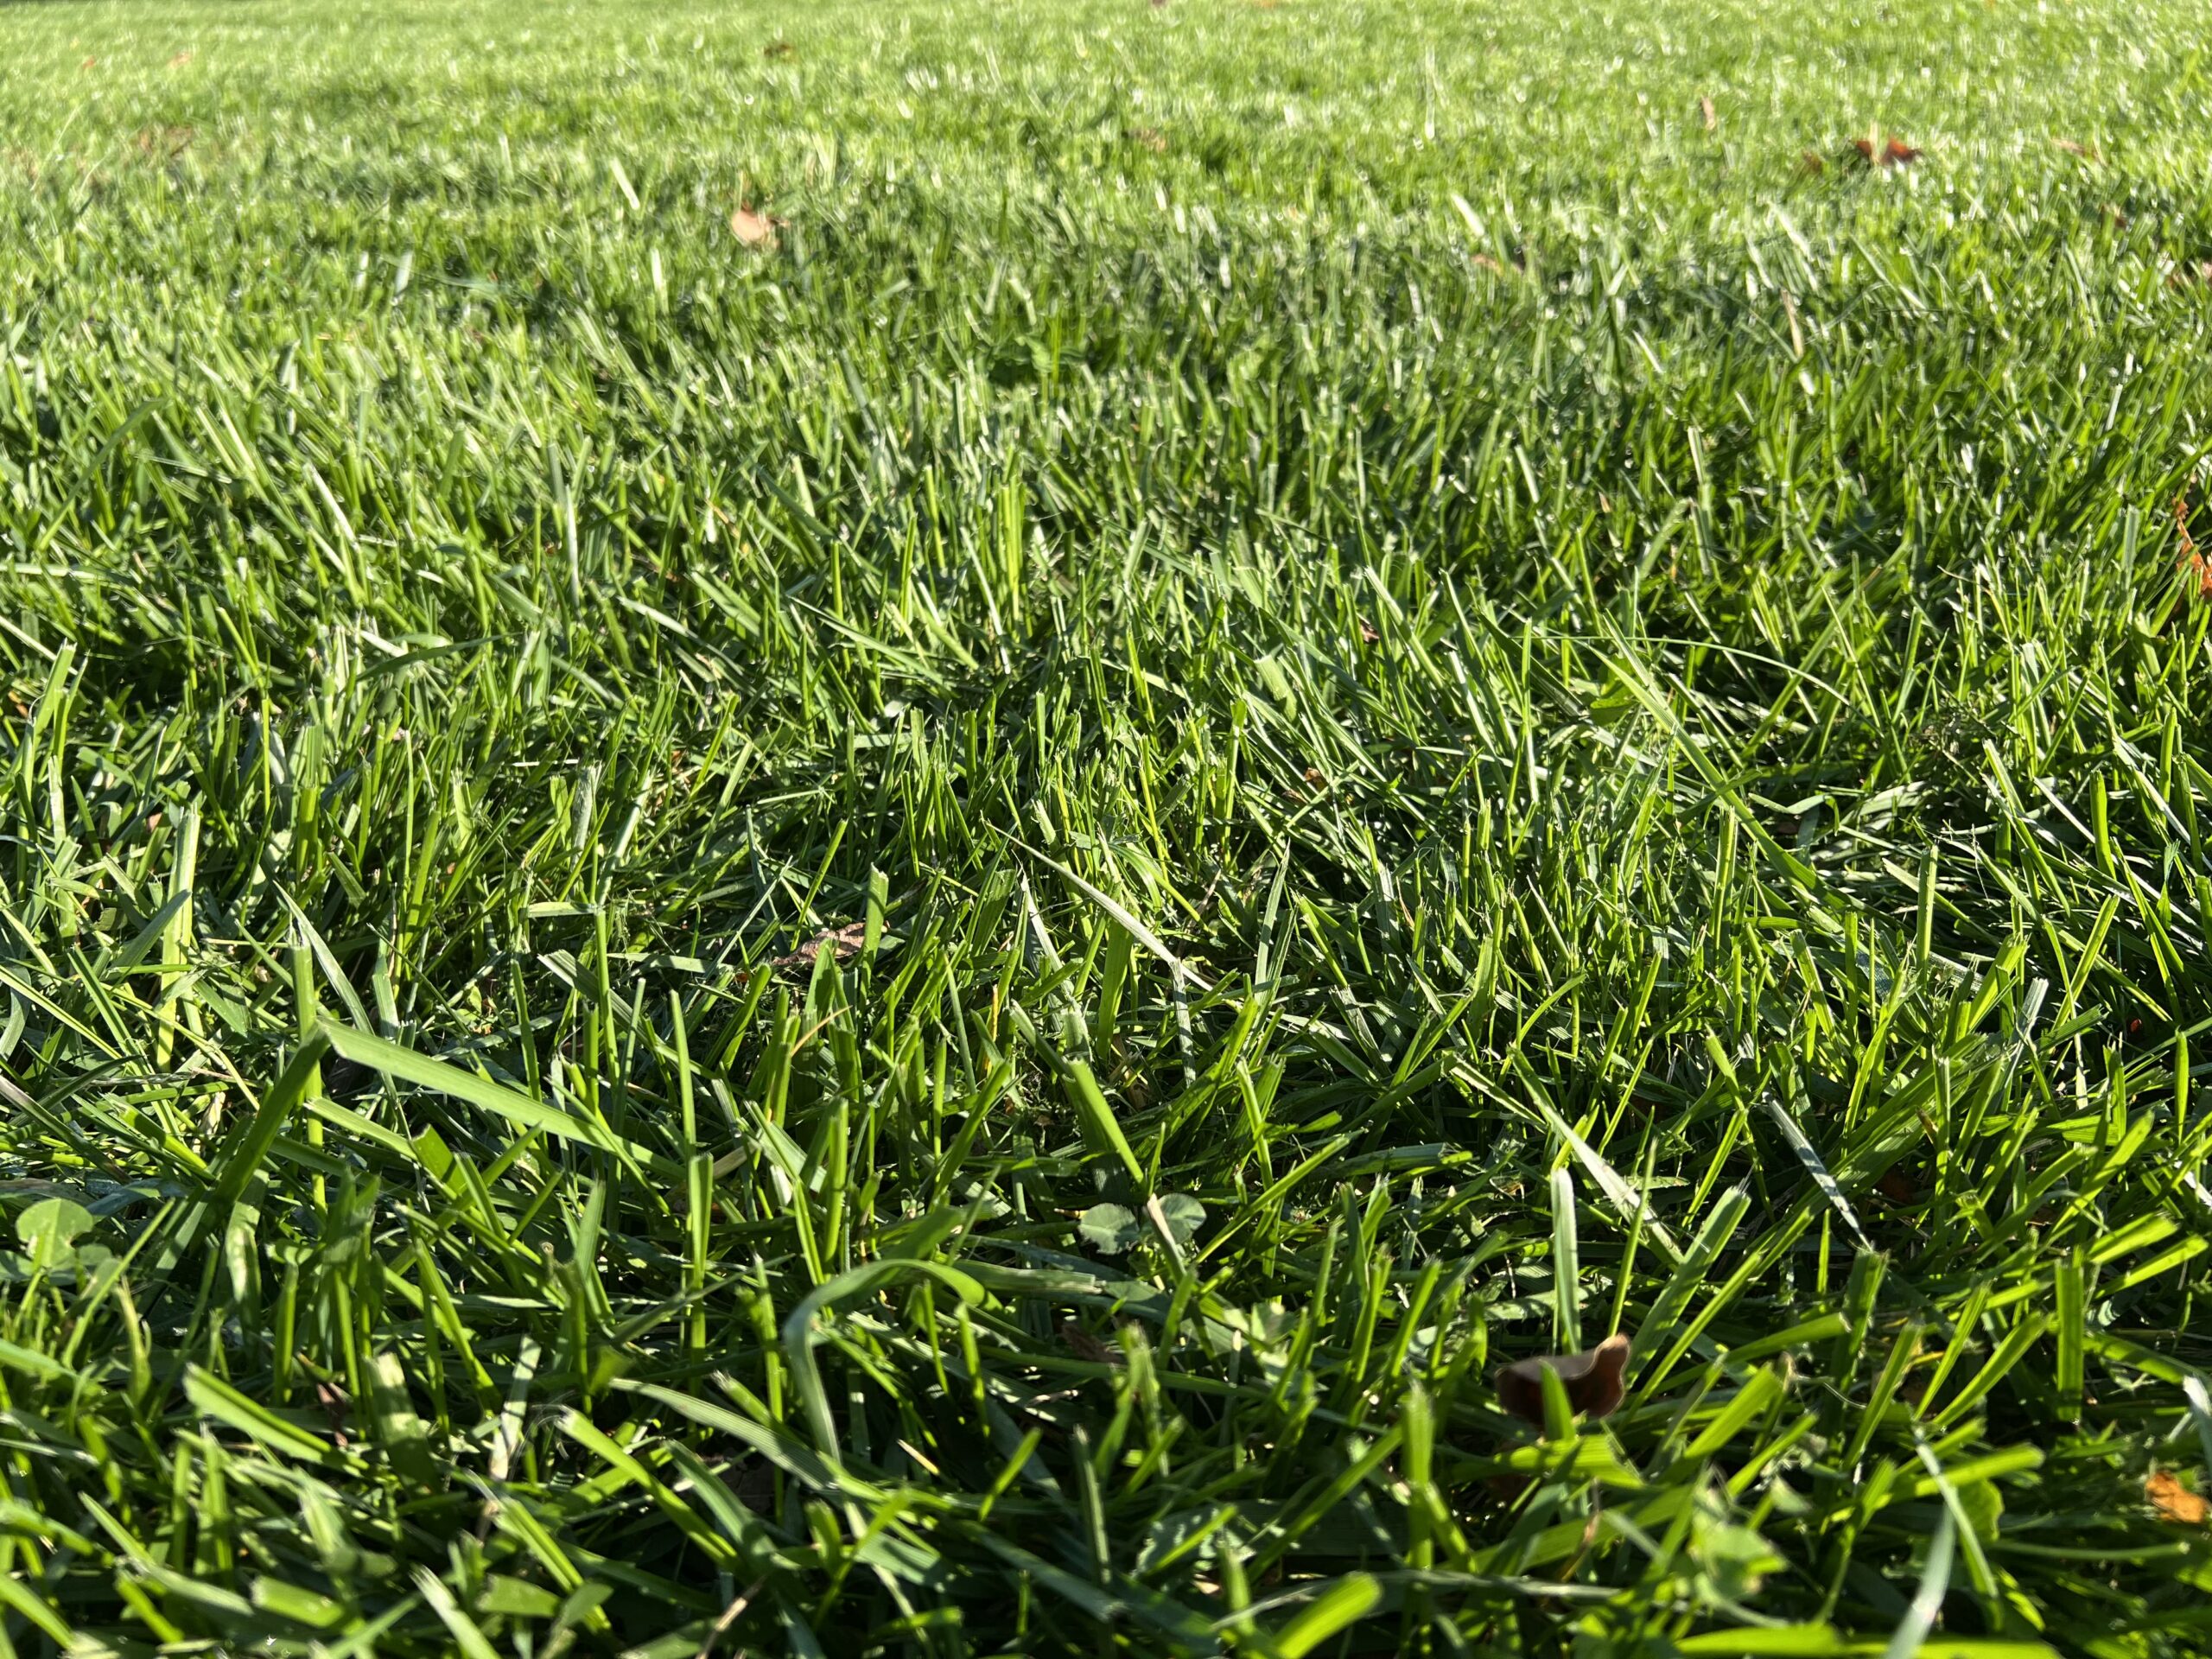
Mowing for the first time wasn’t too much of a hassle and the grass is starting to come back in on the areas I dug up. I’ll report back after more time has passed, but so far I am extremely pleased with how the set up is going.
This $200+ dollar system is a small item that makes you feel like you are rich. A really cheap way to get a great looking yard without having to go out there with a sprinkler and do it manually.
Common questions and troubleshooting Orbit In-Ground Sprinklers
Here are some common questions I get (and had myself) when I first got my In-Ground Orbit System.
How do you adjust orbit in ground sprinklers?
You can adjust the range of the orbit sprinklers by opening the sprinkler head, pulling down the spring, and using a flathead screwdriver to adjust the range on the top of the sprinkler head.
How do I make my sprinklers shoot farther?
To get your in-ground sprinklers to shoot farther, you need to increase the overall water pressure in your hose faucet. Anything below 30 PSI will make for a very weak sprinkler.
Why is my Orbit sprinkler head not rotating?
If the Orbit sprinkler head is not rotating, there is likely dirt or debris stuck in the head. Open it up, clear it out, and ensure the appropriate rotation range settings are in place.
Why we review lawn tools
The reason we started this website in the first place was because we had so much trouble trying to find reasonable, understandable, honest reviews for lawn equipment. And it’s not cheap! After hours and hours of research, trying products and returning them, and messing up our yards – we started this site.
As people who had to learn the hard way, we want you to know exactly what you are signing up for before you purchase a piece of equipment. That’s why we are committed to providing honest, easy-to-understand reviews that mean something.