How To Take Care of Your New Sod Lawn (2024 Update)

lawn striping 2022

Caring for a new sod lawn is an extremely nerve-wracking experience. Sod is expensive and looks great, but can easily fail.

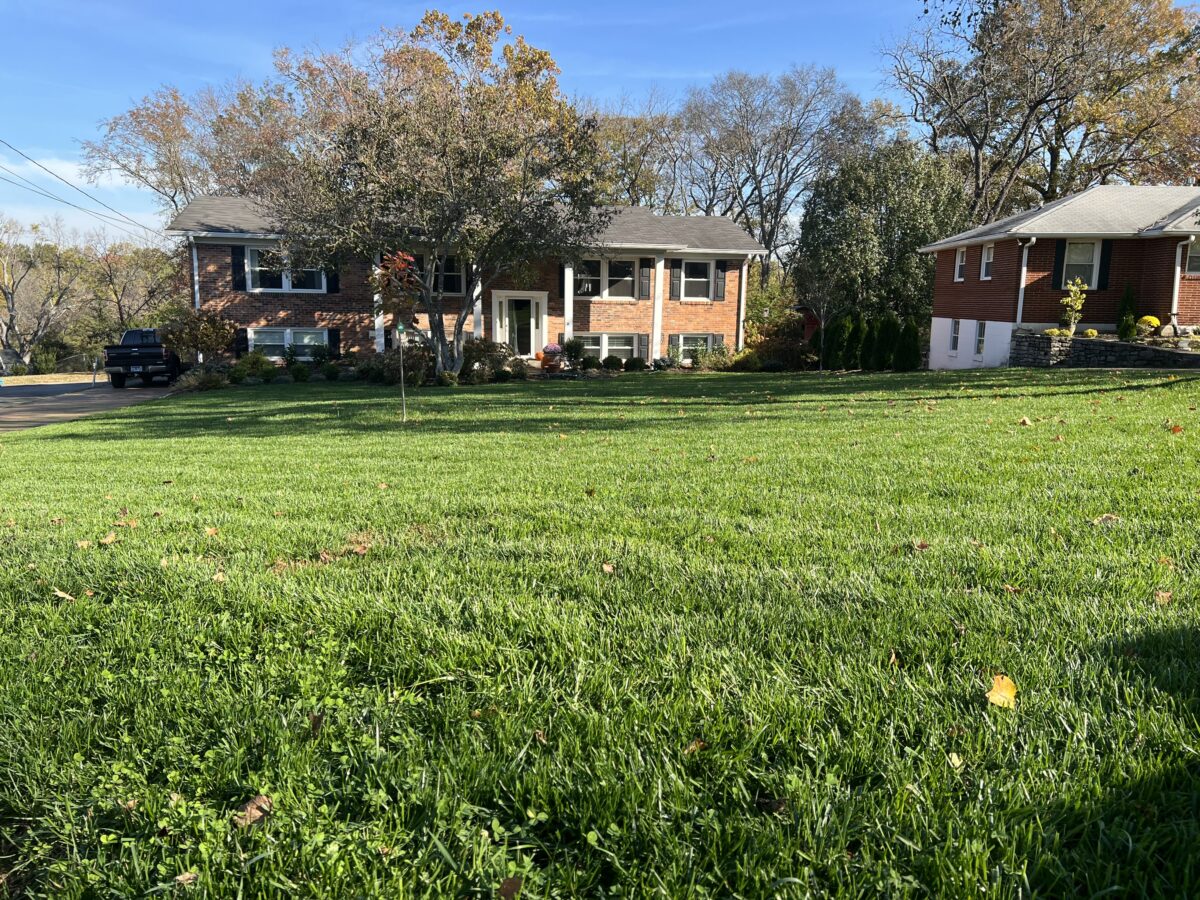
If the sod fails to grow and incorporate into the underlying soil, you are left with a huge mess. 

My neighbor recently had to pull up his old sod lawn and it was an absolute nightmare. To add insult to the injury of losing his investment, he had to pull up all the old plastic mesh that was stuck in the dirt. 

Yikes.

Let’s avoid that at all costs. 

Today, we are going to talk through exactly how to take care of your new sod lawn to make sure it thrives for years to come.

Let’s get started:

The Basics: Why Sod Lawns Are Great

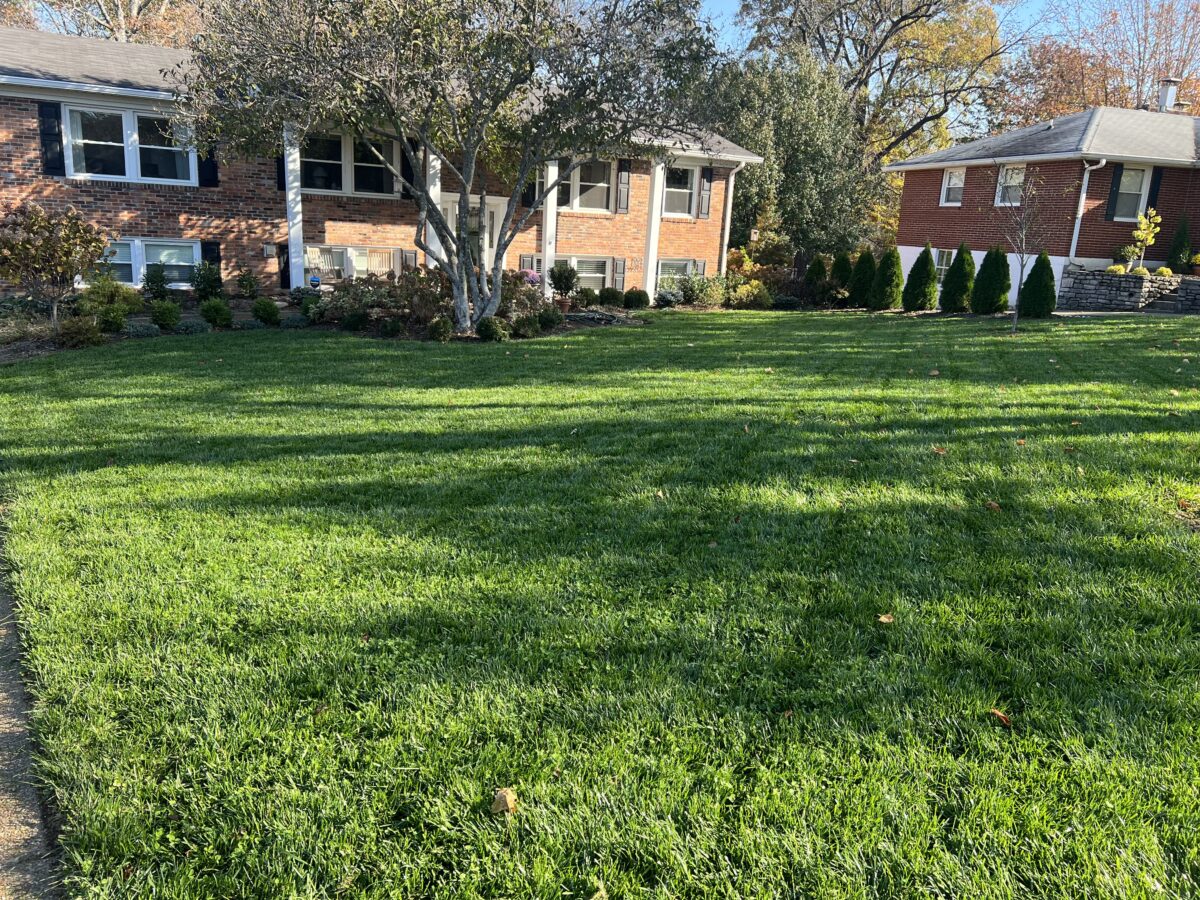
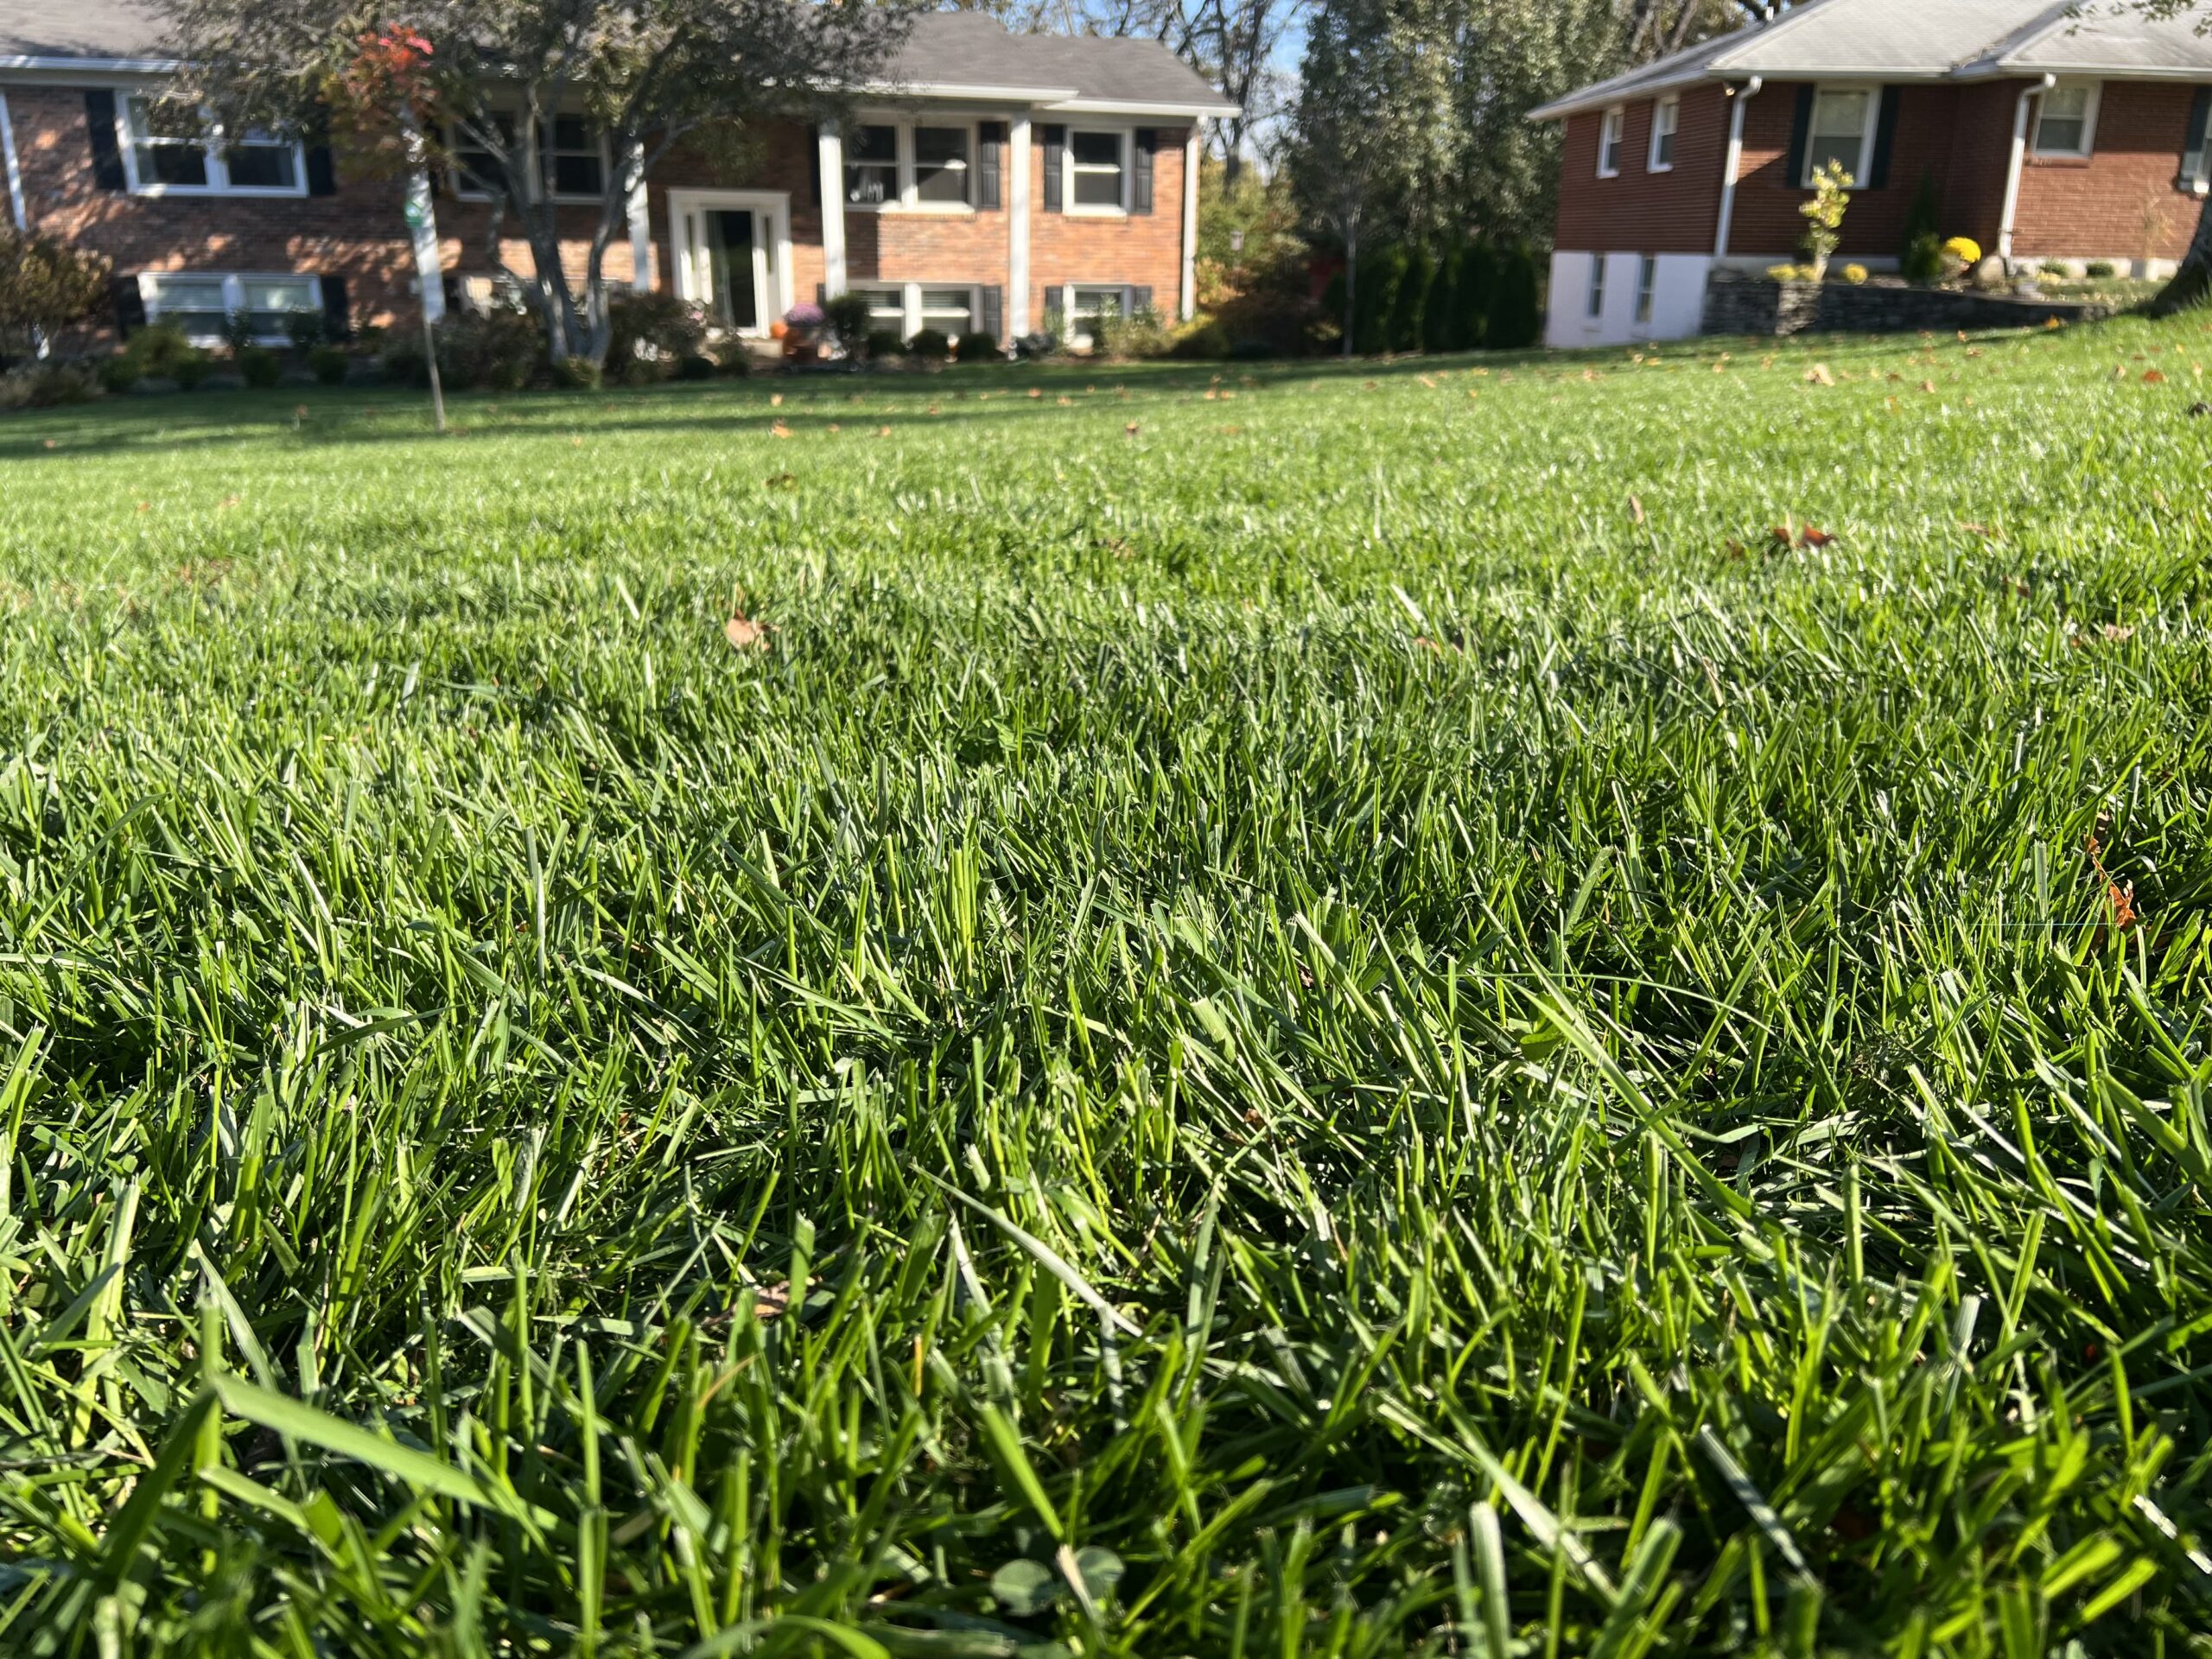
If you can successfully pull off a sod lawn transplantation, then they are by far the easiest way to get a nice looking lawn. Sod lawns are great because they immediately give you curb appeal with a luscious, green lawn. 

#goals.

Realistically, starting from scratch with just a plot of dirt and trying to grow thick grass is probably way harder than getting your sod to successfully stick. Starting from scratch involves tilling the dirt, leveling the lawn, watering, laying down fertilizer and seed, watering some more, and lots of prayer. 

When the grass does start to come in, it’s usually sparse and patchy. Then you have to start the process mostly over again. 

On the other hand, sod lawns instantly beautify your yard with thick, green grass. Work is still required to keep it there, but not nearly as much as a new lawn overhaul.

How To Prepare Your Lawn For Sod

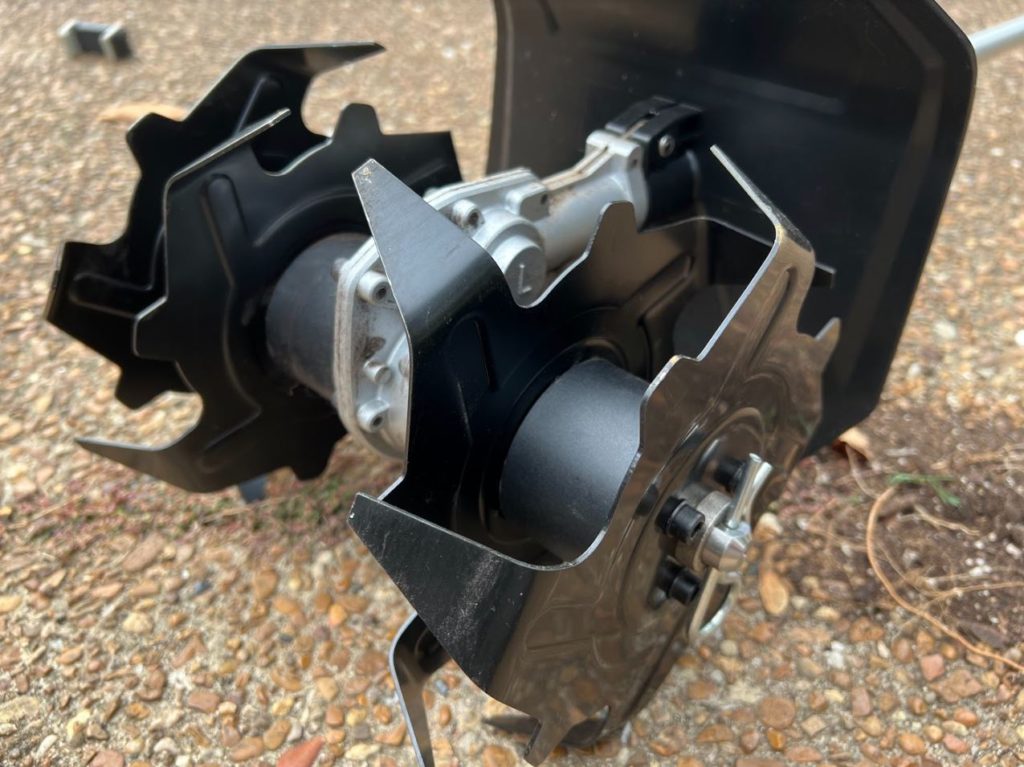
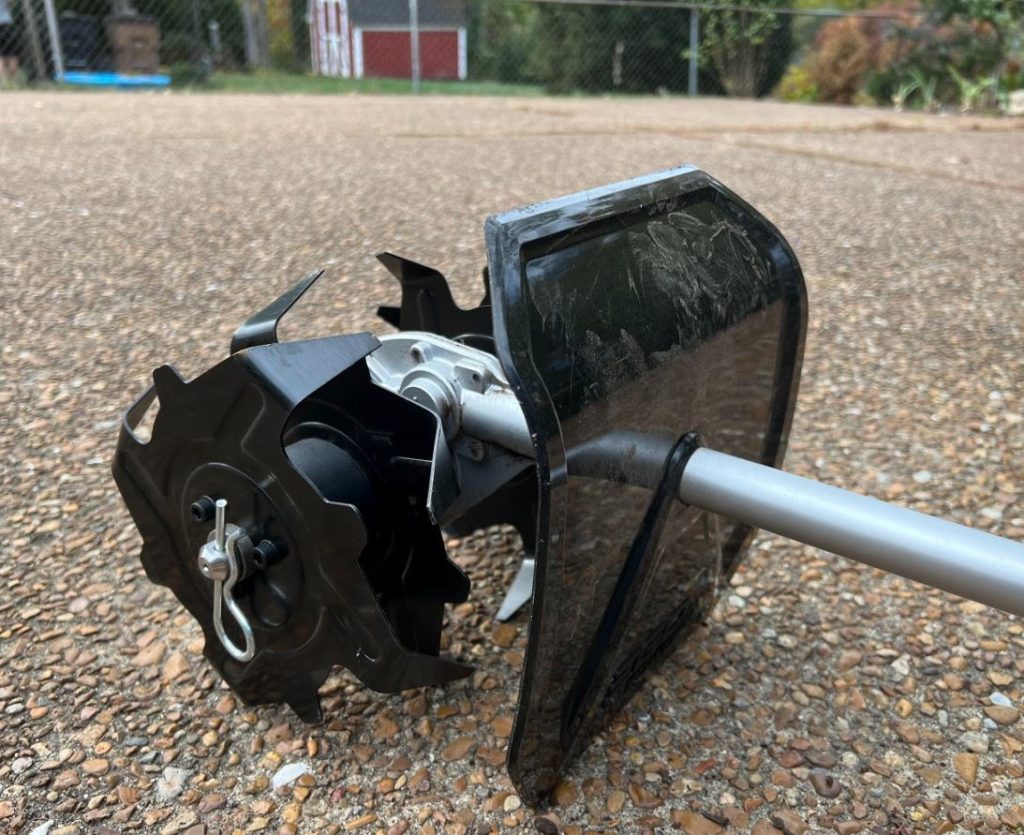
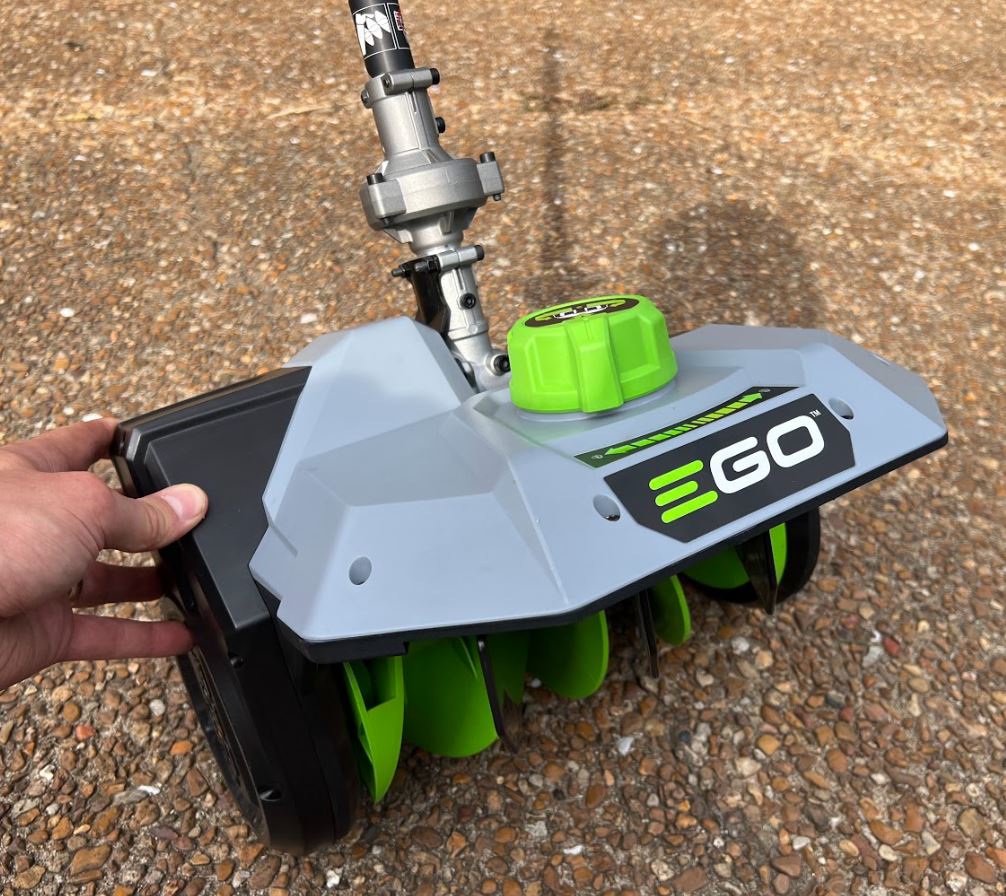
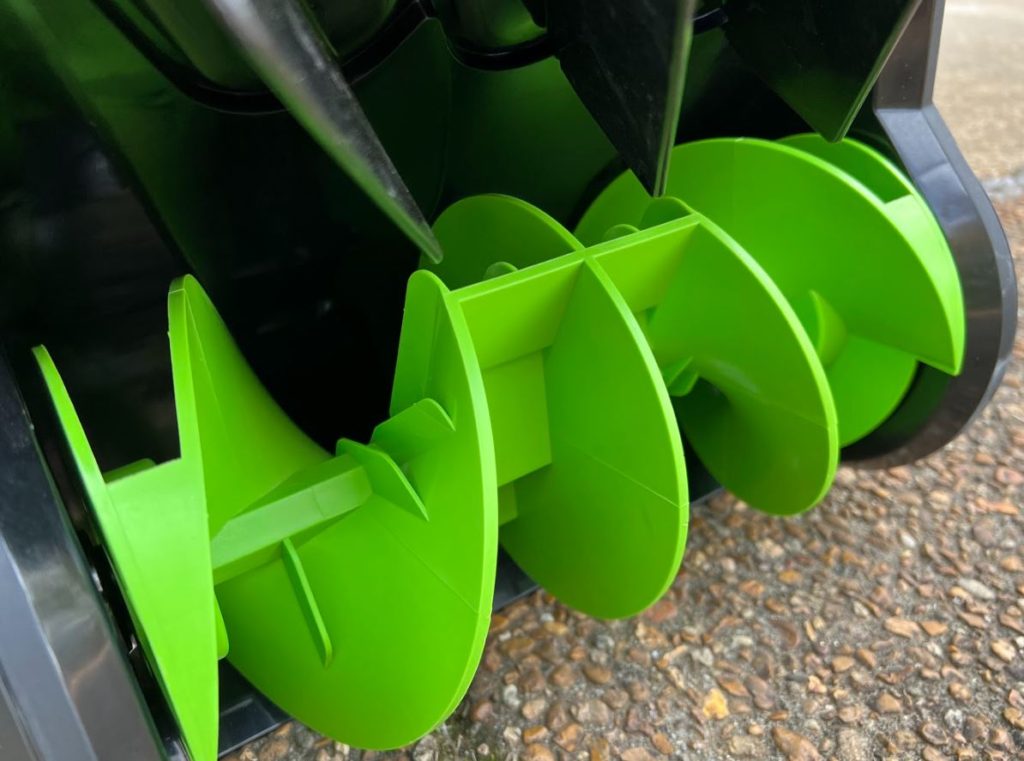
Starting at the top, the first thing you want to do is to till up your yard. Yep, intentionally destroy that sucker. Using a tiller at about 2-3 inches will help pull up all the old, dead grass and weeds growing in your yard. It also has the benefit of bringing new soil up to the top, an extreme version of the yearly aeration process.

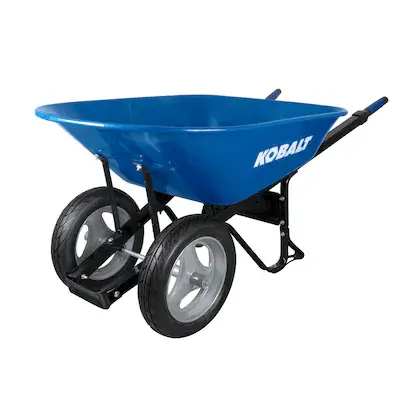
If you have grass and weeds pulled up from the yard that you just tilled, your next step is going  to be to remove everything but dirt using a rake. So go grab a wide rake and a wheelbarrow and haul off all of that junk.

May come in handy!

Once you have cleared out everything but dirt, you can use the same rake to make the lawn as level as possible. Some people use lawn levelers, but you can really get away with a rake and some elbow grease as long as you’re making the dirt relatively flat and even.

After you’ve got it level, you can lay down some lime and fertilizer. Most generic lime and fertilizers will be just fine to throw down without causing too much damage, but if you want to really skyrocket your chance of success then you can take a soil test. Soil tests will tell you the exact state of your soil which you can use to apply the perfect ratio of fertilizer.

If you’ve laid down the fertilizer, getting the soil nice and most with a sprinkler will help prime it to accept the roots from the sod. Make sure to do a nice sprinkle right before laying down the sod.

To summarize:

  1. Use a tiller to dig up weeds and grass from your yard.
  2. Remove everything except for the dirt using a rake.
  3. Level the lawn using the same rake or a lawn leveler.
  4. Lay down some lime and fertilizer.
  5. Keep the soil moist.
  6. Get ready to go.

How To Take Care of New Sod

It’s a great day!  Your lawn looks picture perfect and the sod is completely down and ready to thrive, right? Right?

Not quite. While the sod looks perfect, it is going to take some work to keep it that way. It’s almost like getting flowers for your wife. They look great, but without water they are going to wilt quickly. It is way more complex to keep it not only alive and green, but truly healthy to survive year after year. 

Watering Your New Sod Lawn

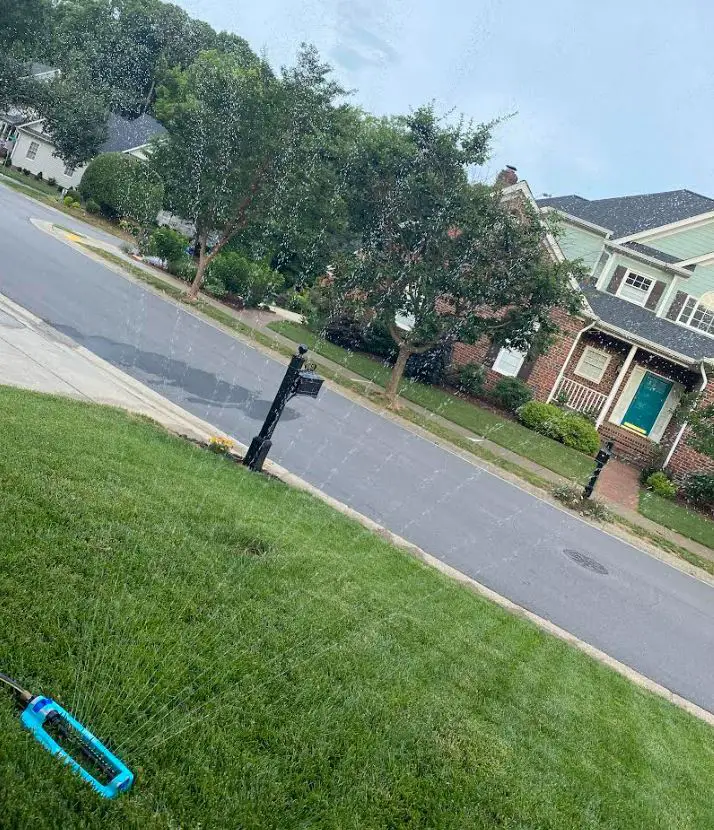
The first thing to do is to let these puppies drink. Give them water! Most folks recommend that you water twice per day for 20-30 minutes. I would go even a little bit less time, 10-20 minutes, but watering multiple times throughout the day, like 4-5 times.

We recommend watering for 10-20 minutes, 4-5 times per day. The difference is all about getting the roots to dig deep. In order to have roots that get deep, they can’t get rotten or diseased by being overwatered. Overwatering will result in fungus and deprive the roots of vital oxygen that they need in the first few weeks for survival.

Be diligent about this!

Our conventional recommendation for someone overseeding their lawn would be to water for 50 minutes, once a day. But that is advice for well established lawns with complex root systems. The longer, the better with those. 

Also be sure to water every day for the first week, then slowly pull back the number of days you are watering each week. Still maintain the 10-20 minute watering time, but 5 days a week the second week, 4 days a week the third week and then finally 2-3 days a week by the fourth week.

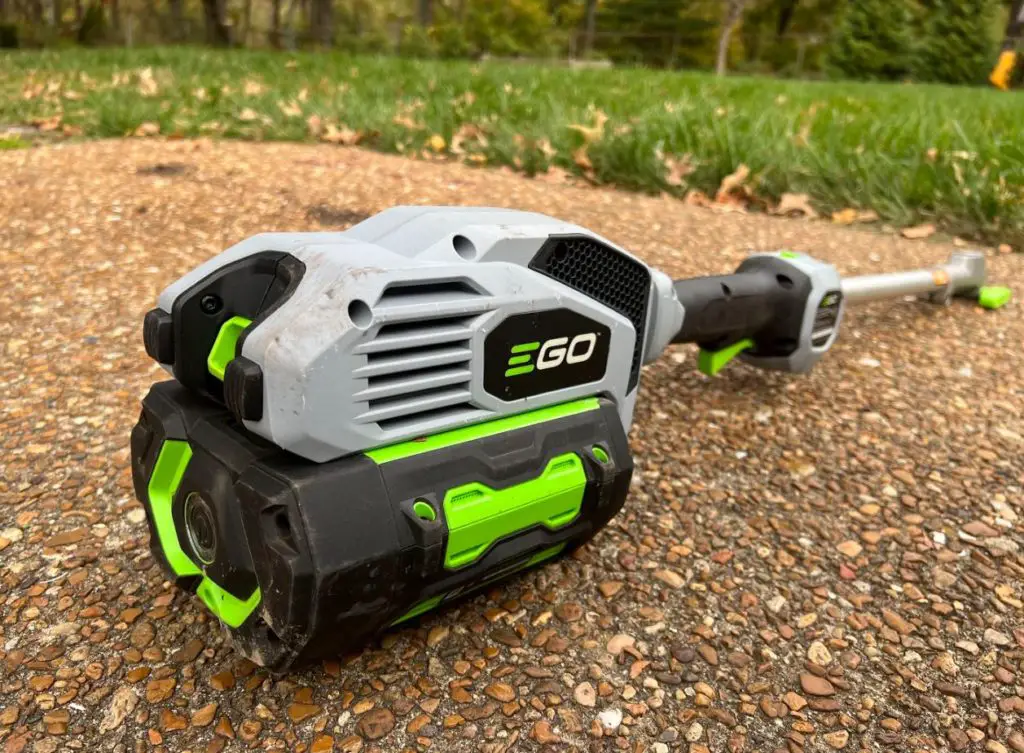
Check out our ultimate sprinkler guide.

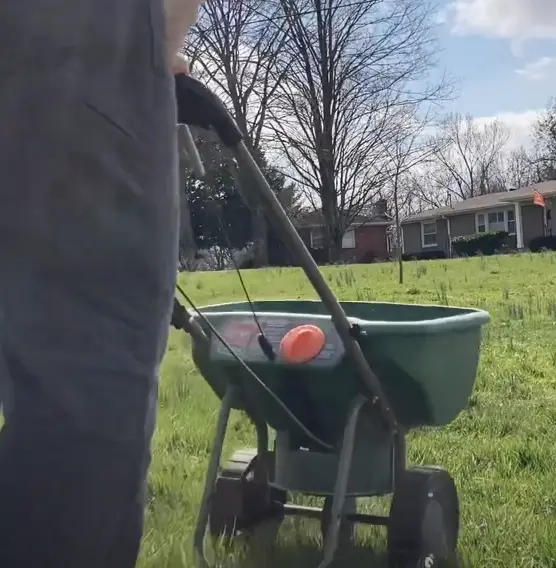
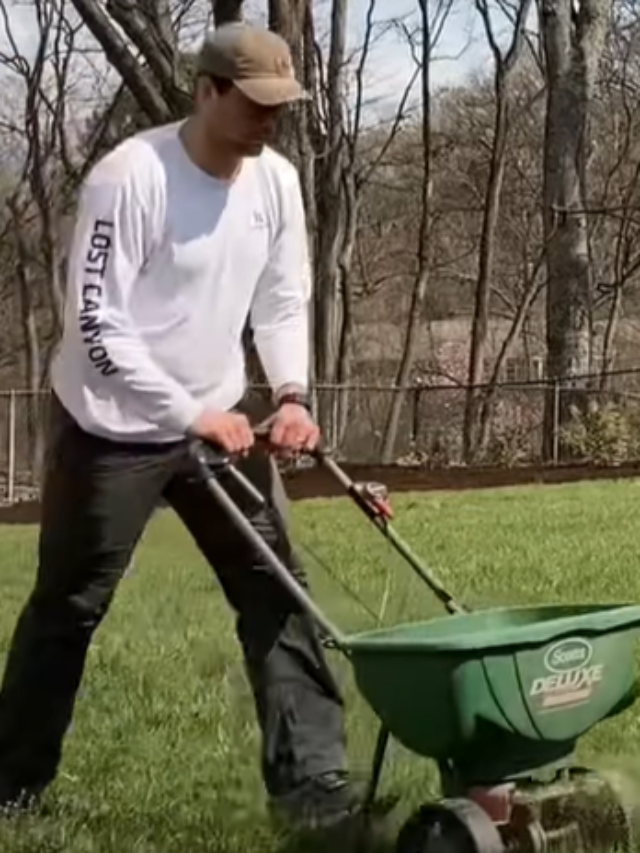
Should you fertilize new sod?

Once you’ve watered religiously for a month, you can put down some fertilizer. Most basic fertilizers will get the job done, but we are going to recommend a nice soil ratio of 18-24-12, which is notorious for developing deep roots. You can get this from anywhere, but we recommend Anderson’s fertilizer, which you can get from Amazon for a great price.

If this process looks and sounds familiar, it is very similar to the initial overseeding process done after your yearly aeration process. The principles are really the same. You want deep roots. 

One of these broadcast spreaders will help you lay it down.

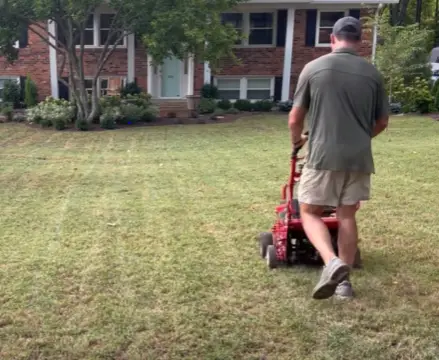
Know When To Mow New Sod

Honestly, don’t even think about mowing for the first few weeks. You’ll notice the grass looks good at first but will wilt a little bit. Putting violent spinning blades over the top of this delicate transplant will only make things worse. 

Once the lawn has perked up a bit and you have watered religiously, then you are good to mow. This generally falls at the 3-4 week mark. If you want, mowing and fertilizing can happen back-to-back. 

Use a nice lightweight mower for extra care.

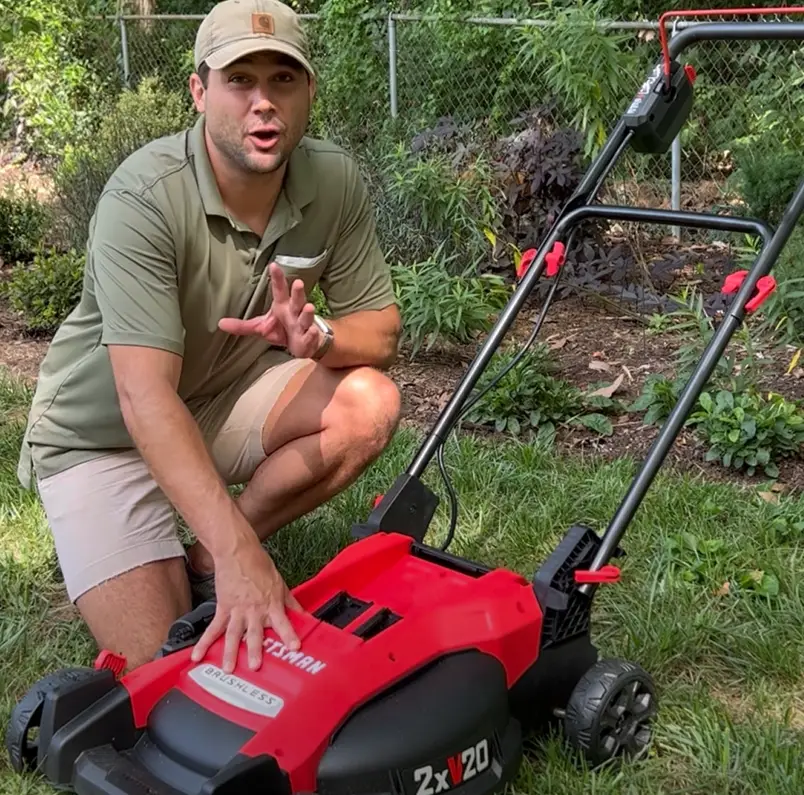
As you should basically always do, crank the height up on your mower all the way to the top – especially for the first few mows. Make sure when you do mow, that the grass is completely dry and there are no mushy areas. If you’ve patched parts of the sod lately, leave those alone with the mower. 

Summarizing this:

  1. Water for 10-20 minutes, 5 times per day, progressively tapering a day off each week.
  2. Fertilize your lawn at around the four week mark with an 18-24-12 fertilizer ratio.
  3. Mow at the 3-4 week mark.
  4. Try to stay off of the grass during this time.

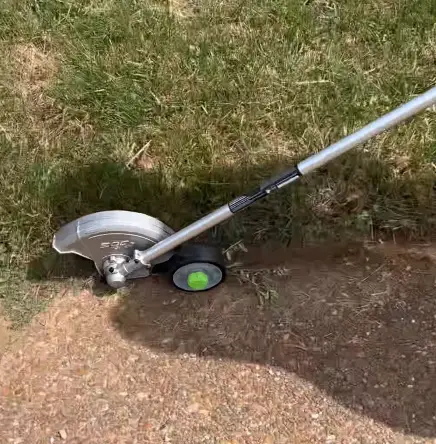
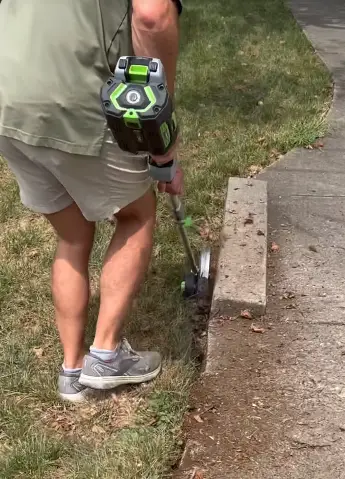
I also recommend not to use an edger during this time. Let the roots totally sink in around the border of the grass, even if it starts to look messy. Once you have full confidence that the roots are deep, then you can start to beautify.

Remember, the health of your lawn is always more important than the appearance of your lawn. Just like with teeth. Don’t let it get to your head.

How Long Will It Take For The Sod To Root?

Typically 2-3 weeks is when you can feel confident that your sod has taken root. During cooler months, you can expect 4-5 weeks for the roots to become established.

If you try to rush the process you can put the whole yard at risk. Roots will begin to start digging after about a week, but are extremely delicate until the 2-3 week mark.

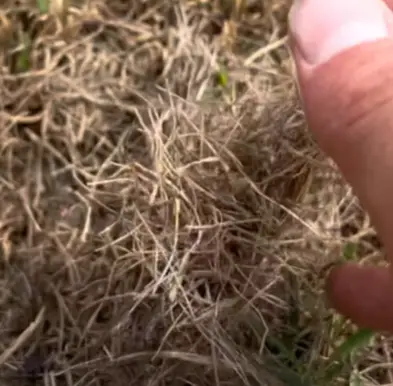
Why Is My New Sod Turning Brown?

New sod turns brown when it lacks water. Proper watering, 4-5 times per day for 10-20 minutes will help recover the sod. 

If you see ALL of the sod turning brown, it is likely a water issue. If you are seeing brown spots, it could be any number of things including dog urine, fungus, or overwatering, although all of these are less likely to occur than all of your sod turning brown from dehydration.

How Long Should You Stay Off New Sod?

Try to keep animals, children, and yourself off of the new sod lawn for at least 3-4 weeks. This is a critical time period to make sure that the roots become  established. 

Why we started this site

We started The Lawn Review out of frustration. We couldn’t find clarity around what type of products were actually good and reliable. All the fertilizers we tried didn’t work. We ended up with a dying lawn, wasted time, and wasted money.

So we started buying and reviewing lawn tools and figuring out which ones were the best. And now we’ve moved onto actually keeping that grass nice and healthy all year around. 

We take this stuff seriously!

We’ve spent thousands of hours building this content for people just like you and me – normal people.

EGO’s Multi-Head Attachment System Is A Lawn Life Saver

The EGO 56V Power+ Multi-Head attachment system is an incredible tool for folks looking to save money and space on an entire suite of lawn tool products.

You may be asking yourself if all the different attachments still work as well as buying separate tools.

We asked the same thing. So we bought the multi-head tool. And have used every single attachment available.

Bottom line: this thing works. We loved most of the attachments and they will honestly replace many of our standalone tools. 

But if we only had the money to buy a couple of the attachments, we’d focus on two or three of our favorites.

We will let you know which EGO attachments we liked the most and give you an overview of each attachment.

Let’s get started:

EGO Power Head Multi-Tool Attachment System: Features and benefits

As we mentioned earlier, the EGO Power Head attachment system is definitely a beast. But we had some attachments that frankly were much easier to use than others. Let’s dive right into the unique features and benefits of this system.

EGO Power+ Power Head (PH1400)

While without any attachments this tool won’t do a gosh darn thing, it is the engine for a bunch of other tools – so it needs to be good. A few paragraphs above, I talked about the most important things when evaluating a multi-tool attachment system head. So how does the EGO Power+ Power Head stack up?

The head itself is really durable – you can see we have scratched it already.

For starters, this power head has a brushless motor. Again, this is important because we are making a significant investment in this tool. All-in, you can easily spend $700+ on the power head and a bunch of the attachments (we did). It is critically important that you get a return on this investment and keep it for as long as possible. 

The brushless motor on the power head will guarantee longevity as compared to brushed motor heads. You’ll notice a quieter, longer-lasting, cooler-running motor that has more torque. It is the most important thing in any battery lawn tool.

Next up is whether or not this has variable speed control. Yes and no. Yes, in that you can control the speed, but only between two settings – high and low. This is the only hesitation we had with this system when we bought it. Ideally, there would be ultimate flexibility in speed anywhere between the smallest amount to the maximum speed. Sadly, this one isn’t quite there.

These are the only two speed controls!

This is important because you lose a bit of control with the tool. If you want to go really slow with something, like starting a small little cut with your pole saw, then you are limited in how slow you can go. Same goes with the maximum speed. Sad!

The battery has an indicator light that tells you how much juice.

Lastly, we need to make sure the dang tool is durable. We have reviewed a few of the EGO products, like their super powerful high CFM blower and their 56V mower – what stuck out to us the most was how “solid” the tools felt. They are well constructed and built with durability in mind. The EGO Power+ power head is no exception – it is remarkably solid and we have no concerns with durability.

The Power+ Multi-Head itself is available on Amazon for a great price.

EGO Multi-Head 15” String Trimmer attachment (STA1500)

The absolute necessity of the multi-head series, the string trimmer attachment is also one of the best. What’s not to love? It fits perfectly into the multi-head and checks all the boxes. Here’s what we love about the EGO string trimmer attachment.

This is the trimmer head that can bump to unwind.
  • 15 inch cutting swath which allows for professional grade trimming jobs and the ability to tackle denser areas of brush
  • Rapid reload bump head lets you quickly let our more trimmer line so you can keep going without having to stop and pull or twist some line out
  • Straight shaft gives you more length and flexibility as compared to a curved-shaft trimmer
  • Comes with a really durable dual twist .095” trimmer line – basically top of the line trimmer line

Pairing this EGO weed eater attachment with the brushless motor of the EGO power head gives you an absolute beast of a battery-powered string trimmer. Functionally, this pairing is one of the most natural for a multi-tool and should be the first purchase you make after you have the power head. 

I love the smaller guard on this attachment.

You can get this string trimmer attachment from a number of places, including Lowe’s or Ace Hardware. We got ours on Amazon for a great price and it came to our house the next day.

EGO Multi-Head Power+ 8” Edger attachment (EA0800)

Next up on our favorite EGO Multi-head attachments is the 8” edger attachment. After you’ve used a string trimmer/weed eater on your lawn, one of the finishing touches that takes it from good to great is a nice edger. If you want those perfect borders around your yard or garden bed, an edger does a fantastic job of providing them in a way that distinguishes your lawn from your neighbors. 

Really strong and durable – wheel also adjusts.

Here’s what we loved about the edger attachment:

  • It has a 3” cutting depth. Many folks ask us if you can use a string trimmer to do some edging, and the answer is “sometimes”. But to truly get a resilient, deep border around your yard then an edger is an absolute must. String trimmers will not get you 3 inches deep into the dirt. 
  • It has a wide guide wheel that allows you to smoothly roll the trimmer forward across whatever surface you are edging. 
  • The guide wheel has a depth adjuster that changes how deep you can edge. Frankly, I had never seen this or bothered with it before, but if you need to go deeper or shallower, this is your way to do it.

Again, combining this edger with the PH1400 (Power Head) gives you a top-of-the-line edger. In my bare bones lawn care kit, I mow, trim, edge, and blow. The edger serves as the highest value-add tool that makes my neighbors stop and say “wow, you have some nice looking grass”. It’s the same as the person next door, just better groomed.

8 inch blade does NOT give up easily.

You can groom yours the same way if you grab it from Lowe’s or Amazon, where we got it for $10 cheaper than Lowe’s.

EGO Multi-Head Power+ 20” hedge trimmer attachment (HTA2000)

Now I know what you’re thinking – a hedge trimmer attachment? It sounds a little out there but in reality it is pretty dang slick. While most folks probably prefer hedge trimmers a little longer (think 21 – 24 inches), this one makes up for the lack of length by being attached to the EGO Multi-Head. 

This made it look longer than it is.

The big tradeoff with this hedge trimmer is that you exchange control for reach. When I’m trimming bushes, I like to be right up close and pay extreme attention to make sure I am rounding curves the right way and not making some odd looking shape.

What are these for anyways?

With the Power+ hedge trimmer attachment, you don’t get to be as close, but you DO get to hedge trim tall bushes. This is a major advantage as who knows who many emergency room trips have occurred from hedge trimmers standing on ladders or doing overhead work that makes a piece of bark fall in their eye (happened to my dad – had to wear a pirate patch).

The full hedge trimmer attachment.

I don’t think this attachment is your all-in-one replacement for a hedge trimmer, but it does complement your existing trimmer and comes in at a super cheap price.

So why not get it? We got ours on Amazon and it was chopping off a 9 foot bush the next day.

EGO Multi-Head Power+ 9.5” Cultivator / Tiller attachment

We love this attachment. Honestly, who wants to own a tiller or cultivator? You use it once in a blue moon, it takes up space, and it’s relatively difficult to operate.

When you start thinking through attachments that truly make a difference to replace existing lawn tools, this one is EXACTLY what we want to use instead of buying a separate, more expensive tool. 

Not huge but nice sturdy tines.

So we did. And it works really well! Again, I don’t cultivate or till very often so I can’t compare this to a ton of other cultivators, but it got the job done.

Sun Joe Garden Tillers are another option for the full tool, but again – the cost doesn’t quite justify buying a lone tool considering how infrequent you use it.

Nice side profile.

BUT if you know you are going to do some tilling in the future, you can save big money by grabbing this one. It was actually easier to use than a regular tiller because you have so much more length with the EGO multi-head. For me, this allowed me to easily apply more downward force than I could have with the shorter, lone tool.

At 9.5 inches, it’s a little smaller than large cultivators that typically run 12-14 inches, but it got the job done.

We got ours on Amazon (of course), because we went to Lowe’s and they didn’t have any!

EGO Multi-Head Power+ 10 inch Pole Saw Attachment (PSA1000)

If you haven’t used a pole saw, you haven’t lived. They are the second most satisfying lawn tool on the planet (after dethatchers of course). All those limbs that thought they escaped you just get absolutely rocked and there’s no better feeling.

Surprisingly powerful.

You get to use a little mini-saw on a stick to take down some branches. Sign me up. My neighbor was using one this morning and I walked over with my son and just watched. Amazing.

Anyways, the fact that you can smack one of these on the end of your EGO multi-tool power head is just downright unfair. Pole saws aren’t for everyone, which is why buying an attachment makes so much sense.

Honestly, most pole saws are pretty long and somewhat heavy and awkward, which makes storing them difficult. But having just the attachment allowed us to hang it on a hook in our garage at about ⅓ of the length of a normal pole saw. 

One other thing we like about this pole saw is that it has an auto-lubricating function. Just beware that the oil WILL drip if you have it hanging face-down, so beware of how you keep it in your garage or shed.

This one is a great add-on to your multi-head if you are looking to take down some limbs on the cheap.

It’s available at some Lowe’s (not ours), Ace, and on Amazon, where it is the cheapest.

EGO Power+ Multi-Head Snow Shovel Attachment (SSA1200)

By far one of the best values you can get from an attachment, the snow shovel is SO COOL. Not only does it launch snow 25 feet (!!), but it can clear up to six inches at a time.

Really underrated snow shovel.


In general, snow shovels are awesome tools and perfect for most people who don’t live WAY up North who get 10+ inches of snow at a time. But just about everyone gets a couple inches and wants to do some clearing. 

Launch the snow 25 feet in whichever direction you choose.

Snow shovels allow you to get rid of a decent amount of snow without having to drop $400 on a snow blower. The attachment piece again is such a killer way to go because you aren’t going to use this more than a few times per year and now you don’t have to go buy a full on tool for snow and take up even MORE garage space.

This attachment is really fun to use and gives you more control than other snow shovels. You can get it on Amazon or a bunch of other places.

EGO Multi-head Power+ Bristle Brush Attachment (BBA2100)

Ever seen a tool and thought, “why would I ever need that?”. My wife does it to me all the time. 

The bristle brush attachment is what I would consider “extra”. Being the skeptic that I am, I bought it and didn’t know what to do with it.

Then I took it out onto my paver patio and was blown away. All the little rocks and debris that had become just “part of” my paver patio because I couldn’t get them with the blower were GONE. It looked like I had a brand new patio. 

This is great for things like thick pollen, small rocks, or other stubborn stuff stuck on a hard surface. Another great application is for right after you’re done using the edger attachment (see #2 above) and have a bunch of dirt kicked up on your driveway or street. Simply run this sucker down there and get it swept up in no time. 

Sadly, I get the sense that they are discontinuing this attachment because it is out of stock at both Amazon and Lowe’s. You can click this link to see if it ever comes back into stock.

The last two: Rubber Broom and Extension attachment

These two attachments for the EGO multi-head were two that we didn’t feel we needed. Frankly at 6’7”, I just don’t really need the extension pole, even for the pole saw.

And the rubber broom MIGHT get used by me once per year, but I also saw that it was a whopping 14lbs and didn’t think it was worth it.

That’s just me!  Some people may really need the extension pole, especially if using the pole saw or hedge trimmer at great heights. The rubber broom I still have a tough time with, but if you work a job site or in a garage and want to clear some stuff out then I’m sure it is a great tool. 

What about the warranty?

If you are using anything from EGO’s residential line of products, the warranty is best-in-class. Honestly – the 5 year limited warranty for the tools and 3 years for the battery and charger are unreal. 

I’ve heard mixed things about people trying to get through to customer service. Some say they couldn’t ever exchange a faulty battery and others that had no problem at all. I imagine they will only get better at responding to the crazy demand they’ve had for their products. 

Are third-party attachments compatible with EGO?

Nope – I know Ryobi has had some people make third-party attachments that apparently work with their products, but EGO has a specifically designed attachment system that doesn’t allow for that. It would probably void the warranty as well. 

Won’t work with others!

Parting thoughts: EGO Multi-Tool Power Head Final Review

The power head itself is absolutely top of the line – better than any other we have personally used. The attachments are great if you treat them like a buffet and only get the ones you want. I think that’s why I love this tool so much – it’s as little or as much as you want it to be. As expensive or as cheap as you want it to be. And it can slowly take over your whole lawn tool collection.

Why we review lawn tools

The reason we started this website in the first place was because we had so much trouble trying to find reasonable, understandable, honest reviews for lawn equipment. And it’s not cheap! After hours and hours of research, trying products and returning them, and messing up our yards – we started this site. 

As people who had to learn the hard way, we want you to know exactly what you are signing up for before you purchase a piece of equipment. That’s why we are committed to providing honest, easy-to-understand reviews that mean something. 

What to look for in an attachment-capable multi-head system

EGO is not the only company that makes a multi-head attachment system. We have owned a few others, including the Ryobi multi-tool (which was a bust in our opinion). Whether or not you get this EGO Power+ Multi-Head attachment system, you need to be sure to consider a few things, like:

Motor type:

You definitely want to get one with a brushless motor. Brushless motors operate using magnets instead of friction to transfer electrons. Basically, these motors run much cooler, last longer, and provide more torque. Win, win, win. This is a non-negotiable for any battery-powered lawn tool we buy these days.

Speed variability:

Because these multi-tools operate a vast array of tools, you want to make sure you have flexibility in how much speed you are using. The snow blower attachment you may want at full blast, but the trimmer you may want to go at a lower speed to work around a delicate garden bed. 

Durability:

Look for a power head that has solid construction and as few plastic parts as possible. Particularly vulnerable spots include where the shaft connects to the attachments and also the grip. You have so many different grip positions with different tools, transitioning from overhead work to ground work, so these can take a beating.

These are the three main things I check out before even considering a purchase for a multi-tool. Keep them as your north star.

Greenworks’ 80V Leaf Blower Packs Gas-like Power

The Greenworks 80V Leaf Blower is an absolute unit. A solid, extremely powerful battery-powered leaf blower that can easily rival gas-powered backpack blowers.

It is VERY nice.

We were lucky enough to get our hands on this blower and boy, were we impressed. 

Today we will break down the best parts about this blower, a few of the things we didn’t love, and give it an overall ranking.

But before we get started, make sure to check out our long-form video review of this blower where you can see and hear exactly what it’s like. And don’t forget to subscribe to our channel to enter into the free giveaway!

Let’s get started.

Greenworks 80V Blower: Features and benefits

Before we hop into the breakdown of this blower’s performance and feel, let’s give a quick overview of what’s included in the purchase.

In the box you will receive: three user manuals (blower, charging station, battery), a tapered nozzle tip, the funnel, the blower motor housing, the 80V charging station and the 80V battery itself.

Now we can get going!

Feel and usability

The first thing we noticed about this Greenworks 80V blower was how DENSE it felt. It feels super solid and like it just came in one piece, carved out of stone instead of a million little pieces assembled together.

Not sure how else to describe it besides dense and tight. I think once you pick it up for the first time you will understand. Their new 60V blower has an almost identical feel, but slightly less power and a different battery unit.

If you really want to try something fun and have the 80V battery already, check out their all-new electric backpack blower.

Versatility

A few features we loved about the versatility of this blower were:

  • Variable speed trigger
  • Cruise control setting for variable speeds
  • Turbo button

With these three features, which aren’t all that common among other, cheaper blowers, you can have total control over how hard you want the air to blow.

Cruise control below and Turbo button above.

Before owning some of these nicer Greenworks blowers, EGO blowers, and Ryobi blowers – I always just held the trigger down as hard as it would go. But with these mega powerful blowers, the air comes out so much faster that you actually need to calm it down some of the time.

Having control over the airflow really helps and having cruise control allows for you to relax your hand and prevent it from cramping (first world problems!).

Nozzle types

The tapered nozzle tip that comes with this blower will give you a little bit more power at the end.

This is the tapered nozzle and it can pop on or off.

If you remember our discussion of CFMs and MPHs earlier, a tapered nozzle tip vs. a regular nozzle tip at the exact same number of CFMs will produce a higher MPH.

That’s why you see some blowers out there with lower CFMs, but really high MPHs – they have very narrow nozzle tips. For me, I will probably keep the tapered nozzle tip on all the time so that I can destroy wet leaves and other things on my deck and driveway that drive me crazy.

Other bells and whistles

The Greenworks 80V blower has that sweet 80V battery that slides right into the back of the blower. This thing has a nice LED light indicator with three levels that can tell you when you need to head back inside – although I doubt you will get super low on battery any time soon (more to come on that).

Comfort and usability of a handheld Greenworks electric blower

Not all blowers are created equally. In fact, I used to own a Stihl BG 86 C gas-powered blower that was about as powerful as this one, maybe a little less, but was built in such a way that I had to crank my shoulder in a weird position to keep it down. Not this one! 

 At 8.9 lbs with the battery and tool combined, it isn’t tough to waltz around with – meaning you likely won’t need a strap unless you have back issues. 

But my favorite part about this blower is that the handle naturally forces the blower to point downward. This allows you to effortlessly hold onto the blower and have it at the optimal angle for blowing leaves. 

Well-balanced!

This is a huge wrist, shoulder, and back saver and something that only a true user of the tool would design. Major props to Greenworks for the design!

How loud is it?

Obviously one of the key things that’s important when using an electric tool is the sound. In fact, many commercial landscapers use electric blowers when they get close to buildings to make sure that they’re not too disruptive. Places like schools, nursing homes, hospitals, offices – all of them don’t want to hear the insane screech of a backpack blower.

We again invite you to watch our YouTube review of the blower so that you can hear it for yourself, but this is probably on the louder side for an electric blower. During normal operations, the blower is on par with other electric blowers, but when you hit the turbo button this bad boy has a little bit of a squeal.

Hard to hold this against the blower as it is one of the most powerful handheld battery-powered blowers on the face of the Earth. 

All about the Greenworks 80V Battery

As we always do, we put the manufacturer’s claims to the test when it comes to tool run-time and battery charge-time. This usually involves us zip-tying the trigger down with the turbo button on, without the turbo button and at full speed, and then at a low-speed setting.

Nice lil power indicator.

Here were our results:

  • Turbo button held down: 12 minutes of run-time
  • Full-speed, no turbo: 17 minutes of run-time
  • Lowest speed: 496 minutes

Whew! We stayed up late for that one, finishing at about 10:30pm waiting for the dang blower to die. 

Me to this blower at 10pm

The must-haves in any battery blower

If you read our introduction, you know that the most important thing to look for in a battery-powered blower is obviously the brushless motor.

Does the Greenworks 80V blower have a brushless motor? Yep.

Brushless motors just mean that it uses magnets to spin the motor instead of copper wiring. This results in less friction, less heat, a much longer-lasting motor, and even more torque. Wow.

Another must-have is battery interoperability. Does the Greenworks 80V battery work with other tools? You betcha

In fact, the Greenworks 80V battery works in probably our favorite battery-powered mower of all time as well. If you are in the market for a mower – this thing is what you’re looking for. 

Lastly, we talked about CFMs and MPH – this blower has both. Super high CFM at 730 and can blow up to 170 MPH. More than enough speed and power for any residential use.

Comparing the Greenworks blower to Ryobi and EGO blowers

We are working on a separate video and full write-up for this, but at a really high level here is our summary.

Ego, Greenworks, and Ryobi blowers.

Official Review: Greenworks 80V Battery-Powered Blower

The Greenworks 80V battery-powered blower is a thoughtfully-made, well-designed battery blower that stands out in how easy and comfortable it is to use.

Does it get our stamp of approval? Heck yes. It is much quieter than a gas blower and can go toe-to-toe on power without a doubt. 

You can grab this blower on Amazon for a great price and can get the tool-only version for significantly cheaper if you already own the battery. 

Why we review lawn tools

The reason we started this website in the first place was because we had so much trouble trying to find reasonable, understandable, honest reviews for lawn equipment. And it’s not cheap! After hours and hours of research, trying products and returning them, and messing up our yards – we started this site. 

We take blower testing seriously.

As people who had to learn the hard way, we want you to know exactly what you are signing up for before you purchase a piece of equipment. That’s why we are committed to providing honest, easy-to-understand reviews that mean something. 

Greenworks makes some other cool products we’ve reviewed, like their Cordless Shop Vac.

What to look for in an electric blower

Cordless blowers come in a bunch of shapes and sizes but there are three basic things you need to understand:

  • CFM – Cubic feet per minute. This is a measure of air output on the blower. Higher CFM = more power, but not necessarily more miles per hour. High CFM with a wide nozzle = lower MPH. High CFM with a narrow nozzle = high miles per hour. Ideally, you want both a high CFM with a narrow to medium nozzle for most residential jobs.
  • Usability – what is the point of having a blower if it is hard to use? Have to get one that is lightweight, easy to start, and has some functions that make your life easier.
  • Motor type – brushless motors reign supreme. Cooler running motors with more torque, a longer run-time, and last many more years. Brushless is a no brainer when picking a blower.

These are three things you need to pay attention to when looking through the specifications. 

5 Convenient Electric Backpack Sprayers For Home Use

The best battery backpack sprayer is the Ryobi 40V Backpack sprayer because it is inexpensive, easy to use, and leverages the 40V battery that can be used across hundreds of their tools.

Long gone are the days of walking around cranking the pump lever all over your yard. Or even worse, the little sprayers that you carry and set down and repeatedly pump then get maybe 1-2 seconds of spray. The new battery powered backpack sprayers keep a consistent amount of pressure inside and make your life way easier. I think the first time I used a backpack sprayer I was caught off guard with how quickly I was able to complete the job.

Here are the best battery backpack sprayers this year:

  1. Ryobi 40V Cordless Backpack Sprayer
  2. Ryobi ONE+ Cordless Backpack Sprayer
  3. Milwaukee M18 FUEL Backpack Sprayer (4 Gallon)
  4. Spraymate Lil Squirt Sprayer
  5. Dewalt Battery Powered Chemical Sprayer

5 Best Battery-Powered Backpack Sprayers: Ranked

Okay! Finally after careful consideration we have put this list together. We’ve gotten our hands on a few of these but also tried to get some more variety in new products. So let’s get to the bottom of it once and for all.

5. Dewalt 20V Battery Powered Backpack Sprayer

The Dewalt Lithium-Ion Battery-Powered Backpack Sprayer is sure to be a rugged, long-lasting tool. Not only does it come with Dewalt’s trusted brand reputation, but it’s a part of their 20V battery series.

Dewalt’s 20V Battery series is compatible with TONS of Dewalt tools. 

Trust the brand – but can’t see inside!

What I love about the Dewalt Battery-Powered Backpack Sprayer

  • Part of the 20V battery series
  • Padded straps with two wrap-around straps
  • 10 different flow settings
  • Several nozzles for different spray patterns

What I don’t love about the Dewalt backpack sprayer

This breaks rule number one! It doesn’t have a see-through tank. So you have NO idea how much fluid is left in there outside of the weight differential. 

Comfortable. Check.

The other thing I don’t love about this backpack sprayer is the price! It comes in at a steep $300 and can be purchased online from Home Depot.

4. Spraymate Lil Squirt Portable Backpack Sprayer

Candidly, we have not used this little guy but thought it was so cool that it needed to make this list. 

It isn’t really a backpack sprayer, but more like a satchel sprayer. It comes with a nice little strap that you can hang over your shoulder and waltz around your lawn to get the job done. 

Cheap and it works!

At just about $100, this thing is the most cost-effective way to get the job done with a battery powered sprayer.

So where is the battery?

The batteries are INSIDE the handle.

Great question. Looking at this, you would have no idea. But it is actually built into the handle of the Lil Squirt sprayer. It plugs into the wall and has a nice little charger that you plug in directly. It makes the product super intuitive and easy to use without having to pull out a separate battery.

Otherwise, this sprayer has a nice six foot hose, a quick-connect extension wand, and is super  lightweight.

If you are a more casual backpack sprayer user, then this is a really good cost-effective alternative to the others here. 

You can grab this one at Home Depot or get its big brother, a fully built out backpack sprayer with four gallons on Amazon.

3. Milwaukee M18 4 Gallon Backpack Sprayer

Milwaukee rocks. In fact, we’ve gotten our hands on a few of their pieces of lawn equipment. Like their new blowers and even their M18 lawn mower

They simply don’t miss. 

So when I saw their backpack sprayer I knew it would make the top five. 

What we love about the Milwaukee M18 Backpack Sprayer

  • The M18 battery line is incredible and can service TONS of tools
  • It can absolutely LAUNCH spray – like over 20 feet away if you desire
  • The shoulder straps are supremely comfortable
  • The battery placement is well-designed
Very comfy.

What we didn’t love

  • We didn’t have this problem, but from others have heard that the tank can leak
  • It’s a bit pricey.
Now that is pretty cool!

All in all this is a great backpack sprayer and perfect for those of us that already own M18 batteries, this thing is sweet. If you already own the batteries you can save a ton of money by purchasing the tool-only version on Amazon or getting it off of Home Depot, wherever you prefer.

2. Ryobi ONE+ 18V Cordless Backpack Sprayer

The Ryobi ONE+ 18V Cordless backpack sprayer is pretty slick. We loved using it and even filmed a long YouTube video that highlights all the different features and benefits.

Very nice!

It is a huge timesaver, just like the other battery-powered backpack sprayers, but is also really reliable. Ryobi products are super common as well, so chances are you already have one of their ONE+ 18V batteries to pop right onto this backpack sprayer.

Very nice!

What we love about the Ryobi 18V backpack sprayer

  • Super easy, ergonomically designed trigger that fits your whole hand
  • Battery interchangeability with all the other Ryobi 18V tools
  • You can use the tank 11 times on the same charge
  • Incredibly comfortable – way better than my Jansport backpack
  • Easy to use pressure control valve on the side
  • See-through 4 gallon tank so you know when you’re getting  low
Extremely easy to use.

Frankly, there wasn’t much to dislike about this backpack sprayer. It comes in at a great price WITH battery and charger on Amazon or at Home Depot for a great price.

1. RYOBI 40V Cordless Backpack Sprayer

Okay guys, we have a confession. This one is basically IDENTICAL to the 18V ONE+ battery backpack sprayer above. And we like it for all the same reasons.

But the 40V series from Ryobi is just much more popular than the 18V series. If you already own a Ryobi tool, you can get this thing for an insane price from a number of places. We found  the best price for the tool-only version on Home Depot’s site and it’s even cheaper than the 18V series. 

Why we review lawn tools

The reason we started this website in the first place was because we had so much trouble trying to find reasonable, understandable, honest reviews for lawn equipment. And it’s not cheap! After hours and hours of research, trying products and returning them, and messing up our yards – we started this site. 

We take tool testing seriously.

As people who had to learn the hard way, we want you to know exactly what you are signing up for before you purchase a piece of equipment. That’s why we are committed to providing honest, easy-to-understand reviews that mean something. 

What to look for in a battery powered backpack sprayer

Again, these aren’t all made the same. With one of these backpack sprayers, you want to make sure to have the below features.

  • Comfort
    • It sounds silly, but if you are going to be personally hauling a bunch of chemicals on your back, you’ve got to make sure it is comfortable. Honestly, with how easy these things are to use, the main differentiator is what the experience feels like. Look for padded shoulder straps and an otherwise lightweight tool.
  • Battery run-time
    • There’s not really a point to a battery-powered sprayer if the battery dies and you can’t finish the job. Regardless of how long your job takes, you want to make sure to get one with a decent battery life. That helps you if you take the battery off and use it on another tool.
  • A see-through tank
    • This one sounds even sillier, but some of these battery-powered backpack sprayers have dark tanks. You can’t see how much fluid is in it. Not a huge deal but also a minor inconvenience that is so easy to avoid. Grab  one where you can see the fluid.

Those are the main things I look for. Of course there are other important things like different nozzles and a strainer to make sure you don’t get a clogged line, but those should come standard.

7 Battery Powered String Trimmers That Can Take On Gas

My favorite battery powered string trimmer is the Greenworks 80V 16″ weed eater because it has a brushless motor, super wide cutting swath, and is part of a great battery system.

My EGO is great!

Luckily, we’ve gotten our hands on and tested dozens of weed eaters in our lives. 

But before we move forward, there’s one super simple thing we want to clarify.

Weed eaters, weed wackers, string trimmers – they’re all the same thing. Believe it or not, people ask us the difference between the three all the time!

Top Battery Powered String Trimmers: By Category

As we mentioned before, the most gas-like electric weed eater for you may not be the best for me. So we will provide the best from each category to help you really narrow it down. Luckily, the best weed eaters all have the above things in common – so keep those as your North Star.

Best battery powered weed eater for large yards

When it comes to large yards, you need a weed eater that not only has a wide cutting swath, but serious battery power. Basically you want to be able to cut thick grass without the battery running out.

One of the best battery-powered weed eaters that my neighbor owns is the Pro 80V 16 inch string trimmer from Greenworks. 

This is mine and it is the one I tested for this article.

I recommend NOT using the stock weed eater string that comes with it. We developed the world’s best weed eater string by testing dozens of different strings and taking the best elements of each. We created a green, .095″, triangle shaped weed eater string that is extremely powerful, visible, and durable.

Basically it’s the dream weed eater. It has a HUGE cutting swatch at 16 inches. For reference, the ones for smaller yards are like 10 inches. To put it into perspective, this is almost a foot and a half of cutting power. Not only does this make it good for weed eating, but it also has the ability to do some nice deep edging work if you forgot your edger.

Why we like the Greenworks 80V Pro 16 inch weed eater

Better question is what is there not to like? Check out a few data points here:

  • Brushless motor (more durable, run cooler, quieter)
  • The motor and handle are attachment capable for other Greenworks 80V tools
  • Straight, long shaft (please no jokes)
  • A great four year warrants on the tool itself AND the battery

Ding, ding, ding, ding, ding! This is the best weed wacker for large yards and probably a bunch of others, too.

We love the durability of this one.

You can grab it from Greenworks’ website directly or on Amazon for a massive discount.

Best battery powered weed eater and edger combo

When it comes to cleaning up your yard and you want to go the extra mile, you have to have an edger. Sure, weed eaters with big cutting swaths can do some light edging, but nothing is going to actually give you the crispiest borders like an edger will.

That’s why it’s great to get a weed eater that allows you to change out attachments. A ton of folks have this now. In fact, we wrote a whole long form post about the best battery powered weed eater and edger kits and we had a clear winner.

The EGO Power+ MHC1502 Multi Combo Kit: 15 String Trimmer, 8-Inch Edger & Power Head.

Yeah, it has a long name and a steeper price tag, but is WORTH IT.

That edger is actually pretty slick!

Here’s why we loved the EGO Power+ MHC1502 trimmer and edger

  • It isn’t a two-in-one, it is really a 8-in-1 – this thing has so many other attachments that it can do just about everything except mow.
  • EGO uses just one battery class – the 56V. Once you have that, you can buy any of their other tools’ “tool-only” version – which means batteryless. That amounts to YUGE savings.
  • Brushless, straight, yada-yada-yada you know my shpiel by now. This checks all the boxes.
We love the edger attachment.

This edger and trimmer combo is sweet. If you are going to get one and ESPECIALLY if you already have an EGO battery, then this is the one for you.

You can from Amazon, which lets you pick from a bunch of different options.. 

Best battery powered commercial weed eater

This is actually a hard one. There aren’t many full-on commercial battery-powered string trimmers because a lot of professionals still use gas.

That being said, there are definitely some battery weed eaters with enough power to keep up with the commercial ones.

It just looks professional

Our favorite here is a brand you probably recognize. Makita. We love Makita and have written extensively about Makita mowers, Makita blowers, and more. 

Here’s what we love about the Makita XRU15PT1 36V string trimmer

Okay this weed eater is a tank. It comes with four batteries, but uses two at a time. If you have existing 18V Makita batteries, then you can save money on batteries, or store up a lot and only have to charge after like 20 lawns. 

It is a killer.

We like this one because it almost directly mimics some of the gas powered string trimmers like  Echo’s SRM 225. It’s loved by us for the following reasons:

  • Super long straight shaft (over 6ft. long)
  • Minimal guard, which is great for visibility but make sure you wear eye protection
  • 15 inch cutting swath and massive RPMs of 6,500 (really fast)
  • Brushless motor

Basically you want the most powerful weed eater you can get that still has the performance of a commercial one. The Makita XRU15PT1 36V absolutely has it. 

This one we grabbed online at Home Depot and picked up in store for a great price.

Best battery powered weed eater with attachments

Why buy a weed eater alone? Just about every big brand is making a power-head or multi-tool or some other name for a nice handheld motor with attachments. 

We started out with the Ryobi multi-tool, but I legitimately burned through two of the blowers in a six month period. So I sent it straight to the trash. 

I picked up one of the EGO Power Heads and have never looked back. To date, we own the string trimmer, the edger, and the snow blower attachment. 

Our own footage of the edger attachment.

Why we like the EGO Power+ Power Head

First of all, you’re here for weed eaters, so if you are interested in the weed eater, you can grab the MHC1502 battery powered weed eater we mentioned above. It has a huge cutting swath, brushless motor, and all the bells and whistles.

But boy do we love the attachments:

  • Pole saw
  • Edger
  • Hedge trimmer
  • Blower
  • Snow shovel
  • Bristle brush
  • Cultivator/Tiller
  • Rubber broom

It’s pretty crazy how many attachments can fit on a single head of the dang EGO Power+ Power Head. If you’re in the market for a heavy-duty, attachment capable battery powered weed eater – this is your go-to. 

Look at all the dirt it kicks up!

You can grab it at Lowe’s, Ace Hardware, or on Amazon. If you’re grabbing it online, I recommend Amazon. If you want to put hands on it, then I suggest stopping by Lowe’s or Ace to get your paws on it.

Stihl’s battery powered weed eaters

Stihl has a reputation for creating some of the best gas-powered equipment on the planet. They lead the chainsaw market with their Stihl MS 251 C chainsaw and also their gas powered string  trimmer, the Stihl FS 56 RC weed eater.

The FS 56 RC is undefeated in gas trimmers.

Stihl recently launched a big line of battery powered weed eaters, chainsaws, and leaf blowers.

To our surprise, we weren’t thrilled with their features or performance.

Why we don’t love Stihl’s new battery powered series

Despite Stihl’s stellar reputation in the gas space, we were saddened by some of their new battery products. For the weed eaters specifically, here is what we didn’t love:

  • No brushless motor – how could they do this? They are market leaders! It’s truly pretty sad.
  • Generally small cutting swath
  • Expensive

I think they are trying to go for a more residential audience as compared to their commercial gas trimmers, but man were we disappointed. Our favorite Stihl battery powered weed eater was the FSA 90 R – probably the closest equivalent to the gas FS 56 RC. 

The Stihl FSA 90 R has great specifications and features, but no brushless motor. It is the most “tolerable” of the group. We wrote a full review of the Stihl FSA 90 R here if you are interested in learning more. 

This one is not THAT bad

Stihl has a contract with Ace Hardware as the primary place to pick these up.

Cheapest battery powered weed eater

Oh boy – balling on a budget. Cheap battery powered weed eaters are great if you have a smaller yard, a townhome, or a thin wallet. 

Honestly, some of them are REALLY convenient. For example, we have ranked a ton of the Black and Decker string trimmers as well as the Worx weed eaters.

Both of these are budget friendly, but also small, lightweight, and extremely easy to use. 

Best budget battery powered weed eaters

Our favorite budget battery powered weed eater has got to be the Black and Decker 20V Max string trimmer. 

It is definitely on the smaller side, with a 12-inch cutting swath, but not as small as some of the others.

Nice!

My favorite part about this trimmer is that the 20V battery on it can also be used on your power drill and a ton of other Black and Decker products. My parents have the 20V power drill, so they got this one for a steal and saved on the battery price.

It also has this little wheel on top that allows you to do some light edging in a straight line. V cool!

You can grab it on Amazon for an unbelievably low price

Best battery powered weed eater for a woman

Sexist! Women can use all weed eaters just as well as a man! And probably better!

Okay – we know that so cool your jets. But we do get this question a lot and it has nothing to do with ability. It isn’t about being a woman, but many women reach out asking for trimmers that are super easy to use, lightweight, and storable. Also minimal maintenance and easy trimmer line replacement.

So we have helped find what they are looking for and always come to the same conclusion. The Worx GT Revolution 3.0.

Why we love the Worx GT Revolution for women

Coming in at just over five pounds, this weed eater is extremely lightweight and easy to maneuver. It breaks down (see pic below) for easy storage and even has a telescoping shaft. So if you are looking for the most flexible and intuitive lawn tool on the planet – this has got to be it.

Foldable!

It has a decent 12 inch cutting swath, is compatible with Worx 20V and 40V batteries, and has a really easy to replace trimmer line.

My single mother neighbor down the street uses this in her lawn and had amazing things to say about it. Oh, and her yard looks incredible. 

This one is available on Amazon – including battery and charger.

Final thoughts on battery powered weed whackers

Folks, as we mentioned at the beginning of this article – weed eaters are highly variable depending on what you’re looking for. We hope this has been an insightful article. If you have any more questions or would like to join our mailing list – feel free to check out our contact page.

Why we started The Lawn Review

The reason we started this website in the first place was because we had so much trouble trying to find reasonable, understandable, honest reviews for lawn equipment. And it’s not cheap! After hours and hours of research, trying products and returning them, and messing up our yards – we started this site. 

We take tool testing seriously.

As people who had to learn the hard way, we want you to know exactly what you are signing up for before you purchase a piece of equipment. That’s why we are committed to providing honest, easy-to-understand reviews that mean something. 

What to look for in a battery powered weed whacker

Cordless weed eaters come in all shapes and sizes. They aren’t highly complicated pieces of equipment, but they do have a few nuances. Here is how I see it:

  • Feel – Obviously this is subjective, but feel is everything to me. I have had weed eaters in the past where the handle is off to the side, making me torque my shoulders and back. If you can, get as many adjustable pieces as possible to make this customizable. It doesn’t seem like you use a weed eater for a long time, but the work is precision work that requires a steady hand and focus.
  • Motor – brushless motors are king here. They are longer lasting and more durable. Regular brushed motors are fine, too. The key difference here is that brushless motors use magnets, instead of friction, to power the motor. This means less heat, more durability, and a longer life. Brushed motors will still do the job, however they tend to have a shorter life. Brushless motors are relatively new, so if you have had an electric tool back in the day, it was probably brushed.
  • Interchangeable batteries – Get a dang tool that has batteries that you can use with other batteries. C’mon people – save money by doing this! You don’t have to keep buying new battery sets. There are a lot of tool companies that have batteries that work with a ton of different tools. But some of these companies have a bunch of different battery types. Be careful!
  • Curved vs Straight shaft – I always, always, always prefer straight shafts. They are so much easier to use and control and are much longer than curved shafts. Curved shafts are good for clearing out a small piece of land unable to be mowed. But if you want to actually do some good trimming and edging, a straight shaft is much better. Curved shafts are difficult to maneuver and to create a straight line for edging. 

How to instantly improve your battery powered weed eater

Upgrade your weed eating game with the ultimate GrassKicker Weed Eater String! While weed eaters and lawn edgers are great tools, it’s not complete without the right string. Our specially crafted line is designed to enhance your weed eater’s performance and give you flawless edges around your yard and garden.

Don’t settle for subpar string that breaks easily and leaves ragged edges. Our team has scoured the market and combined the best colors, shapes, thicknesses, and materials to create a superior line that cuts more cleanly and lasts longer.

With GrassKicker, you can take pride in your perfectly manicured lawn and make a lasting impression on your friends and family. And who knows, your envious neighbors might just start dropping by more often! Don’t wait, elevate your weed eating game with GrassKicker Weed Eater String today! Click the link now to buy.

3 Strong Milwaukee 18V Leaf Blowers

My favorite Milwaukee leaf blower is the Milwaukee M18 FUEL leaf blower because it is great for every day use including around the shop, backyard, and even for drying your car.

But they’ve got three real options here and you can’t really go wrong with either. And we were lucky enough to get our hands on them for a nice side-by-side trial.

We were blown away (ha,ha).

So let’s check them out together.

SPOILER: Our favorite was the M18 Milwaukee 2724-20 Leaf Blower

You can grab it online from Home Depot or on Amazon by following those links.

The 3 Strongest Milwaukee Leaf Blowers

Milwaukee is known for their amazing quality but they are also known for having a limited selection. One shot, one kill, right? A good example of this is their M18 lawn mower. It is the only lawn mower they make but it is super high quality. Same with their M18 hedge trimmer. That’s why I was surprised to see 3 whole leaf blowers by them.

So we investigated and ranked them.

3. Milwaukee M12 12V Compact Spot Blower

At first glance, this tool seems like a nice-to-have accessory. Lo-and-behold I was super surprised to feel how strong it could blow.

Extends well.

Normally, compact blowers are good to use without a nozzle to dry your car after a detailed wash. While this Milwaukee blower is good for that, it also comes with three nozzles. The wide sweeping nozzle is great for truck beds and job sites. But it also comes with a rubber nozzle and extension nozzle. These take it to the next level and can downright replace your leaf blower at home altogether.

Compact but also legit.

To put this into perspective, it measures at about 110 mph in a nice, direct stream. This is similar to most electric blowers on the market.  

You can see the trigger up close with the lock.

Lastly, this bad boy has a ton of settings near the handle that gave me complete control over the job. Speed settings, a speed lock, and even a variable speed trigger were things that stuck out to us as putting this over the “compact blower” category and potentially into full blown  “regular blower” territory.

This thing is dirt cheap, especially if you already own the M12 battery. It looks like Home Depot has it on sale for under $100 right now.

2. Milwaukee M18 Compact Multipurpose Utility Blower (0884-20)

You might need a concealed carry license for this Milwaukee blower. While it is pocket size, at just over two feet long, it actually is surprisingly powerful. I’d liken it to the Kimo handheld blower we reviewed, which we wrote about and did a nice lil’ video for.

In fact, they look like they’re made by the same parent company or something. 

Either way, we loved that blower and we loved this one, too. In fact, we keep it in our coat closet right by our front door and use it to clean out the front walkway and patio before guests come over. It moves air at 160 MPH in an absolute laser.

Not bad!

While it definitely isn’t the blower for your backyard leaf clearing jobs, it is great for wet leaves, sawdust, tight spaces, and other quick uses.

It also comes with a little extension nozzle that takes it a bit further. 

The Kimo has an uncanny similarity.

I ranked this number two because it doesn’t have a brushless motor and therefore won’t have quite the efficiency or durability when compared to brushless motors.

Either way, this thing is really slick and an awesome gift for dad. 

You can get it on Amazon for a great price, with the battery included or at Home Depot – you should price compare.

1. Milwaukee M18 FUEL 120 MPH (2724-20) Leaf Blower

There is a reason this leaf blower is number one. The Milwaukee M18 FUEL series is sweet and features the top-of-the-line Milwaukee products. 

Nice little trigger action on this bad boy.

Firstly, it has a nice brushless motor from their POWERSTATE brushless motor line. This gives this Milwaukee blower some extreme torque, allowing it to get to full blast in one second. Cool but doesn’t change that much. The real benefits to the brushless motor come in its long life and durability. Brushless motors provide a much cooler running motor than typical brushed motor. 

Speed control on the blower.

Another thing I love about this blower is the higher CFMs. Whereas the other two blowers are high speed, but narrow streams – this blower will have high speed AND a wide stream. This is the ideal portfolio of a blower you can use to move all the leaves off your driveway or backyard. 

This blower has all the bells and whistles as well – variable speed trigger, speed lock, and all comes in under 4 lbs. 

This is a top of the line blower and if you go reference my “what to look for in a blower” paragraph at the beginning – the M18 blower checks all the boxes.

You can get this one from trusty old Home Depot for a great price.

Why we review lawn tools

The reason we started this website in the first place was because we had so much trouble trying to find reasonable, understandable, honest reviews for lawn equipment. And it’s not cheap! After hours and hours of research, trying products and returning them, and messing up our yards – we started this site. 

How we do our testing.

As people who had to learn the hard way, we want you to know exactly what you are signing up for before you purchase a piece of equipment. That’s why we are committed to providing honest, easy-to-understand reviews that mean something. 

About Milwaukee tools

Milwaukee tools have a long history of being tough and durable. Milwaukee is a brand that has been around for over 100 years, and it has a well-deserved reputation for making high-quality tools. Milwaukee tools are used by professionals all over the world, and they are known for being able to withstand heavy use. 

Milwaukee makes a wide variety of tools, from hand tools to power tools, and they are used in a variety of industries, from construction to automotive. Milwaukee tools are known for being very versatile, and they can be used for a variety of applications. Milwaukee is a brand that is trusted by professionals, and Milwaukee tools are built to last.

We noticed that Milwaukee was starting to make a splash in the lawn tool industry, so we have been trying to get our hands on any Milwaukee products that we can, including Milwaukee’s M18 super powerful weed eater.

What to look for in an electric blower

Cordless blowers come in a bunch of shapes and sizes but there are three basic things you need to understand:

  • CFM – Cubic feet per minute. This is a measure of air output on the blower. Higher CFM = more power, but not necessarily more miles per hour. High CFM with a wide nozzle = lower MPH. High CFM with a narrow nozzle = high miles per hour. Ideally, you want both a high CFM with a narrow to medium nozzle for most residential jobs.
  • Usability – what is the point of having a blower if it is hard to use? Have to get one that is lightweight, easy to start, and has some functions that make your life easier.
  • Motor type – brushless motors reign supreme. Cooler running motors with more torque, a longer run-time, and last many more years. Brushless is a no brainer when picking a blower.

These are three things you need to pay attention to when looking through the specifications. 

What Is Dethatching? Ultimate How-To Guide (2024)

Dethatching is one of those things I had never heard of before I owned a home. In fact, I didn’t even know what thatch was.

But once my lawn went from green to yellow after a few years of the same old fertilizer and aeration treatment, I started to get confused.

Why was I getting worse results after doing the same thing year after year?

That’s when I found out about dethatching – and more importantly – electric dethatchers.

Why you should let your soil breath

Lawn thatch is basically a bunch of old, dead grass and weeds that takes a while to decompose. The way that I realized I had too much thatch in my lawn was when I took my six month old daughter into the yard. She started clawing at the ground and pulling dead grass out of nowhere. 

Thatch from our yard.

While she is an inexpensive dethatcher, there are child labor laws that prevent me from cutting her loose on the whole lawn (kidding).

Anyways, lawn thatch can essentially waterboard your lawn – blocking sunlight and nutrients from getting to the soil and choking your grass to death. 

In small quantities however, thatch can have insulator-type qualities. Think of it like you think of mulch. Mulch has great protective qualities for keeping weeds at bay. Too much mulch that isn’t replenished starts to decay and become harmful to surrounding plants. 

So…what should you do about it?

How it works

Dethatching is the removal of thatch from the top surface of your soil. When dethatchers remove thatch from the surface of your lawn, it opens up the lawn and allows it to breathe. 

A couple weeks after dethatching and overseeding.

I know you may think this doesn’t make a difference, but you would be surprised to see how much thatch comes out of your lawn.

Ever used one of those things that cleans out your ears? The amount of wax that comes out is crazy and changes you forever.

The same thing is true of dethatchers. Whenever I use one, it makes me feel like I have been holding my breath for years and finally get to breathe.

When to dethatch – Fall or Spring?

Hopefully you won’t have to wait as long as I did to realize what was going on in the yard. It’s actually pretty easy to tell when you need to dethatch your lawn:

My neighbor DEFINITELY dethatched this year.
  1. You can wait and slowly watch your lawn die (not recommended)
  2. Your lawn retains water well after you think it should have evaporated
  3. You notice more weeds and/or mushrooms in your lawn
  4. The lawn is becoming unseasonably yellow
  5. Your lawn looks like it has male pattern baldness

If you’re not sure or are feeling paranoid, feel free to go out and dig a nice little cross section of your lawn. You’ll be able to see how deep the thatch goes. 

If you have a decent layer built up in your yard and you see more than a quarter inch or so on top of the soil, it is time to dethatch.

We wrote a great long post about the best time to aerate and overseed your lawn as well.

The difference between dethatching and aerating

Dethatching and aerating are commonly mixed-up lawn care processes. Both involve removing things from your lawn and you really do them in tandem.

But dethatchers are simply focused on the top layer of soil in your lawn. They are helpful to allow nutrients, sun and water reach the top of the soil, but are really skin-deep. Dethatchers do not get into the soil themselves.

Using a core aerator after dethatching.

On the other hand, aerators pull up chunks of soil that almost look like dog turds. This allows for the soil to open up, become less compact, and essentially mix together. The aeration process pulls plugs from the soil to the top of the lawn.

Don’t freak out! These are soil plugs from aerating.

 Both are done around the same time of the year in this order.

  1. Scalp your lawn and get the grass super short, being sure to bag it.
  2. Dethatch your lawn thoroughly, being sure to get all the thatch off the surface
  3. Use a core aerator on your lawn to pull up plugs
  4. Overseed
  5. Water (2x/week for 50 minutes on each area)
  6. Enjoy!

Types of dethatchers

The O.G. lawn dethatcher is a lawn dethatching rake. Which looks like a normal rake but is more intense. 

Not an ancient torture device, but a manual dethatcher.

This rake can help pull up all of the thatch and works well.

But it is a back destroyer. It’s like shoveling for snow except the snow is all ice and your shovel is made of plastic. 

You can make the process WAY faster, remove more thatch, and not be bed-ridden for the next week by using an electric dethatcher.

Electric dethatchers work by basically looking and operating like a push mower, but underneath there are small tines that dig up the thatch and bring it to the surface of your yard. Electric dethatchers are some of the most satisfying tools on the planet and are addictive.

Most electric dethatchers are corded electric tools, but newer battery-powered dethatchers are coming into the market. These aren’t super common tools right now, but I imagine most folks will have an electric dethatcher in the next few years.

Recommended electric lawn dethatchers

We at The Lawn Review have had the distinct pleasure of using lawn dethatchers ourselves. 

We’ve written extensively about the Sun Joe corded electric dethatcher and used it in our ultimate fall lawn care routine YouTube video

We also reviewed it in a single long-form YouTube video if you want to learn more.

Basically, the Sun Joe dethatcher is an affordable electric dethatcher that works really well. I believe they recently released a battery powered lawn dethatcher, which we haven’t used but are interested in trying.

The Sun Joe electric dethatcher we used.

You can find the corded Sun Joe dethatcher on Amazon as well as the new cordless Sun Joe dethatcher.

Greenworks also has a corded electric dethatcher. We liked this one as well, but didn’t love that it came without a collection bag. It is a great budget-friendly electric dethatcher, so I highly recommend it as well. You can get the Greenworks electric dethatcher on Amazon for a great price.

Kobalt electric dethatcher.

Frequently Asked Questions

We get these all the time from people considering dethatching their lawn. This will be an ongoing list collection, so if you have any questions, feel free to let us know.

What is lawn thatch?

Lawn thatch is a layer of dead and decomposing grass between your soil and grass blades. It is okay in small quantities but can also prevent your lawn from thriving.

What is lawn dethatching?

Lawn dethatching is the process of removing dead grass stuck to your soil in order for your lawn to receive better nutrients.

What’s the difference between dethatching and aerating?

Dethatching is the process of removing dead grass from your soil, whereas aerating pulls soil from the ground on top of your lawn. Both are important parts of your lawn care cycle.

What’s the difference between a dethatcher and a scarifier?

Dethatchers and scarifiers often work together to pull up thatch from your grass. Scarifiers are blades that cut up and loosen thatch while dethatchers physically pull it from the grass.

How often should I dethatch my lawn?

Totally depends on your environment. For folks that get a lot of snow, I recommend dethatching yearly to pull up all the grass that got killed underneath the snow.

For others in drier climates, once every few years might be enough. I know that I like to do it every year as part of my fall lawn care routine with cool season grass.

When is the best time to dethatch my lawn?

For those with cool season grass, early fall is the best time. For warm season grass, early spring.

What is better, aerating or dethatching?

Both are used in combination to prepare your lawn for overseeding.

Why we started this site

We started The Lawn Review out of frustration. We couldn’t find clarity around what type of products were actually good and reliable. All the fertilizers we tried didn’t work. We ended up with a dying lawn, wasted time, and wasted money.

We take this stuff seriously!

So we started buying and reviewing lawn tools and figuring out which ones were the best. And now we’ve moved onto actually keeping that grass nice and healthy all year around. 

We’ve spent thousands of hours building this content for people just like you and me – normal p

Lawn Aerator vs Dethatcher vs Scarifier: Guide To Using Each

Lawn aerators, lawn dethatchers, and lawn scarifiers are all tools that can be used to help your yard thrive.

But these are all too commonly confused with each other. Some folks only aerate, others only dethatch, and hardly anyone only scarifies.

In reality, these are a holy trinity that when used together can absolutely amplify your lawn care results and get you the greenest grass in the Fall.

Curious? Let’s dig in.

Why we started this site

We started The Lawn Review out of frustration. We couldn’t find clarity around what type of products were actually good and reliable. All the fertilizers we tried didn’t work. We ended up with a dying lawn, wasted time, and wasted money.

We take this stuff seriously!

So we started buying and reviewing lawn tools and figuring out which ones were the best. And now we’ve moved onto actually keeping that grass nice and healthy all year around. 

We’ve spent thousands of hours building this content for people just like you and me – normal people.

Lawn Aerators Explained

A vital part of taking care of your lawn is that it needs air and other nutrients to help it thrive. Over time, soil can become dense and nutritionally dead. Water can no longer reach it and neither can sun or other vital nutrients.

Aeration is the process of bringing air and soil turnover to your lawn. Most aerators are core aerators, which pull plugs of compact, older soil to the surface of your lawn. Removing these plugs (which look like dog turds) allows for water and other nutrients to reach deep down into your soil, bringing vitality and health to your entire yard.

A core aerator we rented from Home Depot

Lawn aerators tend to make your yard look like crap for a few weeks, but are often done in combination with some of the other tools we discuss today. Once these are used together with overseeding your lawn, you will start to see your lawn completely rejuvenate itself.

Not dog turds

You can rent a lawn aerator from Home Depot for a pretty cheap price, among a ton of other things you can rent from Home Depot.

When to aerate your lawn

Most folks should aerate their lawn in the fall. If you have a cool or transition season grass, this is the perfect time to reset your lawn and allow for new growth. We recommend aerating after you have already scarfied and dethatched your lawn.

If you have warm season grass, spring is actually the best time to aerate – so for those in Florida and Texas, Spring is the time.

For a full guide, we wrote a longer document that highlights the best time to aerate and overseed your lawn.

Lawn Dethatchers Explained

Lawn dethatchers are some of the most satisfying lawn tools on the planet. It’s basically like  peeling the plastic off of a new appliance, but for your whole yard. 

Lawn dethatchers, particularly electric lawn dethatchers, work by using metal tines that pick up dead, old grass in your yard.

Thatch is the compilation of dead grass, roots, and weeds in your yard that forms a little blanket over your soil. It can be good for a few things, like keeping nutrients and retaining moisture, but if it gets to be too much it can totally choke your yard. 

This is thatch.

Lawn dethatchers differ from lawn aerators in that they don’t actually interact with the soil. Whereas core aerators pick up big chunks of dirt and put them on top of your grass, dethatchers simply pull up dead thatch and bring it to the surface. 

A Sun Joe dethatcher we used.

We recommend using a dethatcher before a core aerator. Dethatching will give you a better aeration and allow for more nutrients and seed to get down into your soil.

Electric dethatcher recommendations

You can also dethatch your lawn with a manual dethatcher, but it is a back breaking process that will crush your hopes and dreams. 

Electric dethatchers are amazing and there are some great options. We have reviewed the Greenworks dethatcher and the Sun Joe dethatcher and even compared the two in the same post. 

Scarifiers explained

Scarifiers can be thought of as an extension to your dethatcher. Scarifiers use little blades to cut vertical lines just at the surface of your soil. Why would you want that?

Well, you may want to help cut up some of the thatch before using the dethatcher and aerating. Scarifiers are not as necessary as dethatchers and aerators, but can definitely give you better results when you dethatch. 

The scarifier blades that help shred thatch.

If you have never used a dethatcher and think your lawn is completely covered in thatch, then it’s worthwhile to use a scarifier to make sure the thatch is nice and loose. Otherwise, the dethatcher may only be able to get a small percentage of the thatch.

The scarifier is a good tool in combo with the aerator and dethatcher.

Scarifier product recommendations

While I’m sure you could buy an electric scarifier, most electric dethatchers have a scarifier attachment that you can quickly run over the yard before dethatching.

The Sun Joe dethatcher we used in one of our videos had a nice scarifier attachment that easily popped on.

The Best Time to use a scarifier, dethatcher, and aerator

As mentioned previously, the best time to use a scarifier, a dethatcher, and an aerator is in combination with overseeding your lawn.

The actual order of events is:

  • Use a scarifier if needed to break up all the thatch in your lawn
  • Use a dethatcher to pull all the dead thatch out of your lawn
  • Then use an aerator to pull up compacted soil

Once you have done these three things, your lawn will be ready to overseed. For most folks, the best time to do this is around mid-September to early October. This gives the appropriate time for the cool season grass seeds to germinate and grow before the winter freeze comes.

For those with warm season grass, the best time to aerate and overseed is in March, following the exact same process.

The importance of overseeding your lawn

Overseeding your lawn is important for the health and vitality of your lawn, but is going to be a fruitless (or grassless) effort if you don’t dethatch and aerate your lawn. 

Overseeding your lawn is the best way to get luscious grass but also helps choke out weeds and other invasive grass types that can quickly overtake your yard.

Following overseeding, you want to be sure to be very consistent with a watering schedule. We recommend at least twice a week for 50 minutes in each area and preferably in the morning.

Frequently asked questions

What is the difference between a Dethatcher vs Aerator?

A dethatcher is used to take the top layer of dead grass, or thatch, off of the top of your yard. This prepares it well for further aeration, receiving more seeds and nutrients, and easier watering.

We made a cool Google Web Story highlighting the difference between aerators and dethatchers!

An aerator pulls little plugs of compact soil out of your lawn, allowing air to flow into the soil and restoring the vitality of the soil. Aeration is a necessary yearly investment in your lawn to help keep it lively and green.

What is the difference between a dethatcher vs a scarifier?

Dethatchers and scarifiers commonly go hand-in-hand and complement each other well. Scarifiers are used to cut up thatch, loosening it for the dethatching process.

Dethatchers are used to collect thatch from the top layer of your yard. Their performance is enhanced by scarifiers, especially if you haven’t dethatched in a long time.

This Cordless Shop Vac Made Cleaning My Car A Breeze

Greenworks 24V Cordless Shop Vac is something out of the Jetsons home. This shop vac can be carried anywhere without requiring an extension cord.

We loved it.

Let’s face it – shop vacs are one of the most necessary items you can have in your garage. From cleaning out your car to cleaning up spills, shop vacs are truly one of the most underrated tools on the planet.

Bottom line: Greenworks went wild and made a cordless shop vac. Yep. A cordless shop vac. This thing is powerful enough for most residential use and is extremely convenient. Grab it on Amazon for a great price.

Greenworks 24V Cordless Shop Vac: Features and benefits

We were lucky enough to get our hands on Greenworks 24V battery-powered shop vac. We made a nice video about it that you can check on YouTube, but also wrote out our experience here.

What’s included with the Greenworks Shop Vac

When we got the Greenworks cordless shop vac, we did a nice video unboxing. Here is  what came with the vacuum:

  • Hose
  • Two nozzles
  • Battery charger
  • Battery
  • Vacuum
  • Foam filter
  • Two manuals – one for battery/charger and one for the tool

Using the 24V Greenworks Shop Vac

The first thing we noticed about this cordless shop vac was how solid it felt. All the fittings felt rock solid and well put together. With some of the other vacuums we’ve tried, you could see how a hose could fall out and everything felt a little janky.

Really solid build.

Hose size

The hose at first looked a little bit small. When we got it connected, we noticed just how much give the hose has. This means that it can extend quite a bit, much more than the harder plastic hoses that come with some of the other brands. It feels like with some of the corded models that the harder plastic tubes always put you a few inches away from where you need to be using the vacuum, but not with this one.

Weight and length

The Greenworks cordless shop vac comes in at about 9.6 lbs and honestly felt even lighter. It does a great job with weight distribution as well, making it easy to tote around without swaying  side to side.

Greenworks said the hose could extend to about 5 feet. Without pulling it at all, it sits at just over two feet. We put its claim to the test and to our surprise, it came out at just over 5 feet (a hair longer).

Stretchy = good.

Length is less important for this one because you don’t have to worry about the limits of an extension cord.

Battery set-up with Greenworks 24V battery system

The Greenworks cordless shop vac has a little cabin for the 24V battery. You simply lift the top and pop the battery in. It does have a spot for two batteries, although it only requires one. The second one can be used here to add on some run time if needed.

Greenworks thought of everything.

One little bell/whistle type of thing I like on this is that the little door that houses the batteries has magnetic clips. This reduces any chance of rattle when in use and is something that speaks to the amount of thought that went into making this shop vac.

Nozzle tip attachments

While most of the time I use a shop vac without any nozzle tips, this one does come with both a fan nozzle tip as well as a narrow nozzle tip for hard to reach spaces. 

One other cool thing about this shop  vac is that you can easily take out the hose and put it in the air-outtake opening, making for a light-duty blower to help clean up any remaining particles you couldn’t get with the vacuum.

Nifty!

If you ever feel like you are losing suction, there is a nice filter that comes with it that can either be replaced, washed, or blown off. If it gets to be too much, then you can easily replace it for cheap. 

Storage

This cordless shop vac is a little smaller than some you may see in industrial settings – it has a 3-gallon storage area for all debris. This is still pretty tough to fill up!

Lastly, the two nozzles are super easy to lose, so I like that the tool has little clips that allow you to store them right on the vacuum.

Is the Greenworks Battery Shop Vac any good?

Greenworks makes a few claims about the run time and charge time for this shop vac. A cordless shop vac is an amazing tool to have until the battery dies. That’s the remaining advantage that corded electric shop vacs still have over cordless. 

With a fully charged 2A 24V battery, Greenworks claims that this shop vac can run for about 20 minutes. Well, we actually used it on some clean up until the battery died. 

It ran for exactly 20 minutes. Feels like a long time when you’re cleaning!

With a completely dead battery, we timed how long it takes to get to a full charge. It took about 75 minutes.

Not bad!

Price and Warranty

One thing we love about this shop vac and all of Greenworks tools, is the 3 year warranty on the tool AND battery. Most tools have a 2 year battery and tool warranty. 

This can be purchased right now on Greenworks website for just under $150.

Official Review: Greenworks 24V Cordless Shop Vac

We absolutely loved the versatility of the cordless Greenworks shop vac. But what set this shop vac apart from all others, both corded and cordless, was the thought that went into its creation. It was extremely well made with the end user in mind. 

We are going to buy this for just about everyone we know come Christmas time. You can grab yours on Amazon for a great price.

Why we review lawn tools

The reason we started this website in the first place was because we had so much trouble trying to find reasonable, understandable, honest reviews for lawn equipment. And it’s not cheap! After hours and hours of research, trying products and returning them, and messing up our yards – we started this site. 

As people who had to learn the hard way, we want you to know exactly what you are signing up for before you purchase a piece of equipment. That’s why we are committed to providing honest, easy-to-understand reviews that mean something. 

About Greenworks tools

Greenworks is one of the most innovative lawn tool brands. They create all-electric, predominantly battery-powered lawn tools that are of the highest quality.

We’ve owned and reviewed a TON of their products, including:

One consistent theme: they are all very well built.

Why Shop Vacs are the best tools

Shop vacs are the duct tape of the tool space. In fact, to not own one is a mortal sin. They have the ability to clean up dirt and fine dust from really tight spots and can be carried around outside. 

But the big differentiator from most vacuums is that the shop vac is able to suck up liquids without frying the electrical parts.

This means you can easily go from sucking up sawdust to cleaning up a spilled beer. 

Stihl’s FSA 90 R Electric Trimmer Is Their Best One

Stihl’s FSA 90 R string trimmer is their new, professional-grade, battery powered string trimmer. I’ll cut to the chase – I was disappointed by this string trimmer.

Cool picture from Ace Hardware.

Stihl? Battery-powered? Yep, we are still (Stihl) getting used to the idea of it ourselves. But we checked out the Stihl FSA 45 and Stihl FSA 57 string trimmers as well, and weren’t all that impressed. I even tested out the new Stihl RMA 510 V mower (me with it pictured below).

But, we are ready to get hurt again! The FSA 90 brings the promise of professional landscaper-type quality and power to the table. So for now, we are listening.

Let’s put this Stihl string trimmer under the microscope:

Stihl FSA 90 R String Trimmer: Features and benefits

Now that we’ve given you a quick primer on Stihl, the world of battery powered lawn tools, and our motivation for writing these reviews, let’s get started actually checking out the Stihl FSA 90 R string trimmer.

Power: Finally a good one

Let’s cut right to the chase. When it comes to a string trimmer, power is of the utmost importance. The first positive piece of information I can give you about this string trimmer is that it has a nice 15” cutting swath. 

15 inches is consistent with the gas-powered professional lawn tools and is a non-negotiable for anyone who has a yard bigger than ¼ of an acre. Trimmers of this size allow you to cut through thicker brush with more consistency than smaller trimmers. It also allows you to tilt this thing sideways and do a pretty darn good job edging as well. 

They tried to create the battery version of their classic Stihl FS 56 RC.

If you need to go even further and do some brushcutting, Stihl has made a handy guide of add-ons that can be used with the FSA 90 R.

The power on this trimmer is definitely good for any homeowner and can even be used by the professional landscapers of the world. In areas that are noise-sensitive (schools, businesses, etc.), popping this trimmer off of the trailer and doing a bang-up job is super easy. While it wouldn’t be my main trimmer in my lawn tool arsenal if I were a pro, it can definitely be a good compliment and please your customers. 

Using this is easy

Where Stihl fell short with their other string trimmers, they made up for in usability. The Stihl FSA 90 R string trimmer has a nice long shaft (no jokes), which I prefer (please don’t joke) because of how much easier it is to use. It allows you to be much more precise in handling the trimmer, almost surgical. With this one, I didn’t feel like I had to crank my shoulder because it has a nice rubber loop handle and the battery is located in a well-balanced spot. 

One thing I liked about the battery’s location was that it didn’t hang underneath the handle or anywhere else. It compactly slides into the top of the trimmer, making the whole thing feel solid.

Battery slides into a little pocket.

At just under 10lbs with the battery on, it’s definitely one of the lighter weight pro-style string trimmers on the battery market. It also comes with this nice little built-in hook that allows you to hang it on a garage rack or even a nail. 

Hangs on the wall!

All-in-all, this thing was super easy to use and felt comfortable the whole time. 

The brushless motor makes it pretty durable

Durability is also one of the huge question marks on the FSA 90 R and all battery-powered string trimmers for that matter.

CORRECTION: I previously stated that this trimmer did NOT have a brushless motor. I was wrong! As one of our YouTube viewers pointed out (shoutout Milton), these do in fact have brushless motors that are electronically controlled.

Stihl highlights their brushless motor technology on this page, but not on the product main page or in the manual.

Brushless motors are great because they provide a more reliable, durable, cooler-running motor as compared to brushed motors.

Price and value

The Stihl FSA 90 R string trimmer is going to run you well over $400 for the tool, battery, and charger. If you are #blessed and already own a Stihl battery, you can get the tool-only version for just under $400 from Ace Hardware.

Unfortunately, I don’t think this is a great deal. If you are looking for a nice pro-grade string trimmer, I recommend checking out EGO string trimmers instead. 

String Trimmer Line for Stihl FSA 90 R

We developed an amazing string trimmer line that we tested against DOZENS of other lines. Check it out here.

The Final Verdict: Stihl FSA 90 R String Trimmer

Sad to say it, but this Stihl string trimmer falls into the same category as the other more residential offerings. It by far has the most power, but it comes at a steep price compared to some of its peers, like some of the more powerful string trimmers.

Why we review lawn tools

The reason we started this website in the first place was because we had so much trouble trying to find reasonable, understandable, honest reviews for lawn equipment. And it’s not cheap! After hours and hours of research, trying products and returning them, and messing up our yards – we started this site. 

How we spend our time.

As people who had to learn the hard way, we want you to know exactly what you are signing up for before you purchase a piece of equipment. That’s why we are committed to providing honest, easy-to-understand reviews that mean something. 

How to instantly improve your weed eater

Upgrade your weed eating game with the ultimate GrassKicker Weed Eater String! While weed eaters and lawn edgers are great tools, it’s not complete without the right string. Our specially crafted line is designed to enhance your weed eater’s performance and give you flawless edges around your yard and garden.

Don’t settle for subpar string that breaks easily and leaves ragged edges. Our team has scoured the market and combined the best colors, shapes, thicknesses, and materials to create a superior line that cuts more cleanly and lasts longer.

With GrassKicker, you can take pride in your perfectly manicured lawn and make a lasting impression on your friends and family. And who knows, your envious neighbors might just start dropping by more often! Don’t wait, elevate your weed eating game with GrassKicker Weed Eater String today! Click the link now to buy.

Gas vs Electric String Trimmer

When purchasing a piece of lawn equipment in 2022 it’s important to understand your power source options. It basically boils down to gas or electric trimmers. Electric trimmers are typically easier to start and usually maintenance is a breeze. They also have less of a noise and environmental impact. Electric trimmers are usually a good bet for small to medium-sized jobs.

Trimmers powered by gas usually end up having more power and are more suitable for larger, more commercial type applications. This is mainly due to the issues the professionals have with keeping them charged. But not all of us are professionals, we just want a badass string trimmer from Stihl.

Stihl’s reputation

Stihl is still at it! Pumping out high quality product after high quality product. They’re thought of as one of the GOATS of the yard product game. The boys in orange are known to have a superior product to their competitors.

The world’s largest chainsaw manufacturer, the company moved some operations to Virginia in the 1970s and opened up their first factory dedicated to a single chainsaw. They have continued to master their craft and expand their product offers in the lawn care space.

Easily recognizable.

Stihl has a great reputation that many commercial landscapers rely on each day. Many residential owners will be more than pleased with their products.

Exit mobile version